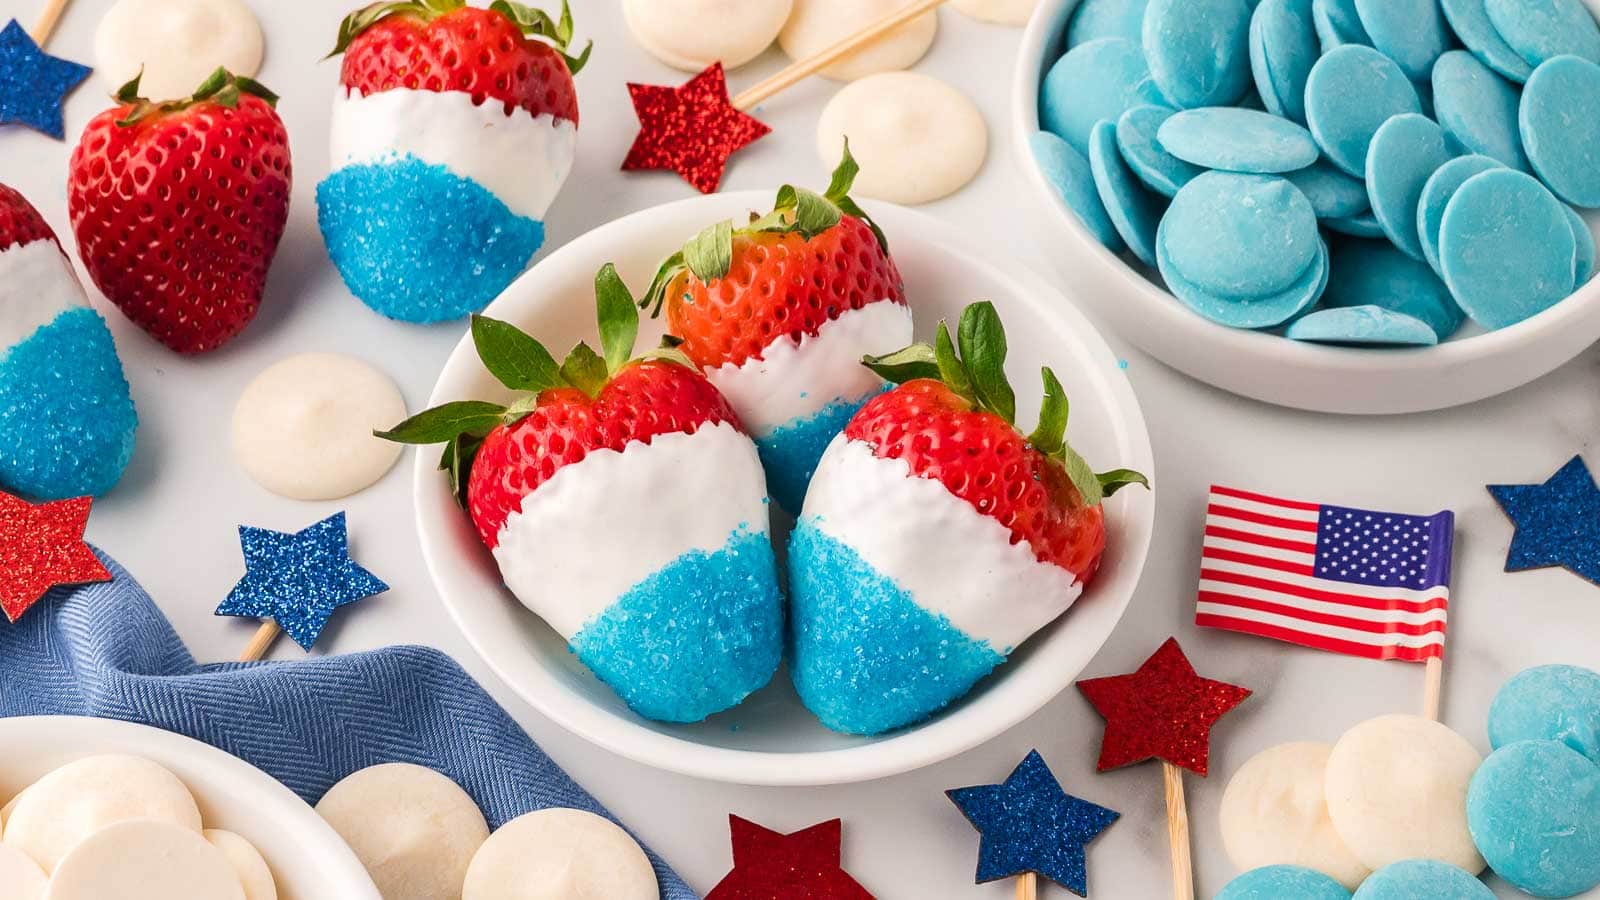
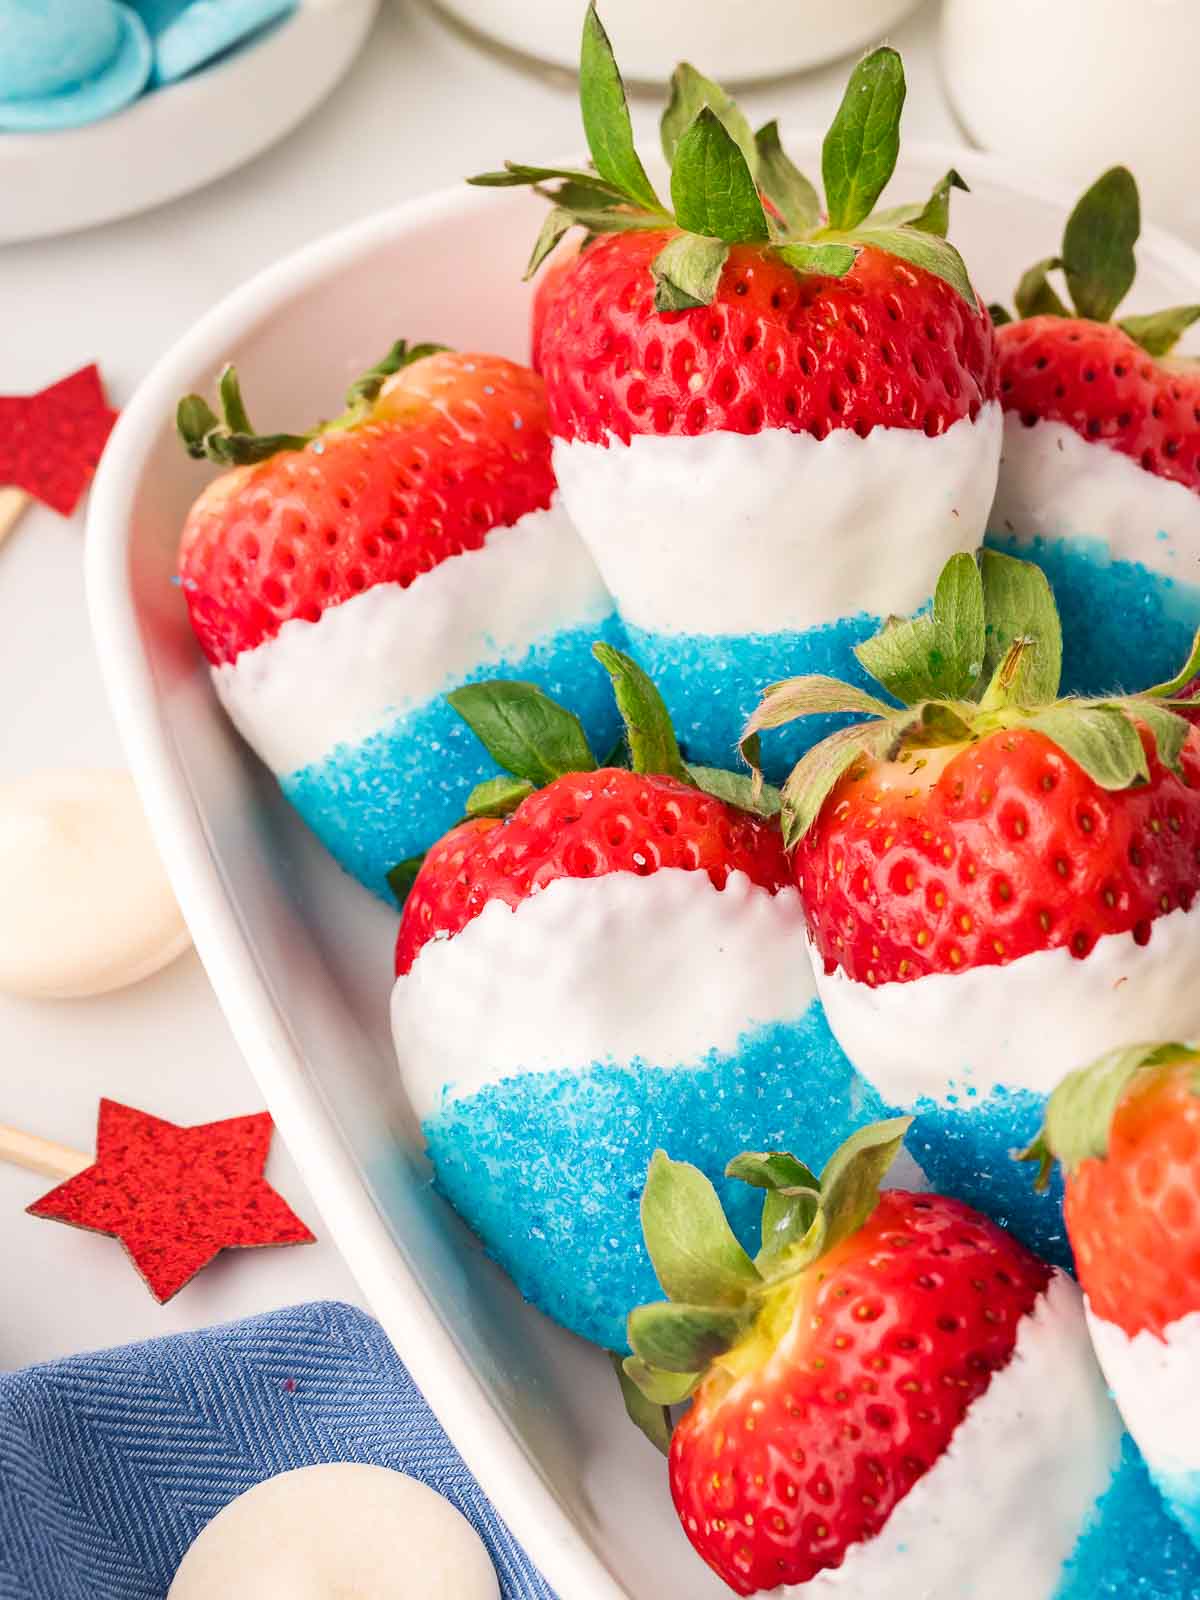
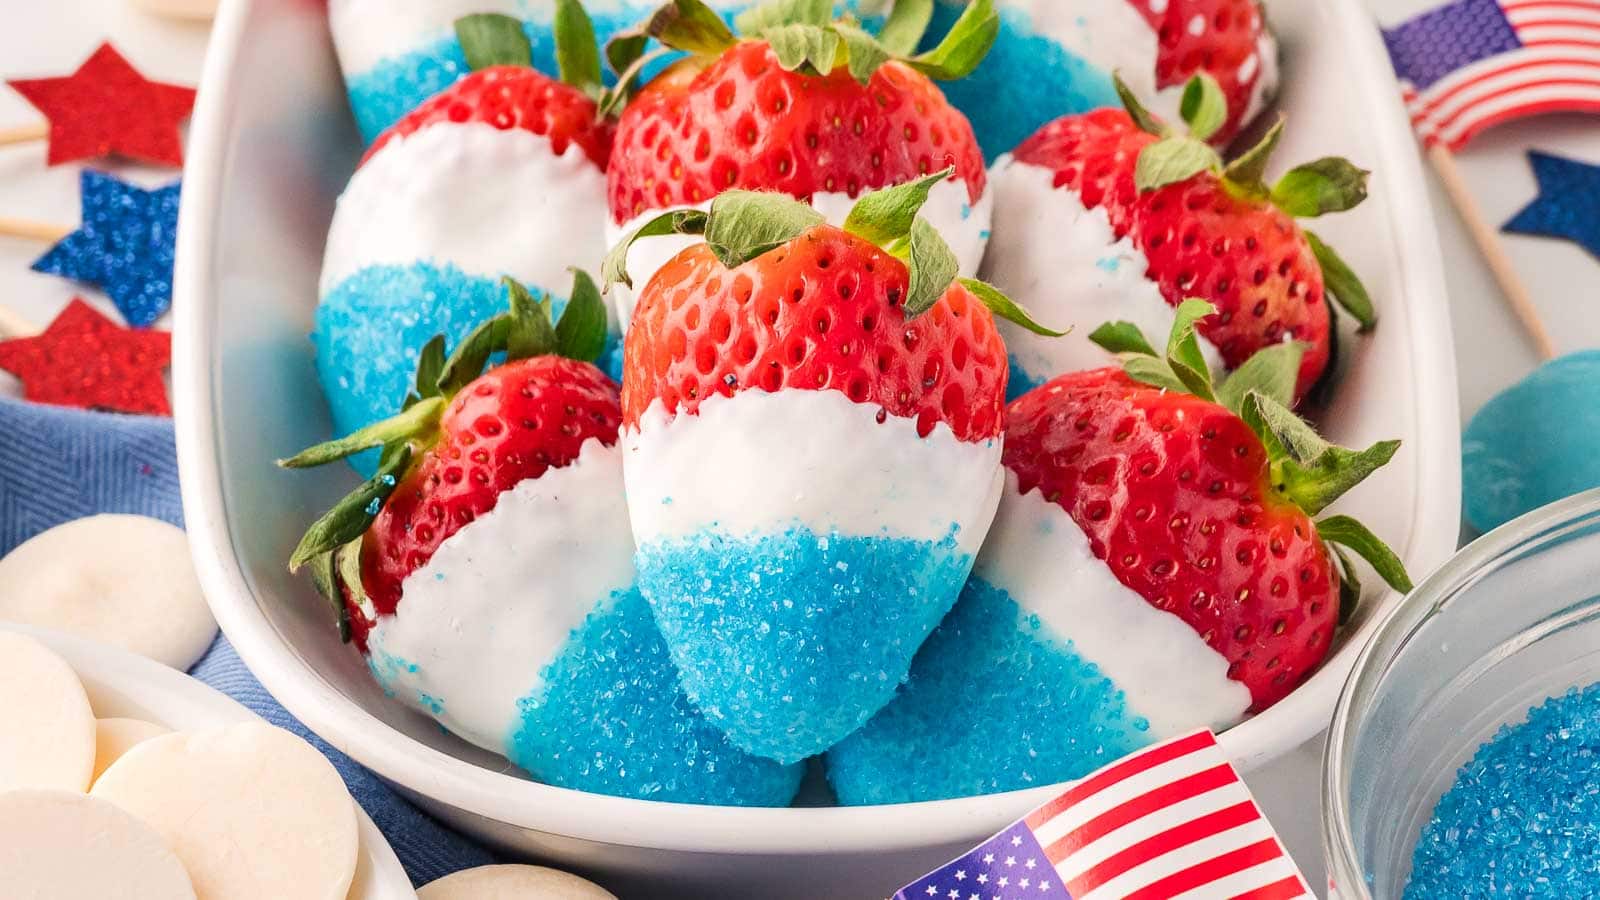
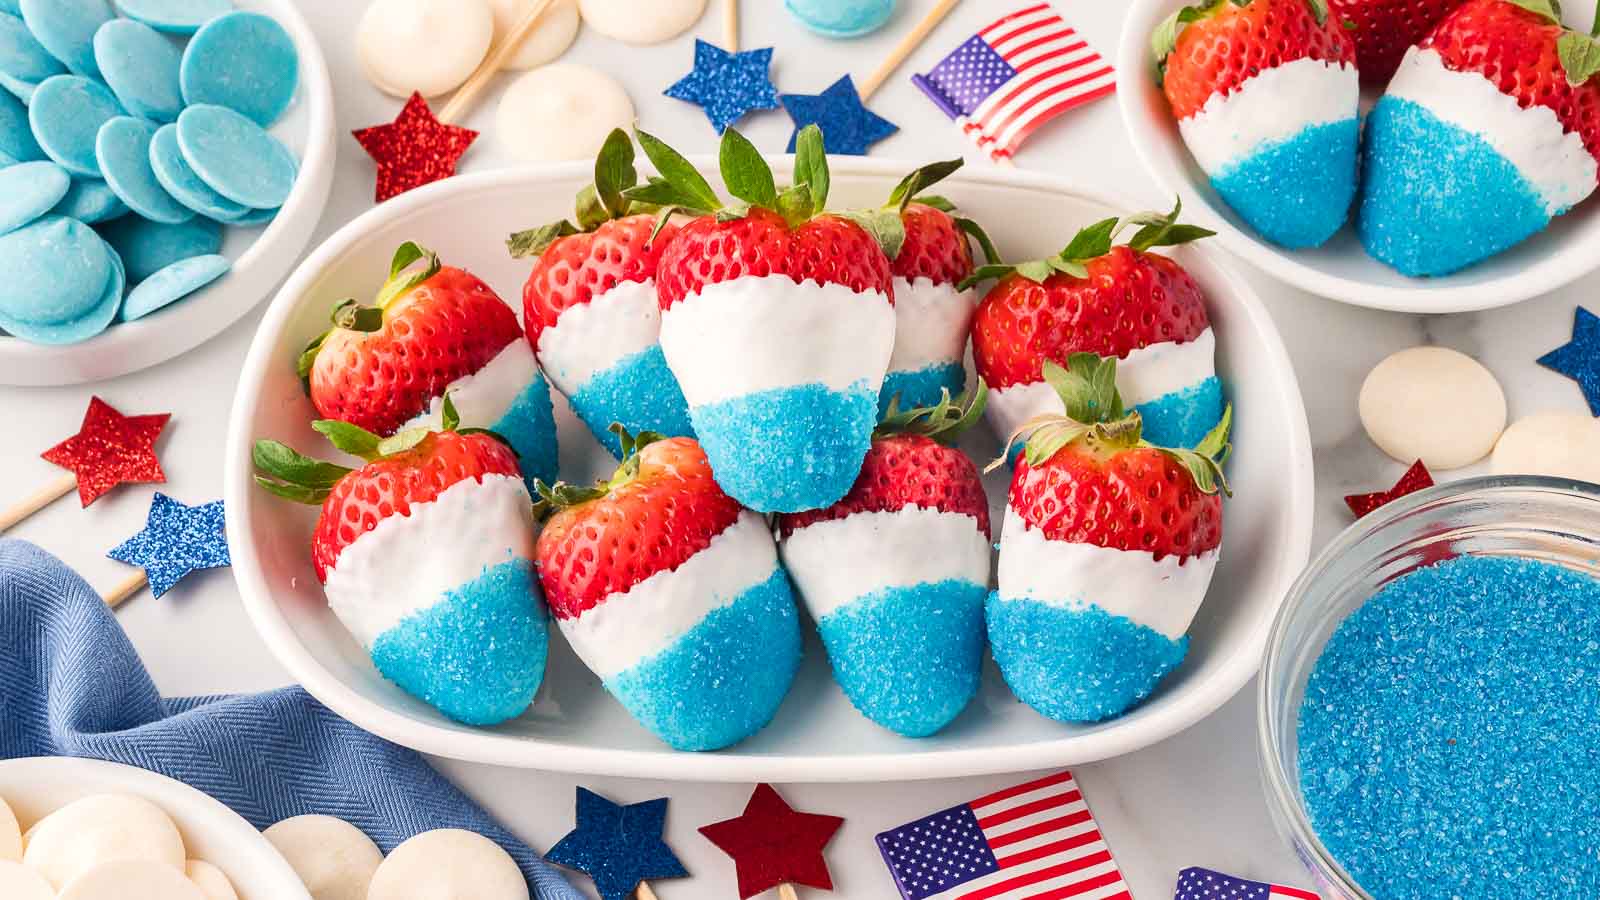
Red, White and Blue Strawberries
These Red, White and Blue Strawberries are the ultimate no-bake patriotic treat. Juicy strawberries get a dip in creamy white chocolate, a splash of vibrant blue candy melts, and a final roll in sparkly blue sanding sugar. They’re bright, festive, and perfect for Memorial Day, Fourth of July, or any summer celebration where red-white-and-blue is the dress code. No oven, no stress, and just a handful of simple ingredients.
These are perfect for any summer gathering — 4th of July, Memorial Day, Labor Day, or even a casual weekend BBQ. They’re easy to make ahead and don’t need any oven time, which is a win when it’s hot out. You can serve them on a dessert tray, pack them up for a picnic, or just keep a batch in the fridge for a sweet snack that looks like you went all out.
Why you’ll love these Red, White and Blue Strawberries
Easy Patriotic Dessert with Strawberries
These were a hit at a cookout we went to last summer. I made them ahead of time, popped them in the fridge, and brought them along in a container. By the time the burgers were off the grill, the tray was empty. They’re one of those recipes that people get excited about before they even take a bite. The colors are bold, and they’re easy to grab and eat!
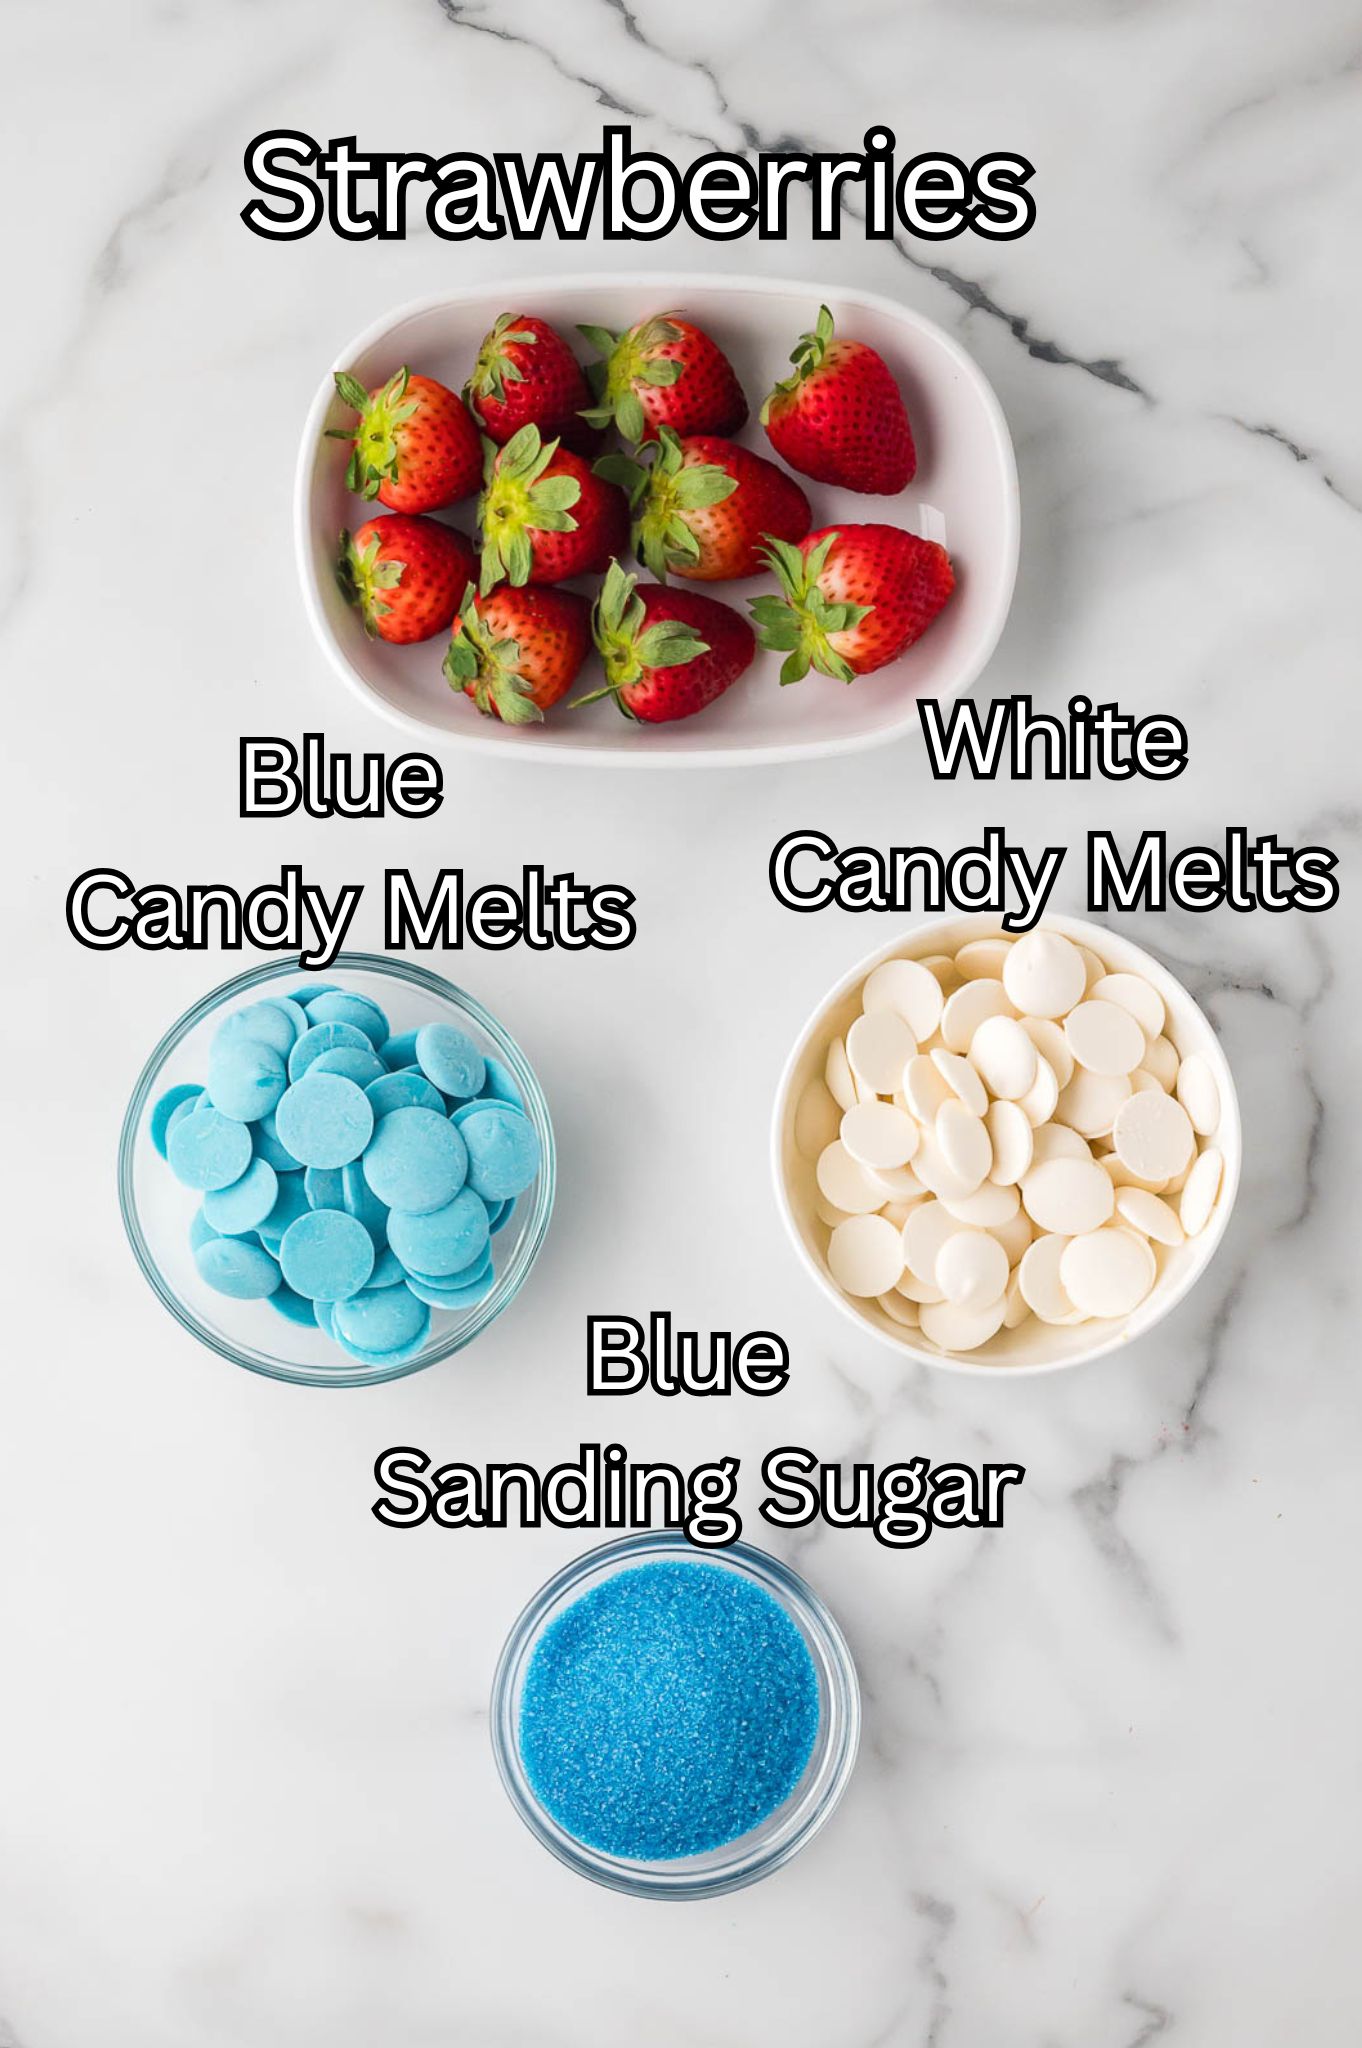
Ingredients Needed for Red, White and Blue Strawberries
- Strawberries: Fresh, bright red strawberries are the star of the show. Look for ones that are medium to large in size and have a nice point at the end (it helps with dipping). They should be completely dry before you dip them or the coating won’t stick well.
- White candy melts: These give you that clean, creamy middle layer that contrasts perfectly with the red and blue. They set quickly and have a smooth texture. If you don’t have candy melts, you can use white chocolate chips, just know they melt a little differently and may need extra coconut oil to thin.
- Blue candy melts: These add the bold blue stripe and help anchor the sanding sugar. They’re vibrant and smooth when melted. If you don’t have blue melts, you can stir blue food coloring into white melts, but make sure to use oil-based coloring to avoid seizing.
- Blue sanding sugar: This is what gives the strawberries that sparkle. It sticks to the melted candy coating and adds texture and crunch. You can find it in the baking aisle near sprinkles or order it online. If you prefer, crushed blue sprinkles work too. Just go with something dry and colorful.
- Coconut oil (optional): If your candy melts are too thick or clumpy, coconut oil helps smooth them out. Just a little goes a long way. Use refined coconut oil if you don’t want any coconut flavor coming through.
How to make Red, White and Blue Strawberries
**For more detailed instructions, please refer to the printable recipe card below.**
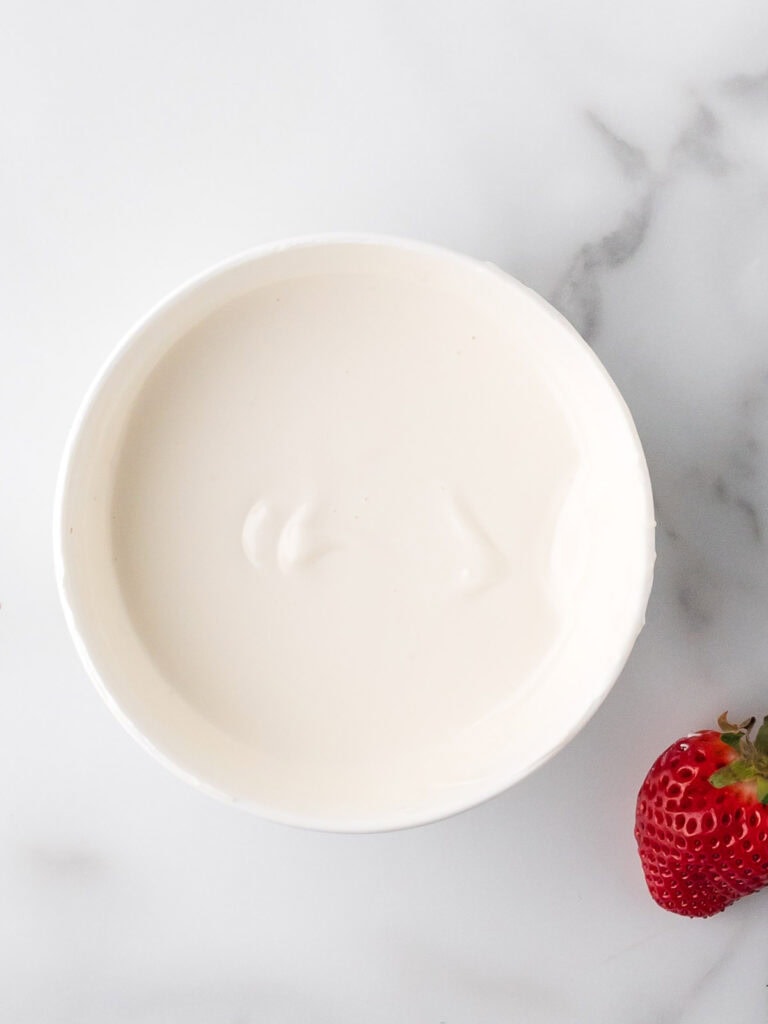
Melt the candy melts in a microwave-safe bowl in 30-second intervals, stirring in between until smooth. Add coconut oil if needed to thin.
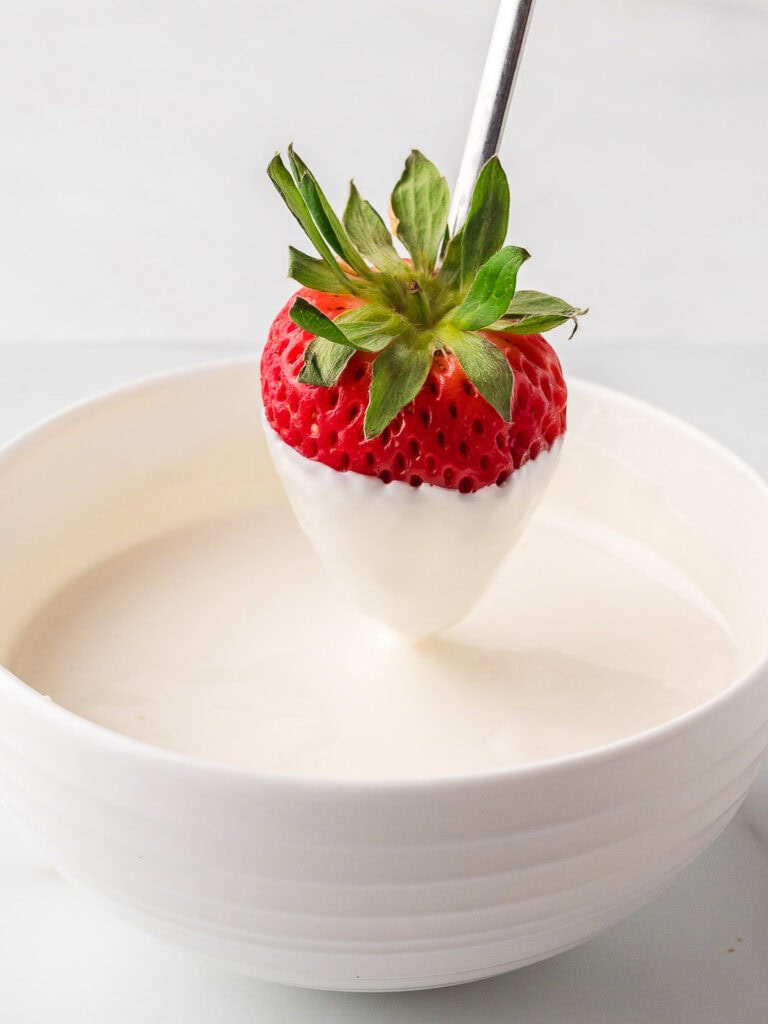
Hold each strawberry by the stem and dip it about two-thirds into the white candy. Let the excess drip off and place it on the tray to set.

Dip the bottom third of the white-coated strawberry into the blue melts.
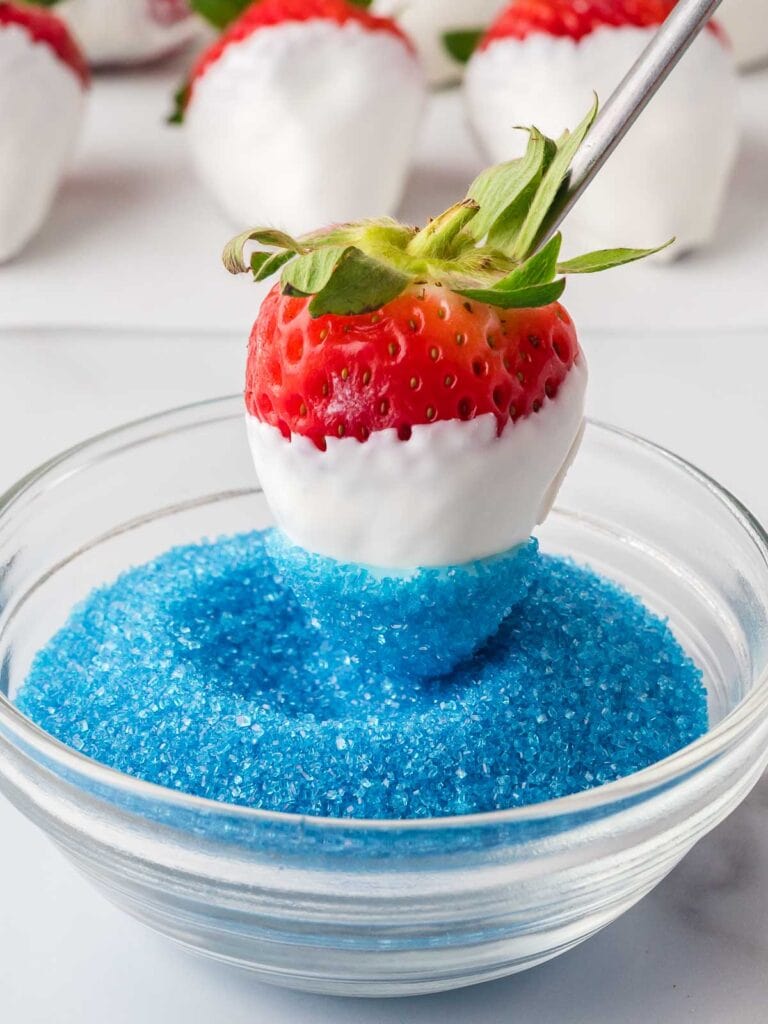
Immediately dip the blue-coated tip into the sanding sugar and gently roll or press to coat evenly. Chill until fully set.
Variations
- Use milk or dark chocolate instead of white: If you’re not a fan of white candy melts, milk or dark chocolate gives a richer flavor. You’ll lose the “white” in the patriotic color scheme, but the red and blue still pop and the taste is amazing.
- Swap the blue melts for just sanding sugar: If you don’t want to buy blue candy melts, you can go straight from white chocolate into blue sugar for a two-color version. It’s just as festive and a little less sweet.
- Add a drizzle on top: Melt a bit of red or white candy coating and drizzle over the finished strawberries once they’ve set. It gives a more detailed, bakery-style finish and you can get creative with the design.
- Use gold or silver sanding sugar for a different look: Not every party needs red, white, and blue. Swap the blue for gold or silver sanding sugar for graduation parties, weddings, or New Year’s.
- Make mini strawberry bites: Use smaller strawberries, slice off the tops, and serve them flat-side down on a tray with toothpicks. Great for finger food setups and party grazing boards.
Serving Suggestions
- Add them to a patriotic dessert platter: Pair with Red Velvet Brownies, Cherry Pie Cookies, and Patriotic Cakesicles for a themed dessert spread that’s ready for Memorial Day or July 4th.
- Serve on skewers for easy grabbing: Thread a few strawberries onto bamboo skewers and lay them across a platter for guests to pick up and go. It’s a great touch for outdoor parties.
- Pair with a cold dessert tray: These strawberries go really well with chilled lemon bars, no-bake cheesecake bites, or icebox cakes. A mix of textures keeps the dessert table fun.
- Use them as a cake topper: Add these to the top of a sheet cake or trifle to give a store-bought dessert a patriotic upgrade. They make a big visual impact without much effort.
- Serve with a fruit and cheese board: Add these strawberries to a grazing board with blueberries, watermelon, brie, and crackers. Just like my Charcuterie Board, it’s a festive way to balance sweet and savory.
Storage and Freezing
- How should I store Red, White and Blue Strawberries?
Store the dipped strawberries in a single layer in an airtight container in the fridge. If you’re stacking them, use parchment or wax paper between layers to prevent sticking. They’ll stay fresh for up to 2 days, but they’re best eaten within the first 24 hours when the candy coating is crisp.
- Can I freeze Red, White and Blue Strawberries?
I don’t recommend freezing these. The texture of the strawberries changes when frozen and thawed. They release moisture and the candy coating can crack or get sticky. If you absolutely need to prep ahead, you’re better off making them the night before and storing them chilled.
Don’t forget to pin this for later!


Tips & Tricks
- Use dry strawberries: Moisture is the enemy of melted chocolate and candy melts. Make sure the strawberries are fully dry, no shortcuts here or the coating won’t stick properly. Pat them with paper towels and let them air dry completely.
- Don’t overheat your candy melts: Melt them in short bursts and stir often. Overheating will cause them to seize or burn. If they get too thick, stir in a teaspoon of coconut oil until smooth.
- Let the first layer set before adding the next: It’s tempting to keep going, but if the white layer isn’t set, the blue layer will smudge and you’ll lose that crisp stripe. Give it 5–10 minutes to firm up first.
- Use a deep narrow bowl for dipping: You’ll get a cleaner dip with less mess and waste if you melt your candy in a container that lets you dip straight down rather than swirling. Think a mug or small prep bowl.
- Chill them to set faster: If your kitchen is warm or you’re short on time, pop the tray into the fridge for 10–15 minutes to help everything set up cleanly without melting or smudging.
Recommended
More Fun Desserts
FAQ

Red, White and Blue Strawberries
Equipment
- Fork or dipping tool
Ingredients
- 24 fresh strawberries washed and dried completely
- 1 cup white candy melts
- ½ cup blue candy melts
- ⅓ cup blue sanding sugar
Instructions
- Line a sheet pan with parchment paper and set aside.
- Melt the white candy melts in a microwave-safe bowl in 30-second bursts, stirring in between until smooth. If the mixture is too thick, stir in a bit of coconut oil (see notes below).
- Hold each strawberry by the stem and dip about two-thirds of the way into the white candy coating. Let any excess drip off.
- Place the dipped strawberry on the prepared tray and repeat with the remaining strawberries.
- Let the white coating set for about 5–10 minutes, or until just firm.
- Melt the blue candy melts in a clean microwave-safe bowl, using the same method as before.
- Dip the bottom third of each strawberry into the blue candy melt, just enough to create a red-white-blue layered look.
- Immediately dip or roll the blue end into a bowl of blue sanding sugar to coat.
- Return the finished strawberry to the tray and let them sit until fully set.


I made them for the July 4th weekend and everyone loved it, thanks for sharing such an easy and simple recipe!
So glad you loved them! Thanks for sharing.