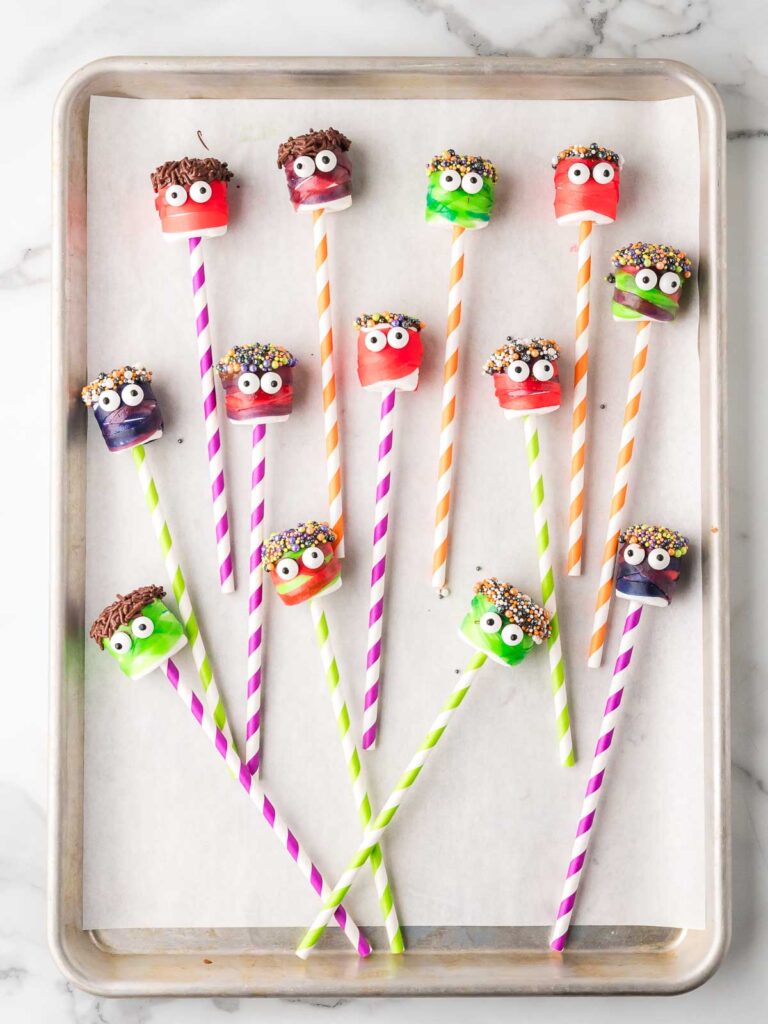
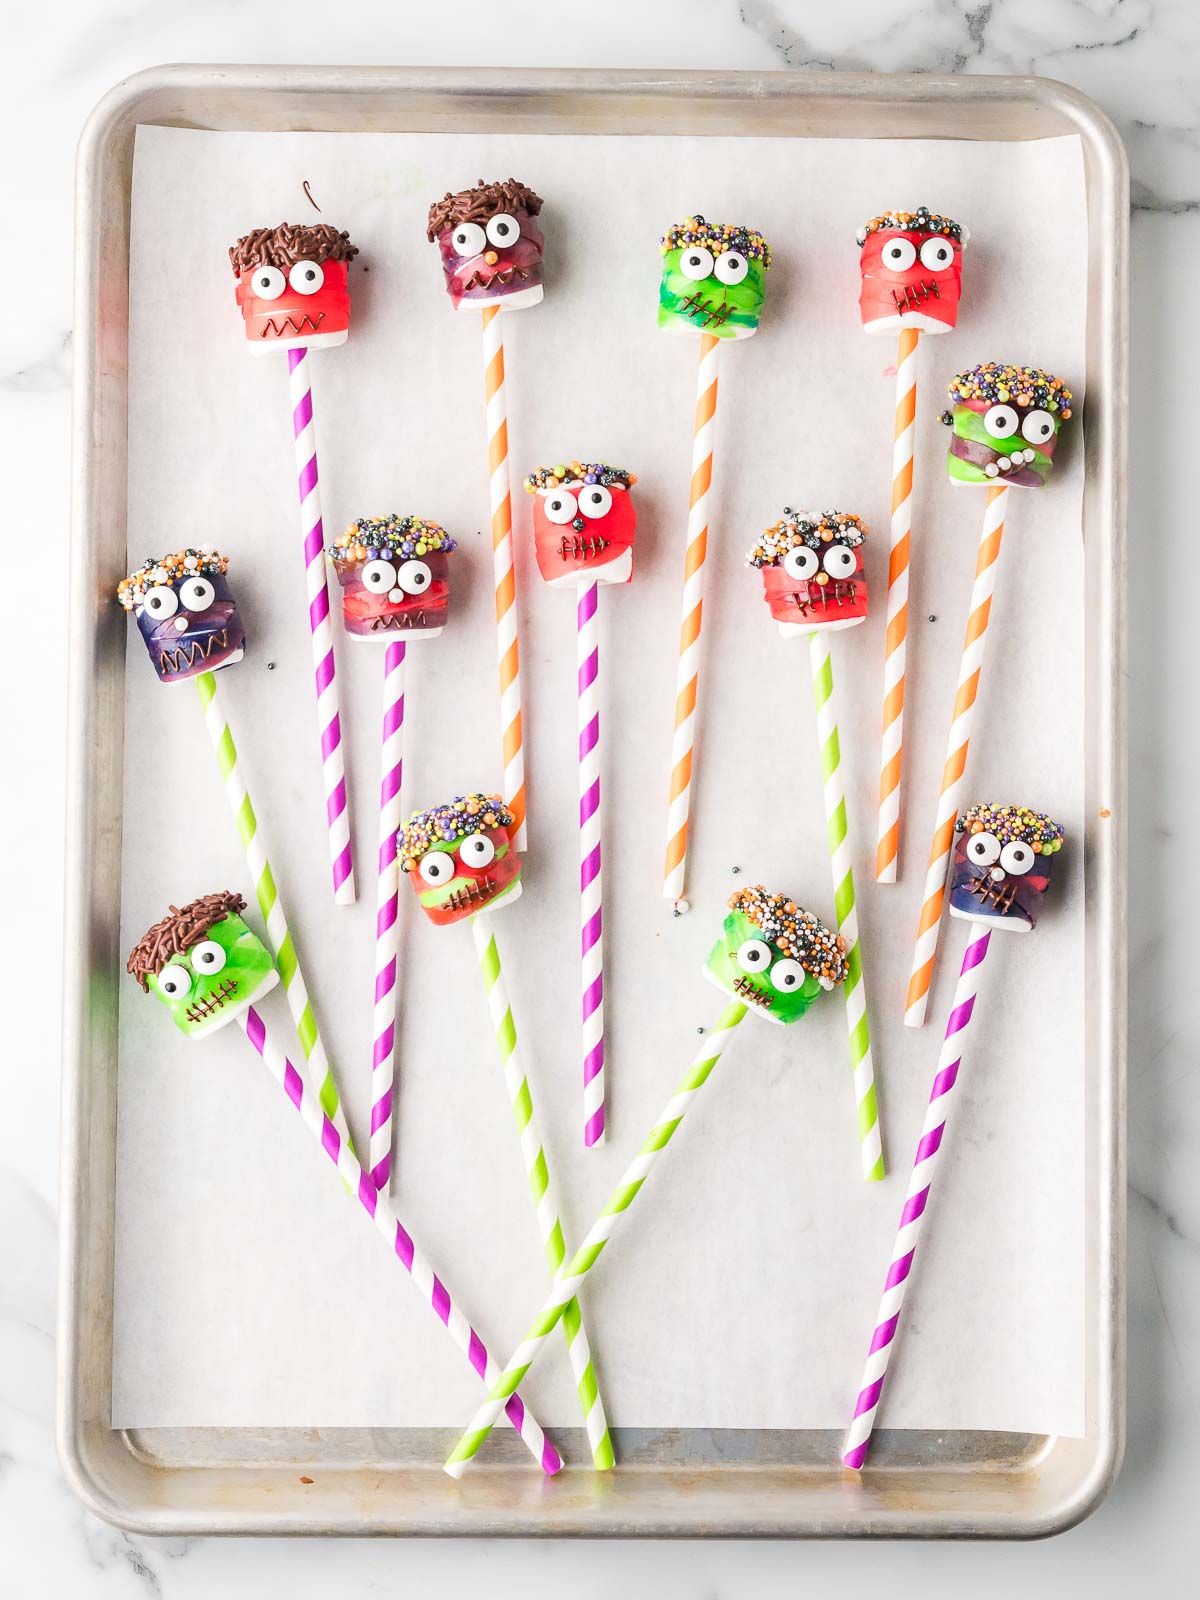
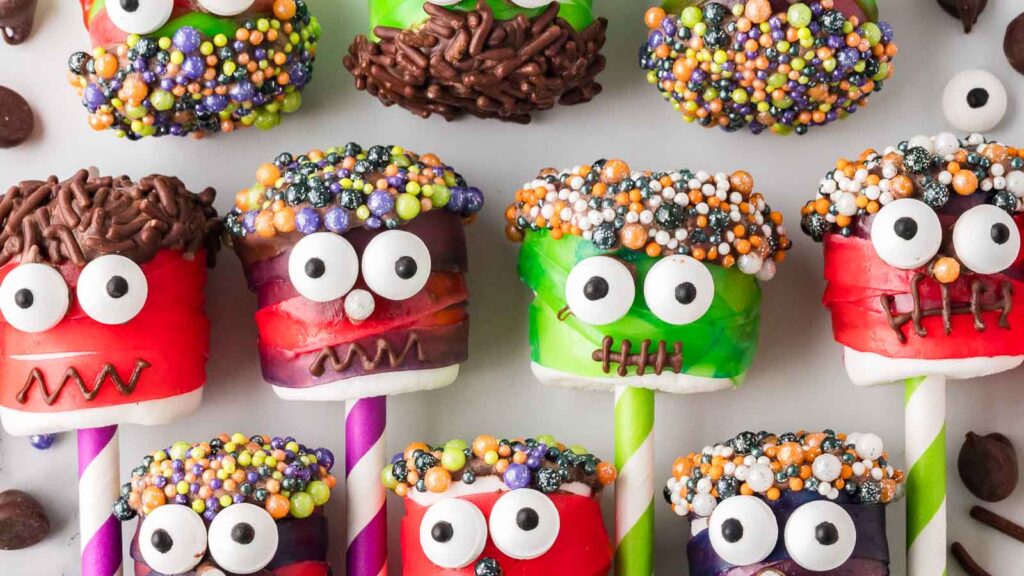
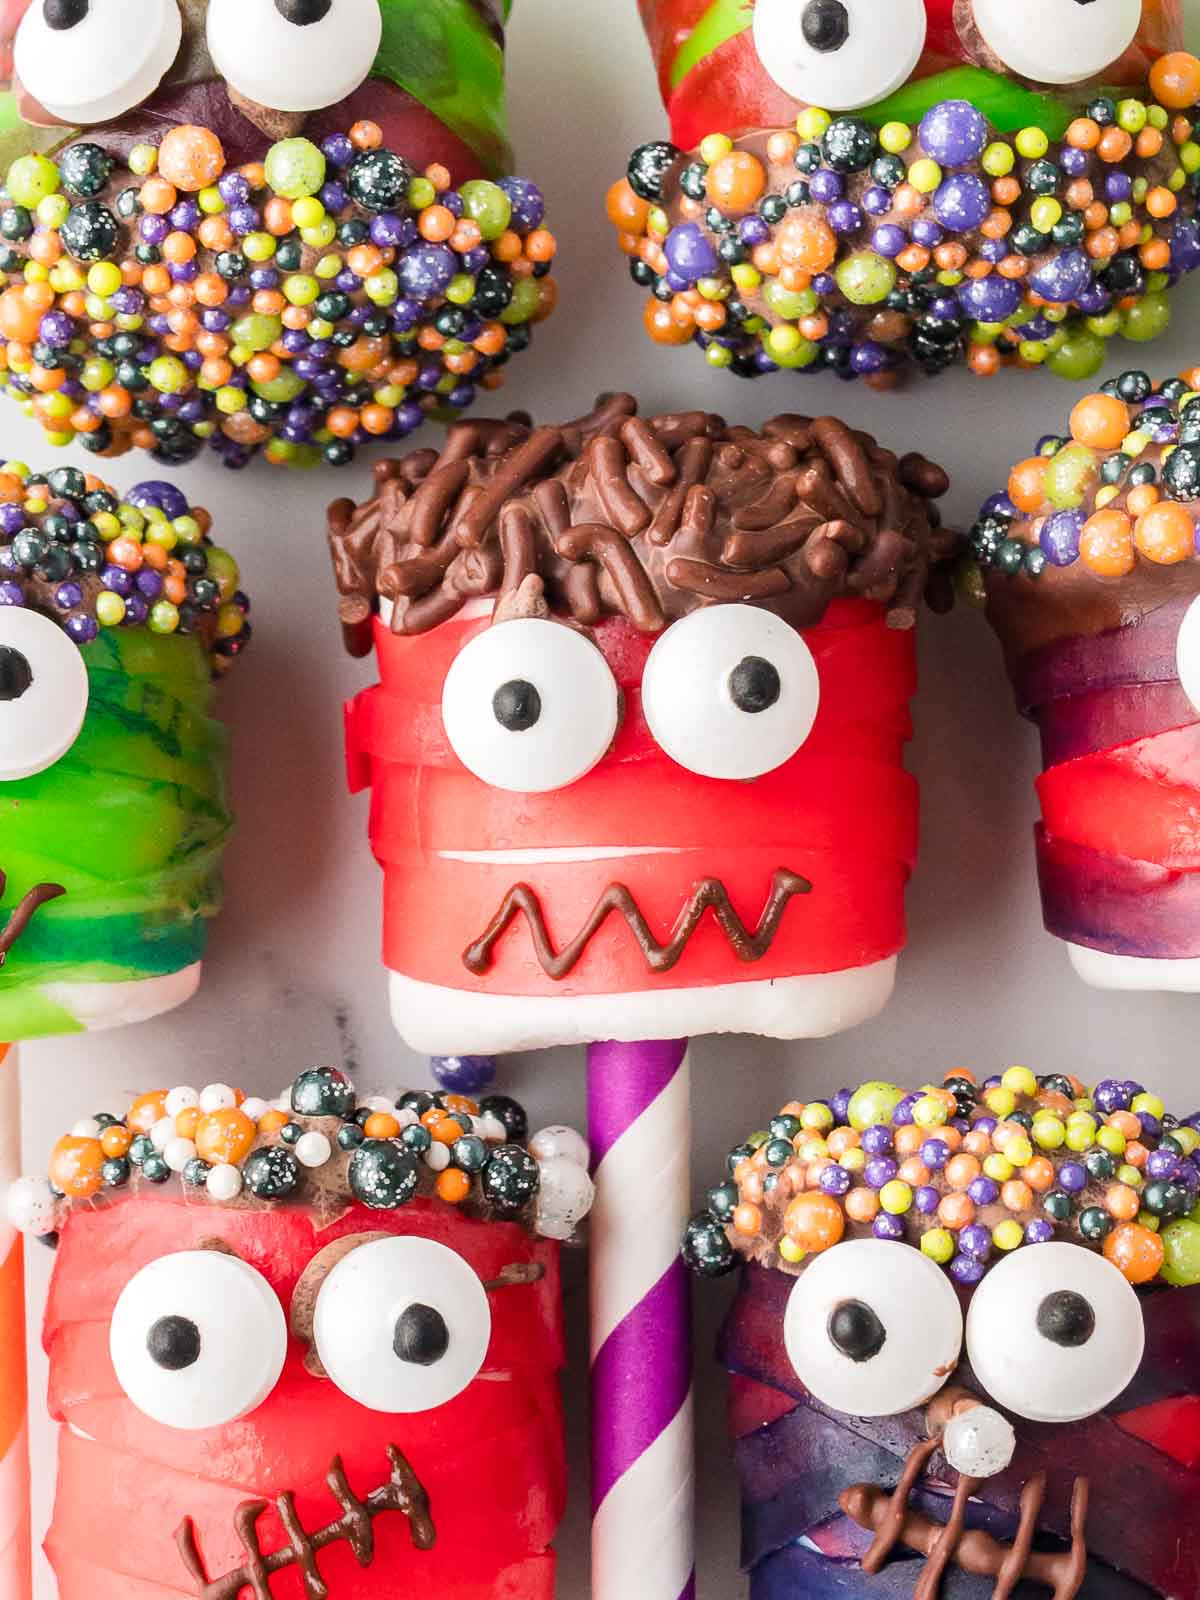
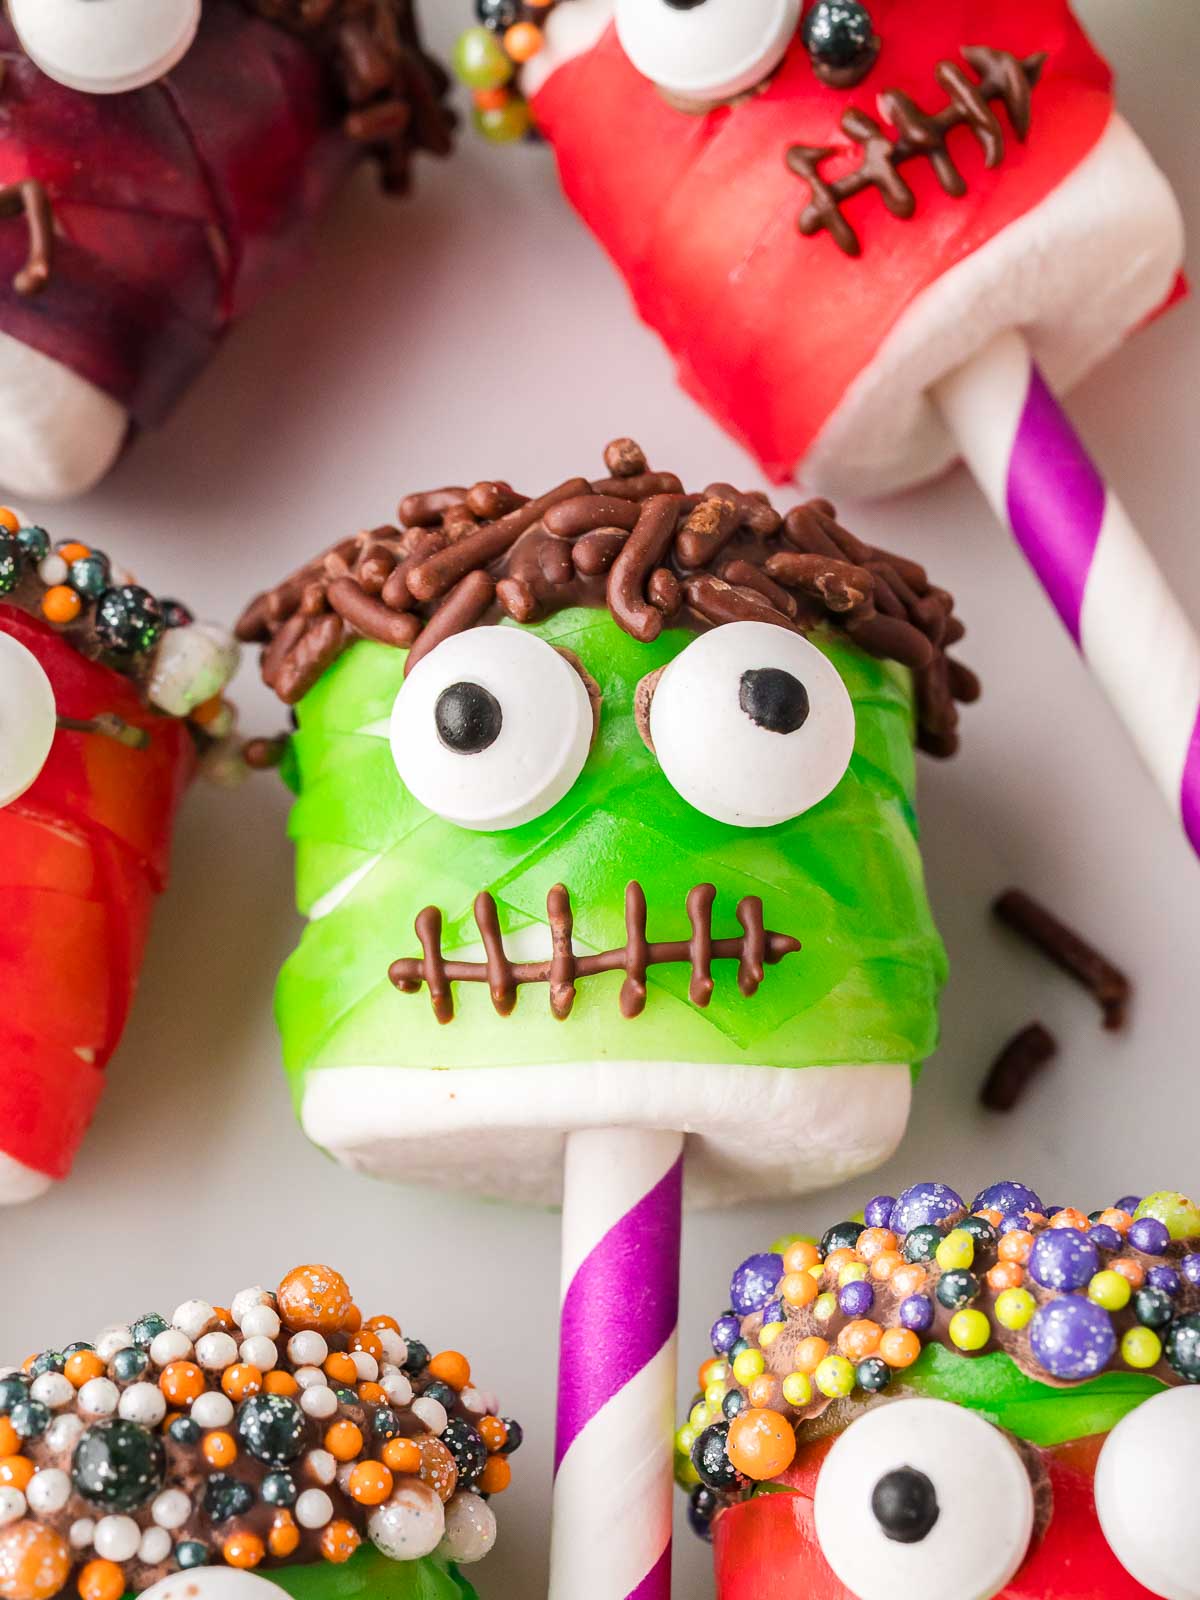
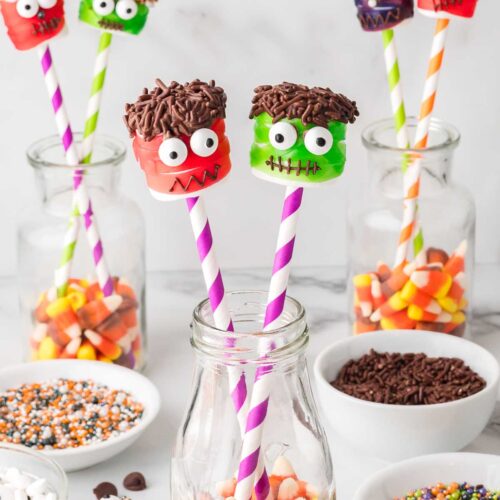
Monster Marshmallows
Monster Marshmallows are a quick and creative Halloween treat that does not require any baking. You just need a few pantry staples and a little imagination. Each one turns out a bit different, which makes it even more fun. They are perfect for classroom parties, Halloween movie nights, or a weekend craft session with the kids.
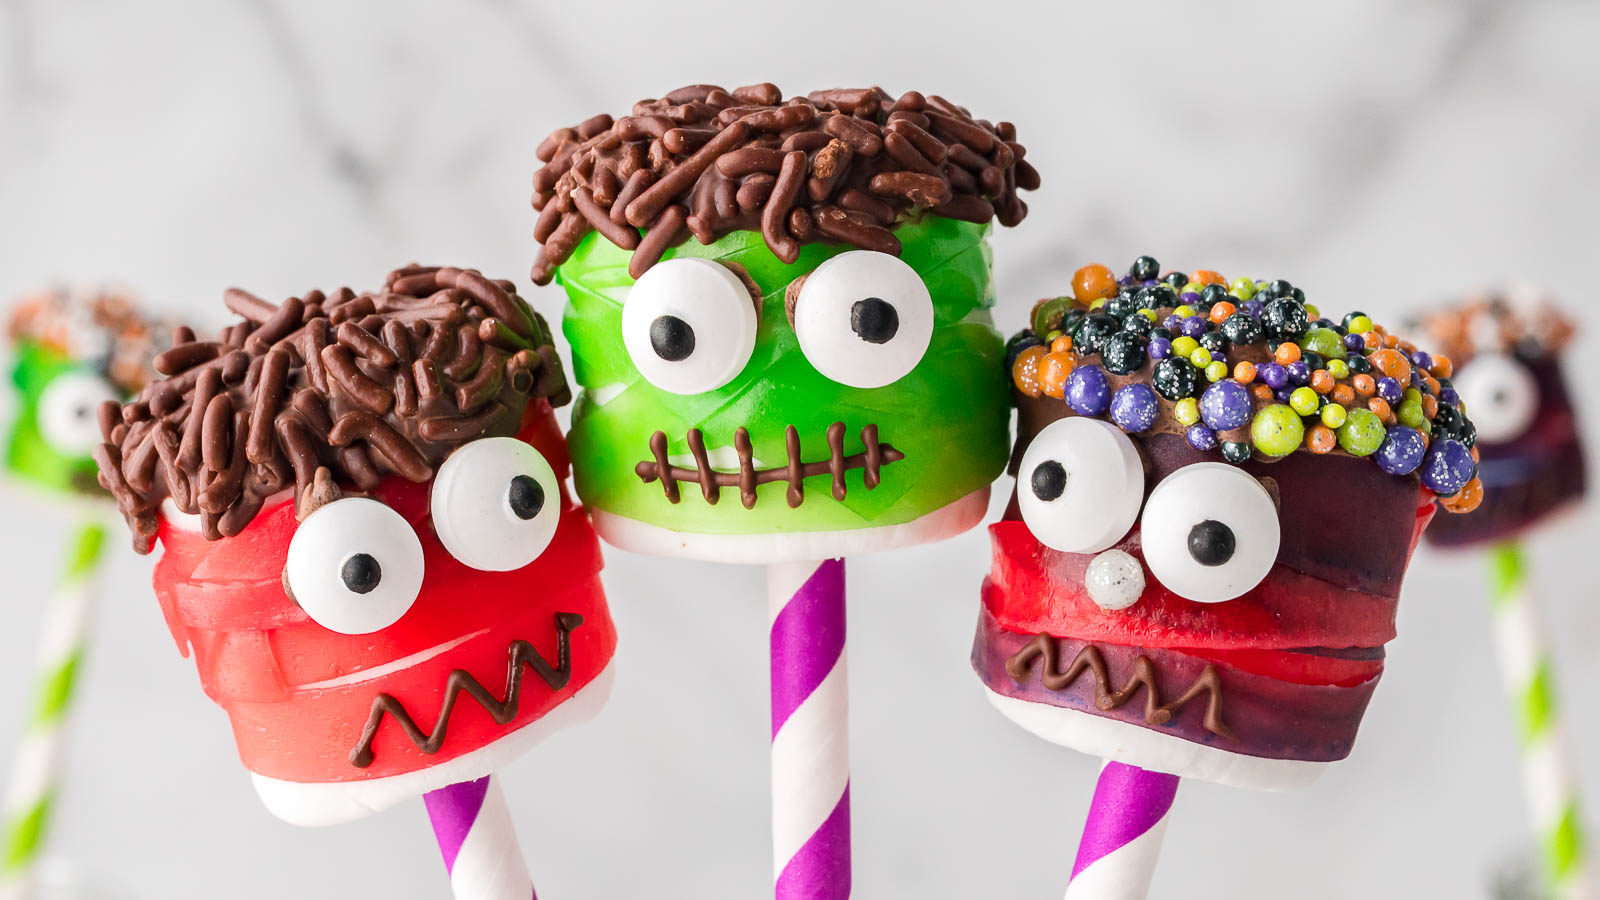
This recipe is all about easy fun. All you need are marshmallows, fruit roll-ups, candy eyeballs, and some chocolate. There is no right or wrong way to decorate them. Keep it simple or go over the top with details. Either way, they will be the highlight of your Halloween spread.
Why you’ll love these Monster Marshmallows
A Monster-Sized Treat We Love Making Every Year
Growing up in Ireland, Halloween was more about homemade costumes and a few sweets, but here in the US it is next-level fun. These marshmallow monsters have become a tradition in our house. I started making them one year when I had lots of fruit leathers in the house, and now we laugh every time we decorate them. Some end up spooky, some look like they just woke up, and somehow that makes them even better.
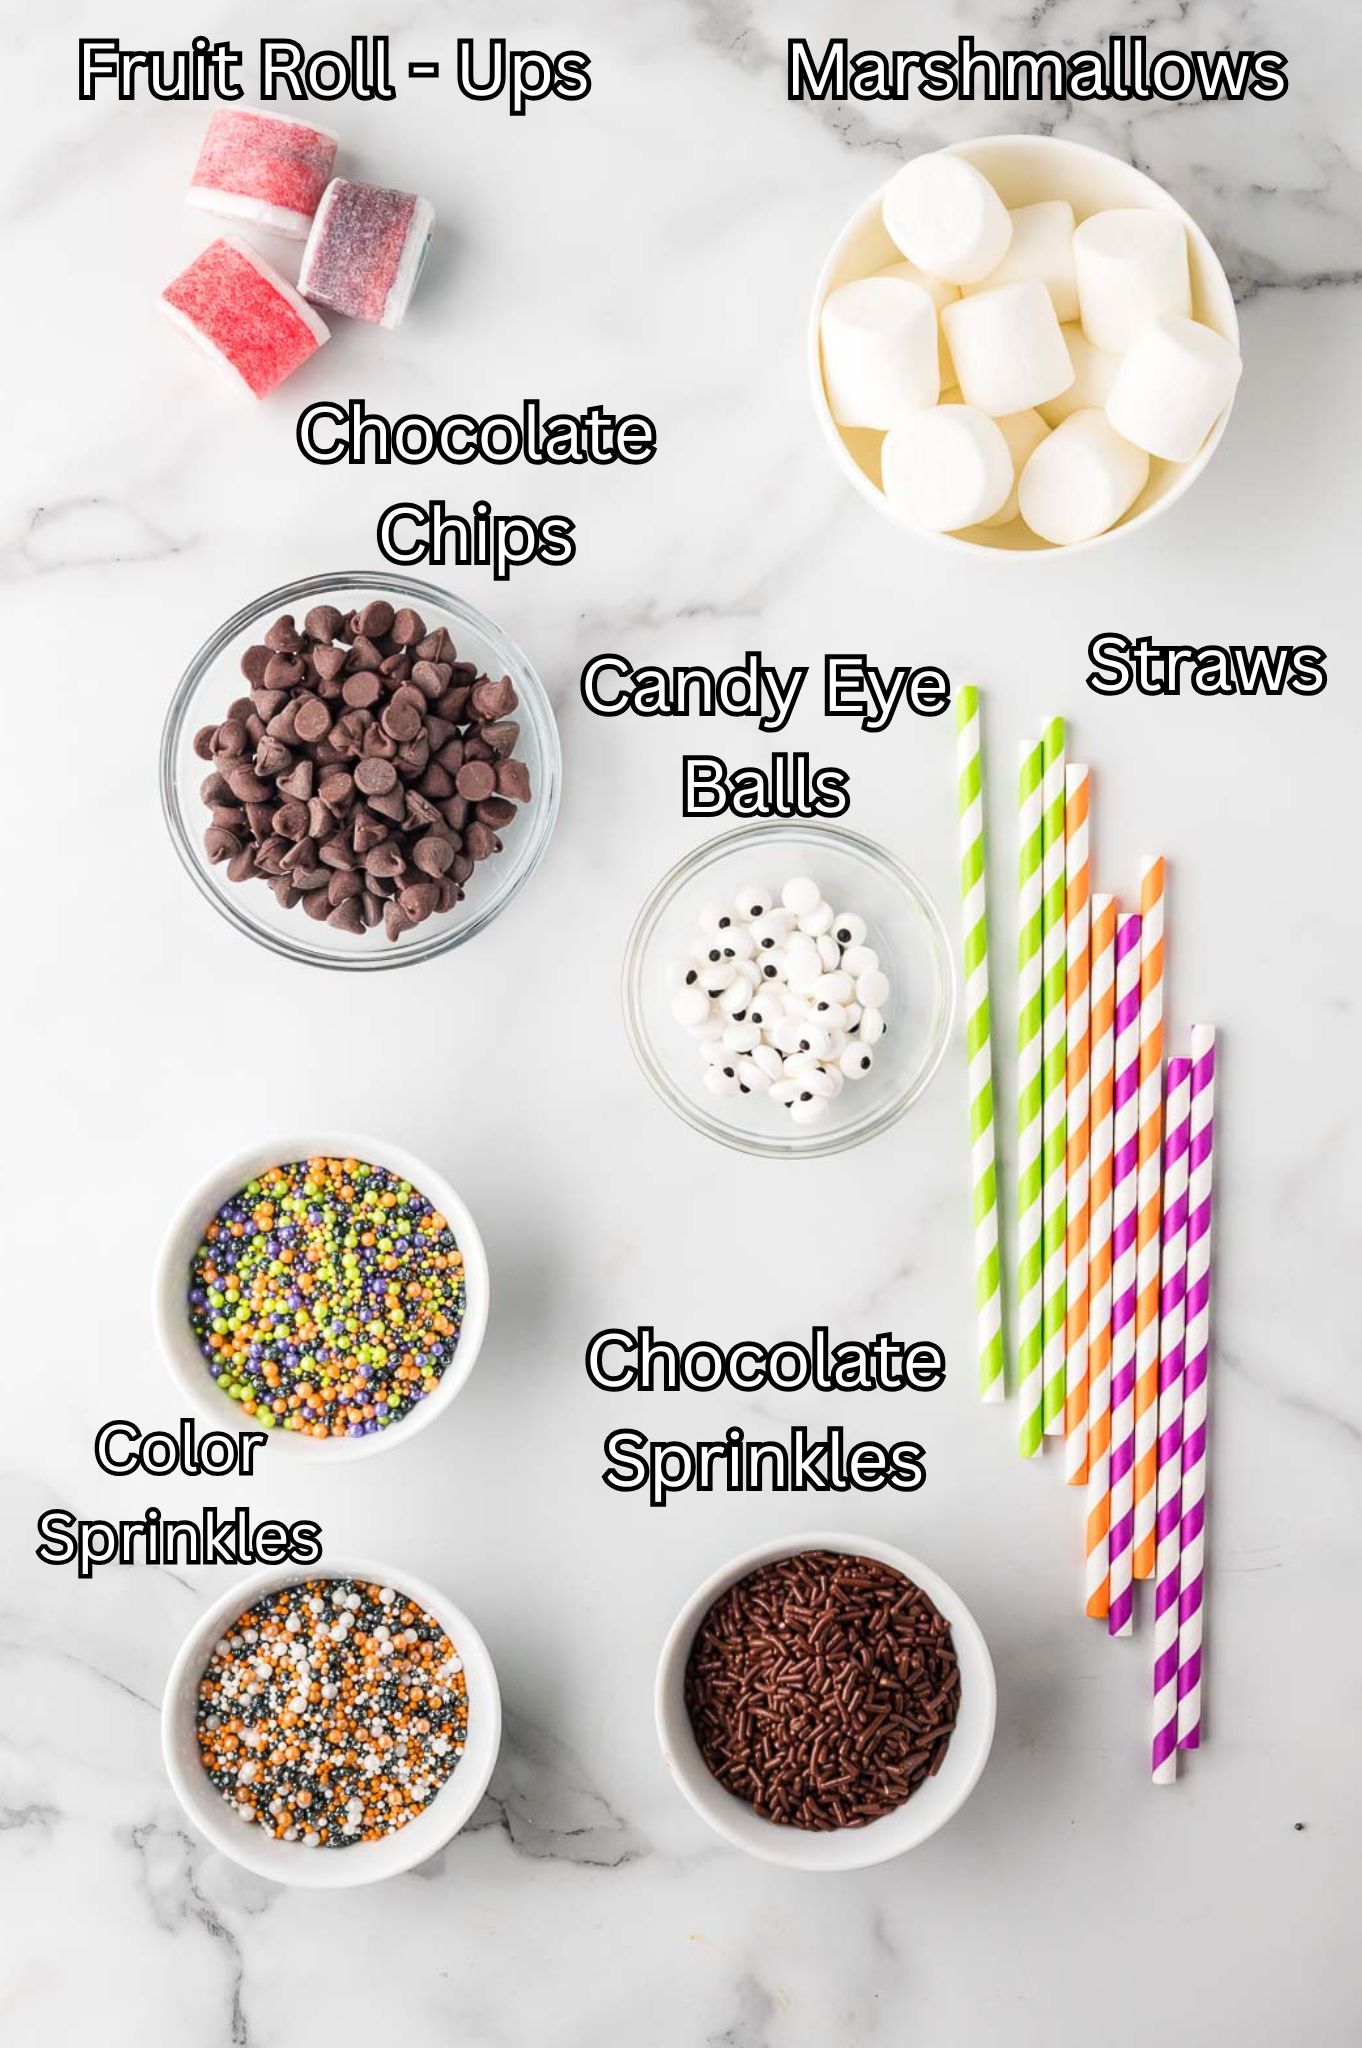
Ingredients Needed for Monster Marshmallows
- Marshmallows – Large ones work best for the classic monster shape
- Fruit roll-ups – Cut into skinny strips to wrap like mummy bandages
- Chocolate chips – Melted for dipping and adding details
- Candy eyeballs – Two per monster, or more if you want to get weird with it
- Sprinkles or chocolate curls – Press into the melted chocolate to make fun monster hair
How to make Monster Marshmallows
**For more detailed instructions, please refer to the printable recipe card below.**
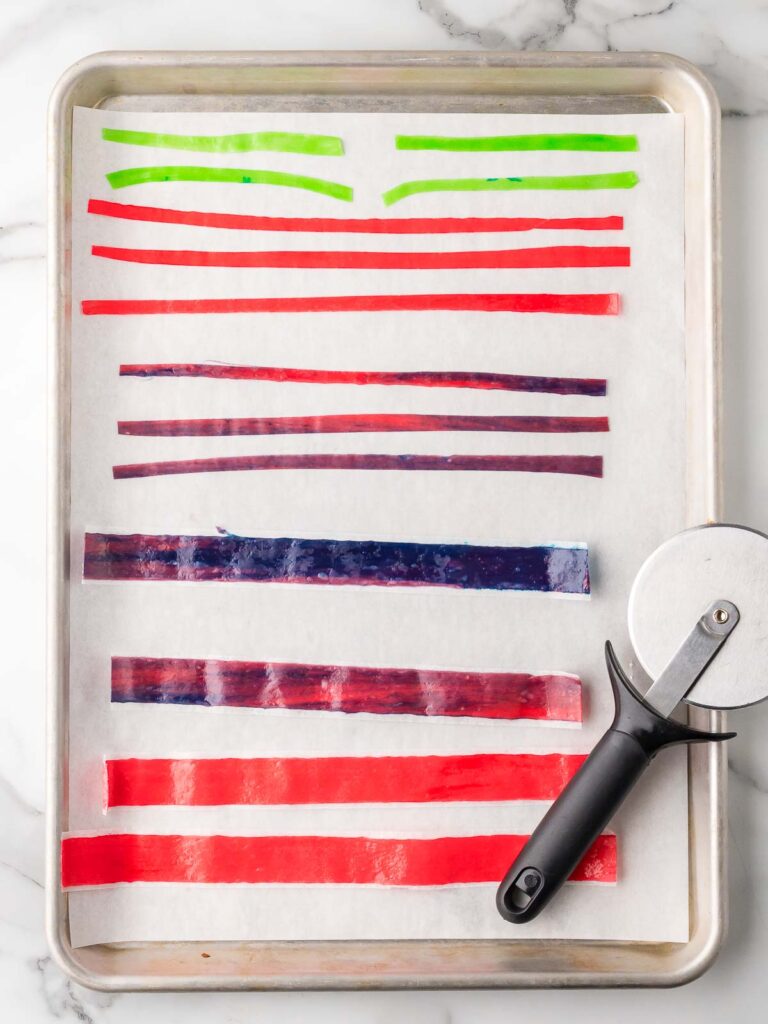
Cut fruit roll-ups into thin strips using a pizza cutter or scissors.
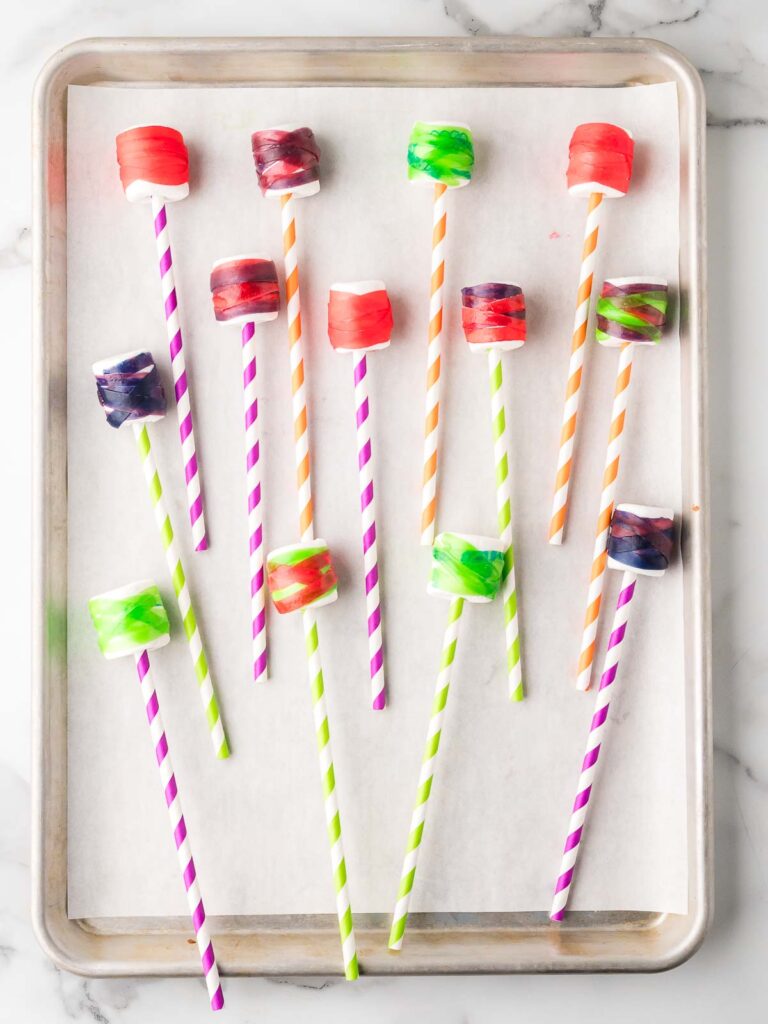
Push each marshmallow onto a straw and wrap each marshmallow with a few strips to look like bandages.
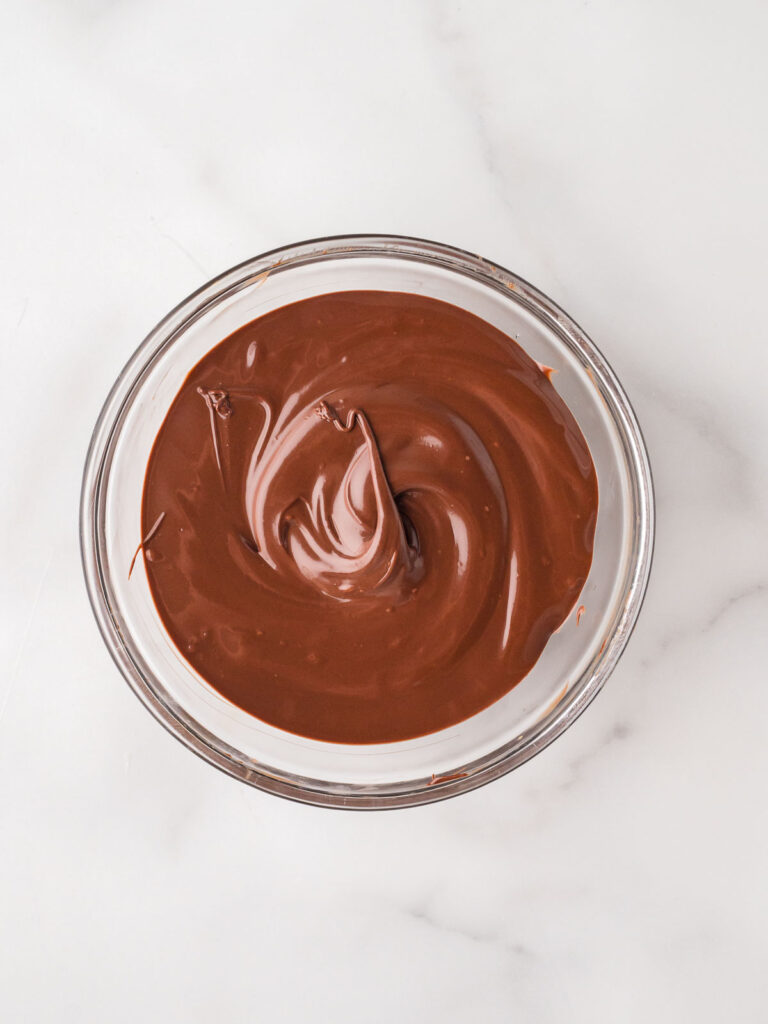
Melt the chocolate chips in a microwave-safe bowl in 20-second intervals, stirring until smooth.
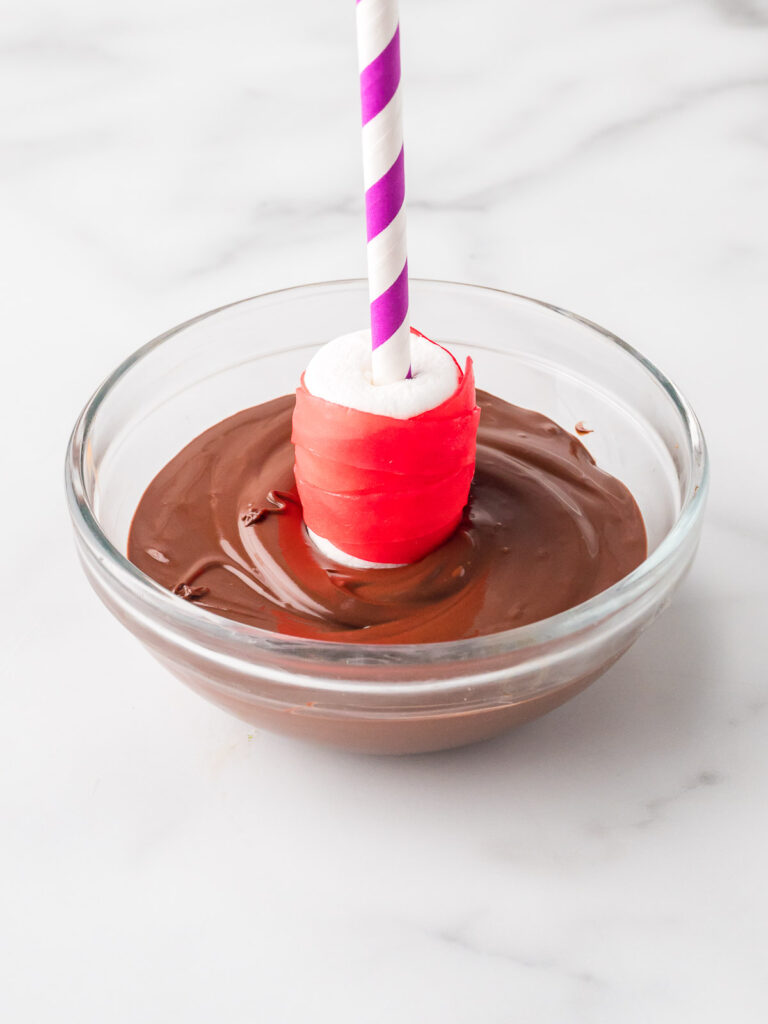
Dip the top of each marshmallow into the melted chocolate.
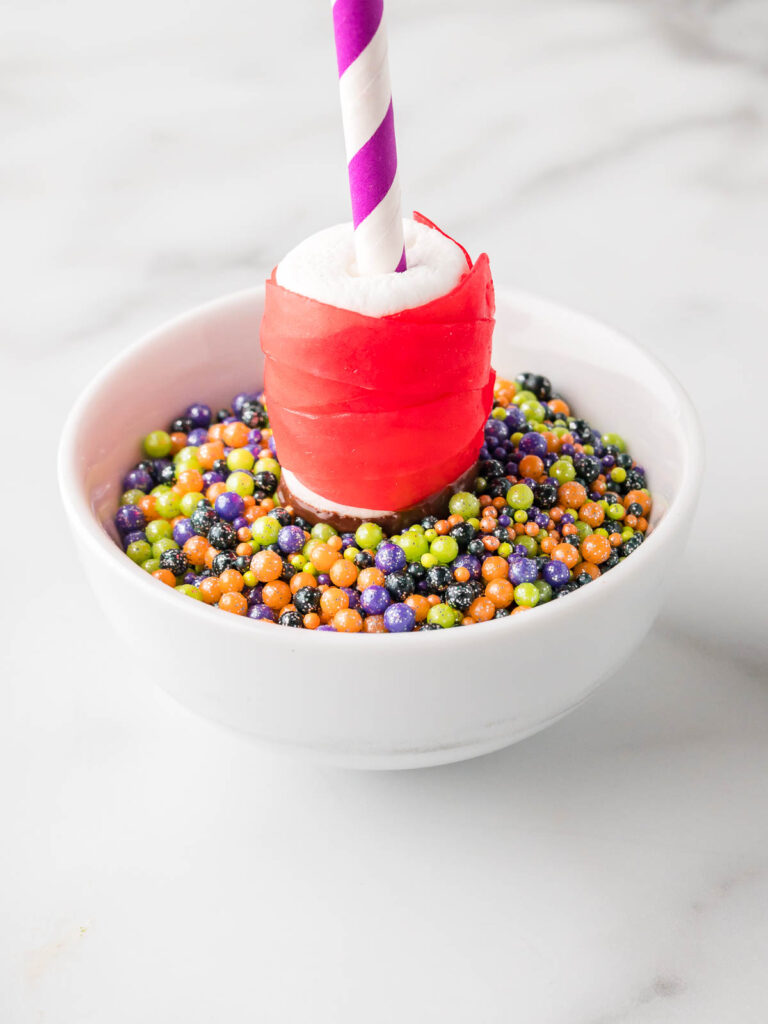
Immediately press the chocolate-covered tops into sprinkles or curls to make fun monster hair.
Add a small dab of melted chocolate to the back of each candy eyeball, then press it gently onto the front of the marshmallow.
Add a small dab of melted chocolate to the back of each candy eyeball, then press it gently onto the front of the marshmallow.
Variations
- Slime Green Monsters – Use green candy melts instead of chocolate for a bright, gooey twist. Great for Frankenstein vibes or alien-style monsters.
- Bloody Bandage Mummies – Drizzle red icing over the fruit roll-up strips to make creepy mummy monsters. This adds a spooky little detail without much effort.
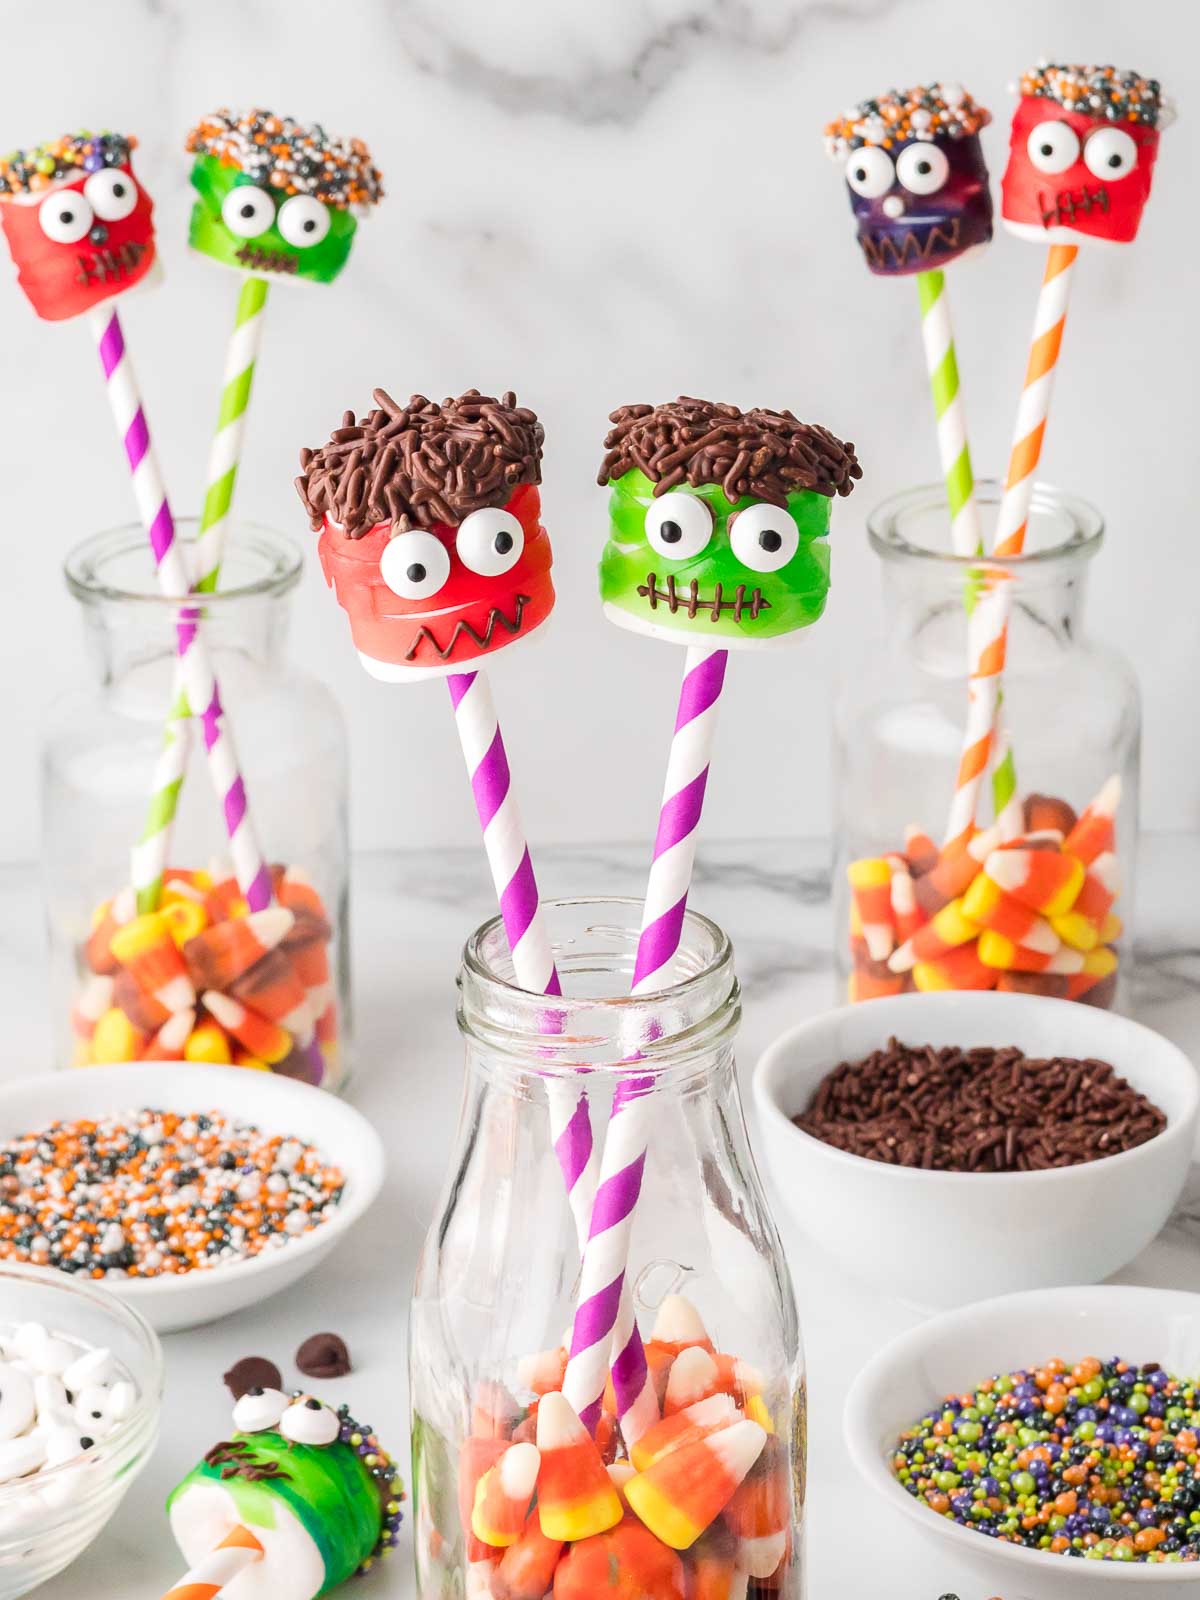
- Monster Pops – Serve them like cake pops by using lollipop sticks and arranging them in a decorated jar or foam block. They travel well and look great displayed upright.
- Chocolate-Dipped Ghosts – Skip the fruit roll-ups and use white chocolate to dip the whole marshmallow. Add eyes and a little mouth for a ghostly version.
Serving Suggestions
- Party Platters – Line up the monsters on a Halloween-themed platter with other Monster Treats, Candy Corn Fudge, and Pretzel Spider Webs ( coming soon to the blog) for a festive treat spread.
- Individually Wrapped Treats – Wrap each one in a small clear bag and tie with ribbon for a classroom party or Halloween favor.
- Topping for Cupcakes – Stick one marshmallow monster into the top of a frosted cupcake for an instant spooky upgrade.
- Decorative Centerpiece – Arrange the monsters in a jar filled with candy corn or sprinkles to use as a colorful and edible Halloween centerpiece.
- Trick-or-Treat Table Option – Set them out with a sign letting kids choose their favorite monster to take home.
Storage and Freezing
- How should I store Monster Marshmallows?
Store your monster marshmallows in an airtight container at room temperature for up to 3 days. Keep them out of direct sunlight or heat, as the chocolate and candy details can melt or slide off.
- Can I freeze Monster Marshmallows?
Freezing causes the marshmallows to change texture and the fruit roll-ups to get sticky once thawed. For best results, make and enjoy them fresh within a few days.
Don’t forget to pin this for later!

Tips & Tricks
- Use fresh marshmallows – Older marshmallows can be too stiff or dry, making them harder to decorate and less fun to eat.
- Melt chocolate slowly – Microwave in short bursts and stir often. Overheating can cause the chocolate to seize and become grainy.
- Cut fruit roll-ups ahead of time – This makes wrapping faster, especially if little helpers are joining in. Lay the strips out so everyone can grab and go.
- Stick eyeballs on right after dipping – Add the chocolate to the back and attach them before the coating sets. This keeps them from falling off or sliding around.
- Have fun with faces – Don’t worry about making them perfect. A lopsided mouth or wonky eyes just adds to their charm.
Recommended
More Halloween Treats

FAQ
Monster Marshmallows
Equipment
- Scissors
- Small piping bag or zip-top bag
Ingredients
- 12 large marshmallows
- 2 fruit roll-ups cut into thin strips
- ½ cup chocolate chips
- Sprinkles or chocolate curls
- 24 candy eyeballs
- Extra melted chocolate for mouths
Instructions
- Wrap each marshmallow with thin strips of fruit roll-up to look like bandages.
- Melt the chocolate and dip the tops of the marshmallows into it.
- Immediately dip the chocolate-covered tops into sprinkles or curls to make monster hair.
- Add a small dab of melted chocolate to the back of each candy eyeball, then press it gently onto the front of the marshmallow.
- Use a piping bag to draw chocolate scars, mouths, or stitches if desired.
- Let set on parchment paper until chocolate firms up.

These are so spooky cute! Bookmarking to make with my kids.
Great!! I love it. They are so much fun to make.
These are so fun and cute! Can’t wait to make these with my kids on Halloween! Thanks for the adorable idea!
You are so welcome!
Oh my goodness. I love these. They are SO adorable.
Thank you!