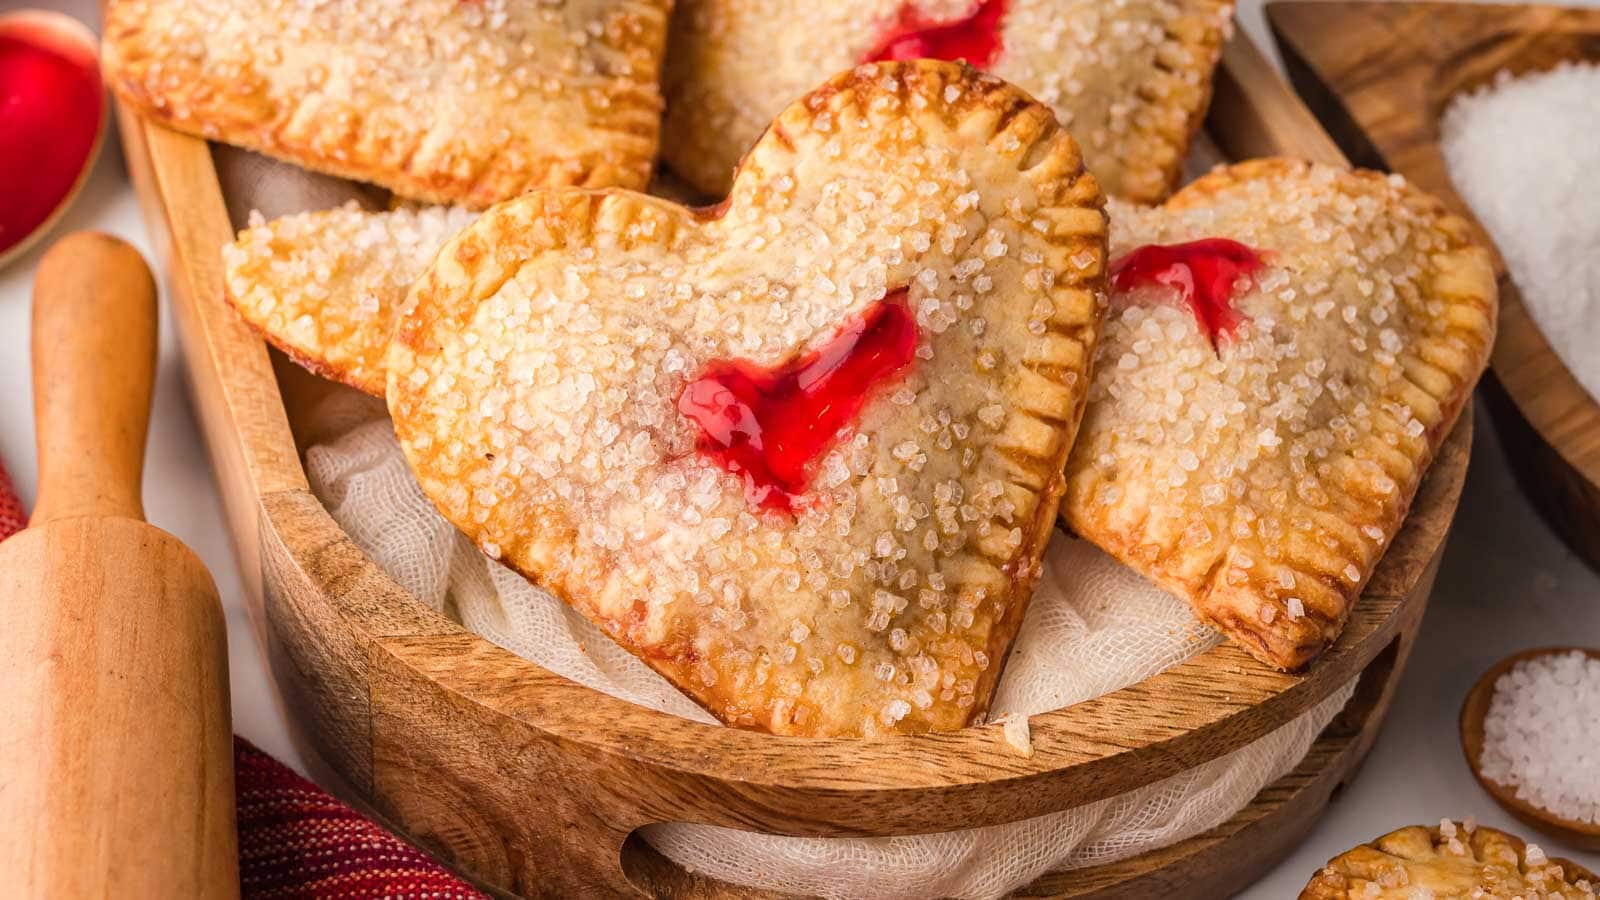
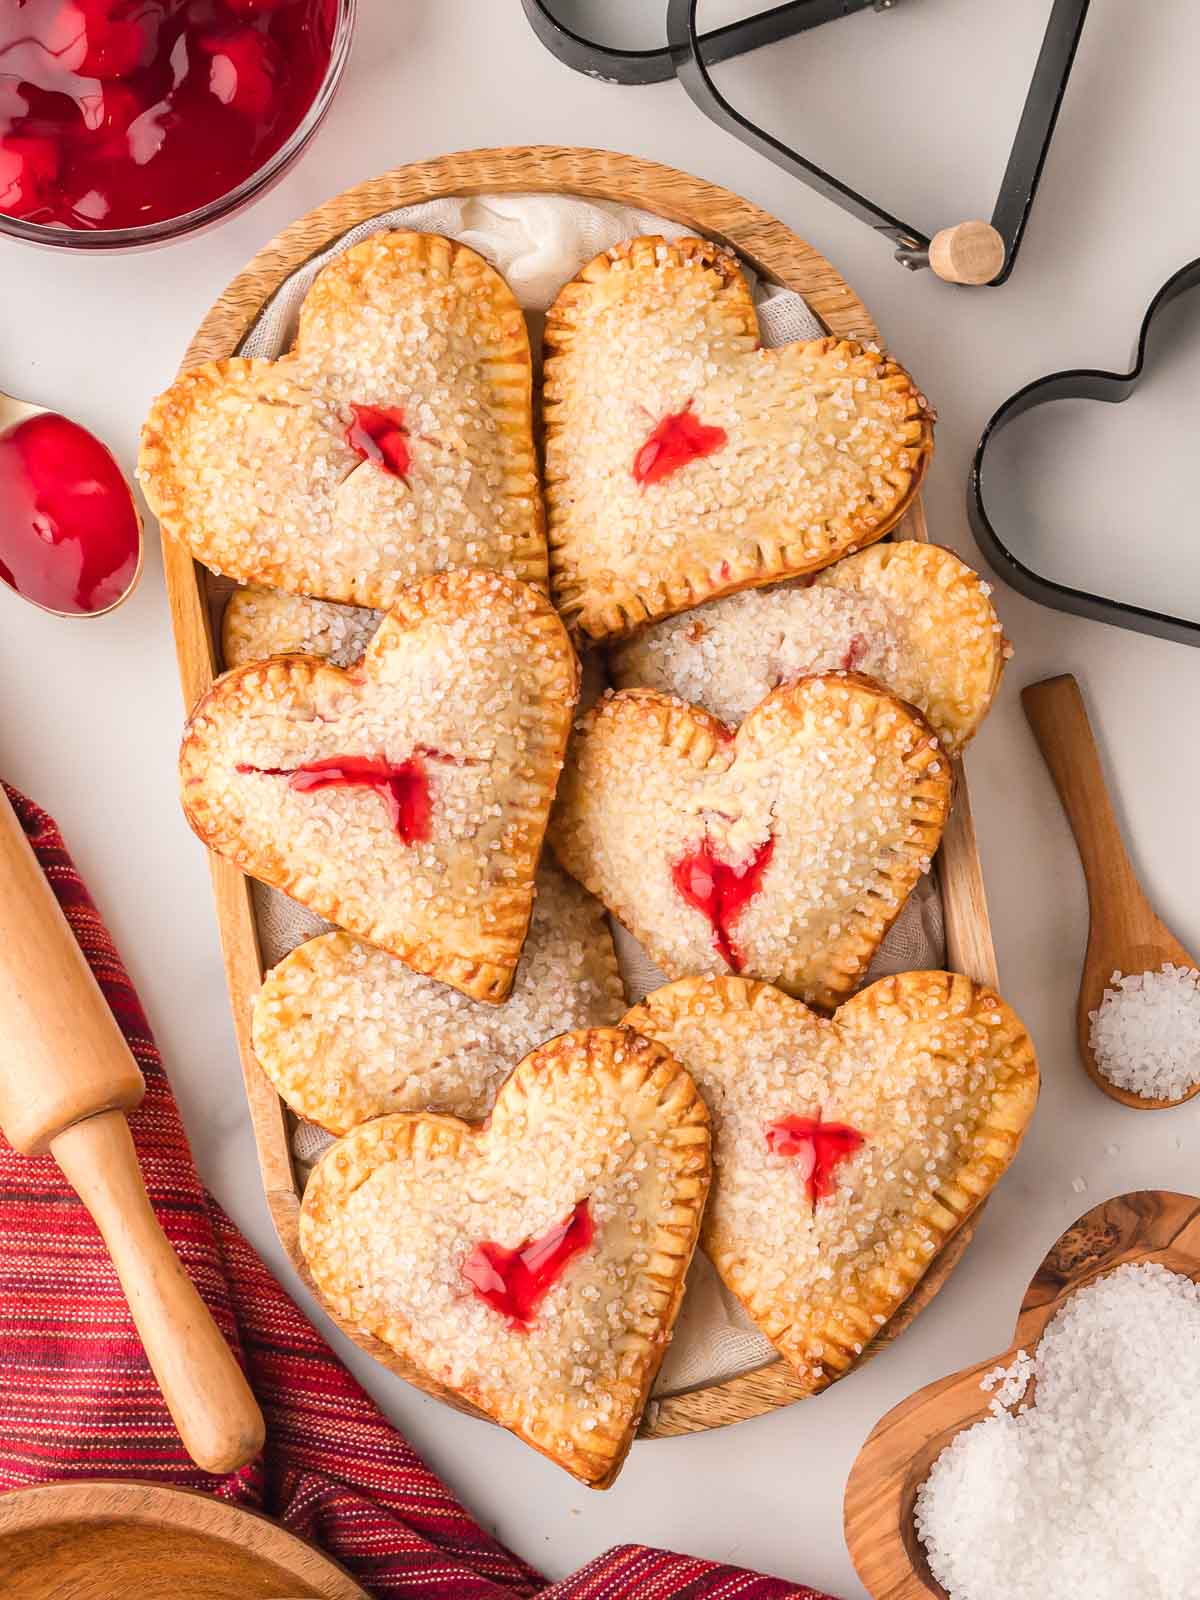
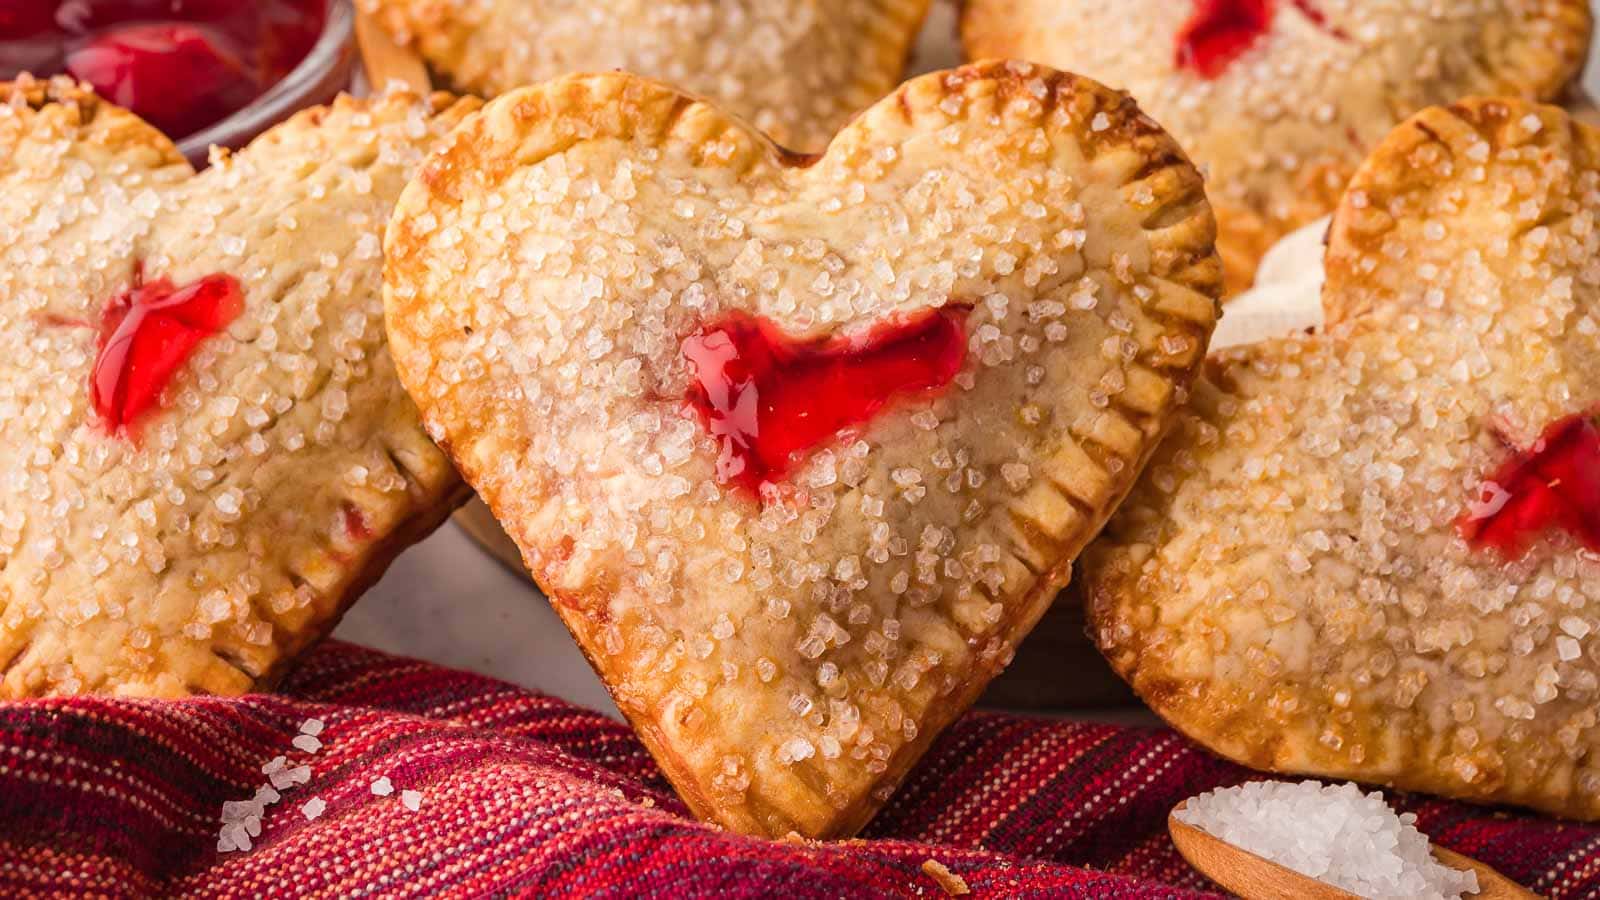
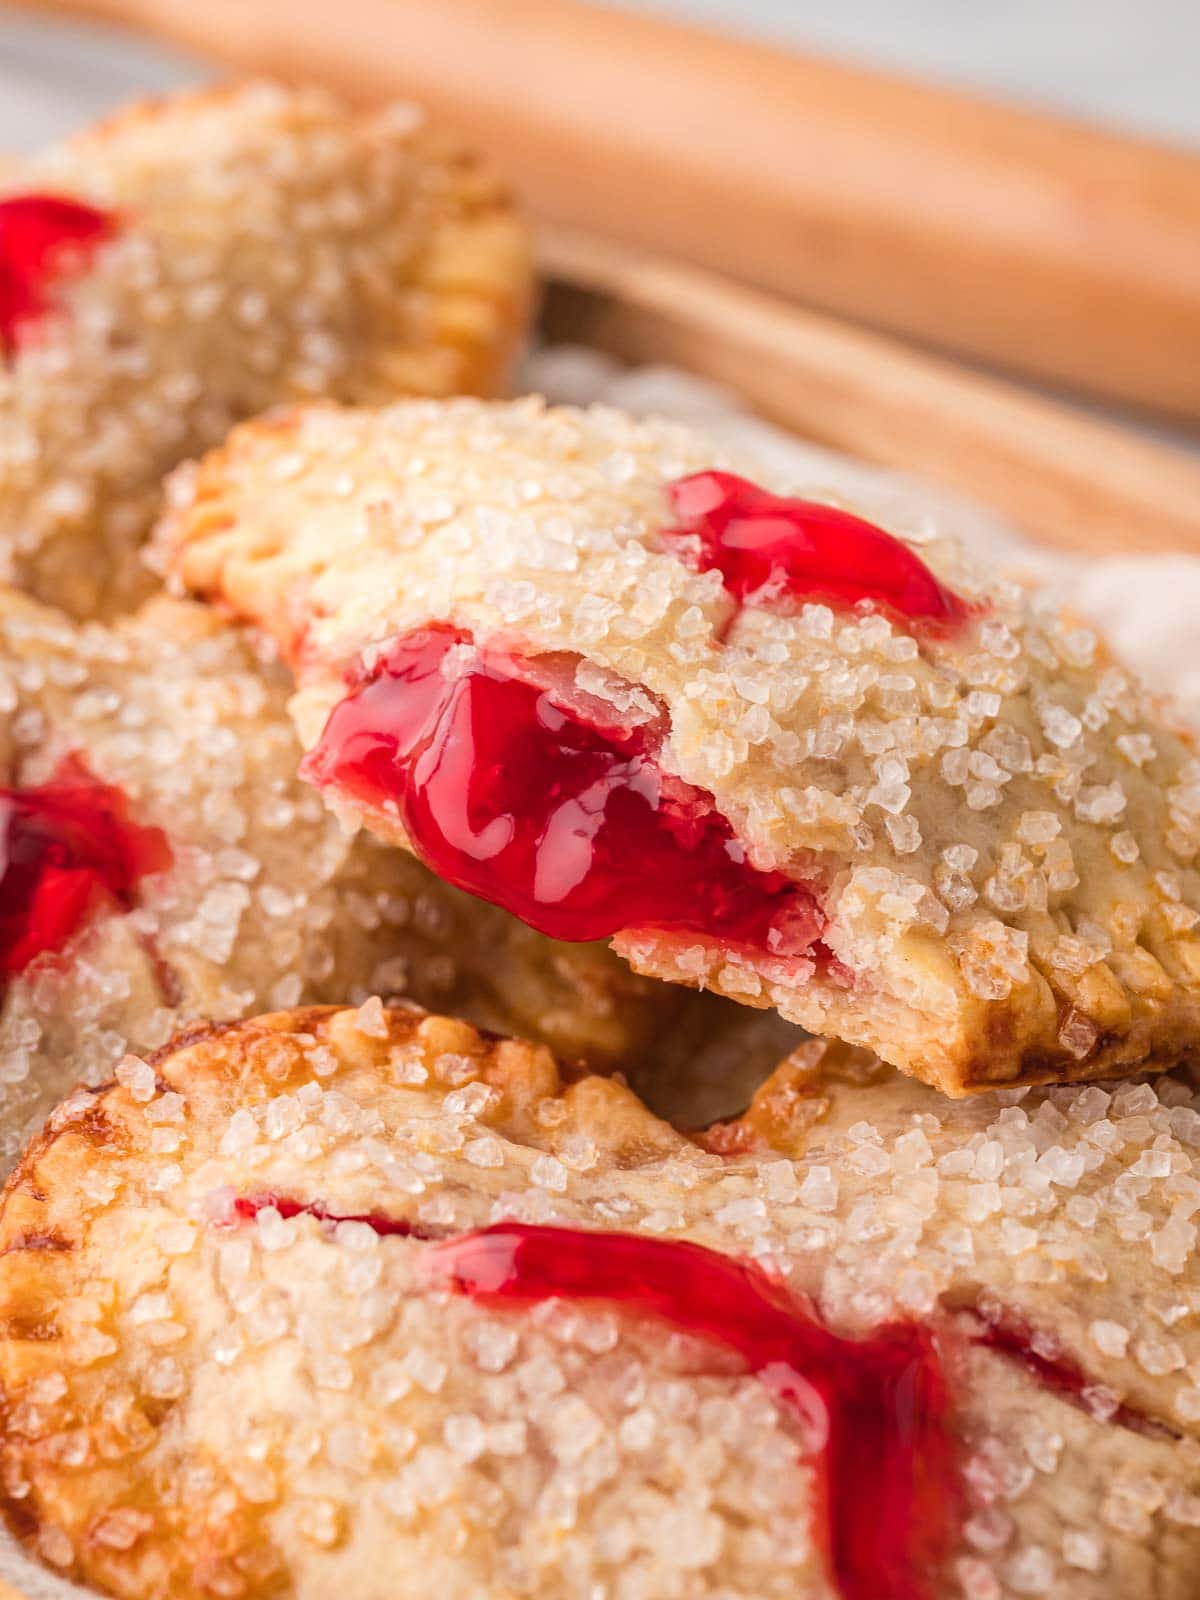
Heart Shaped Cherry Hand Pies
These heart-shaped cherry hand pies are an easy Valentine’s Day dessert made with flaky pie dough and cherry pie filling. They’re small, simple, and perfect when you want something fun and easy to make.
These mini cherry hand pies work really well for Valentine’s Day parties, dessert boards, or as a make-ahead treat for the weekend. The heart shape also makes them a nice fit for Mother’s Day or baby showers, where smaller, handheld desserts make sense. If you’re planning a Valentine’s spread, these pair nicely with my Heart Cake Pops or Pinwheel Cookies, especially if you like having a mix of textures on the table.
Why you’ll love these Heart Shaped Cherry Hand Pies
Why Are Heart-Shaped Hand Pies So Popular for Valentine’s Day?
Heart shaped desserts make sense for Valentine’s Day, especially when they’re easy to serve and don’t need plates or forks. These cherry hand pies are small enough to grab, but still feel like a proper dessert. In Ireland, hand pies and turnovers are everywhere. They were always a weekend treat, and this is just a Valentine’s take on the same idea.
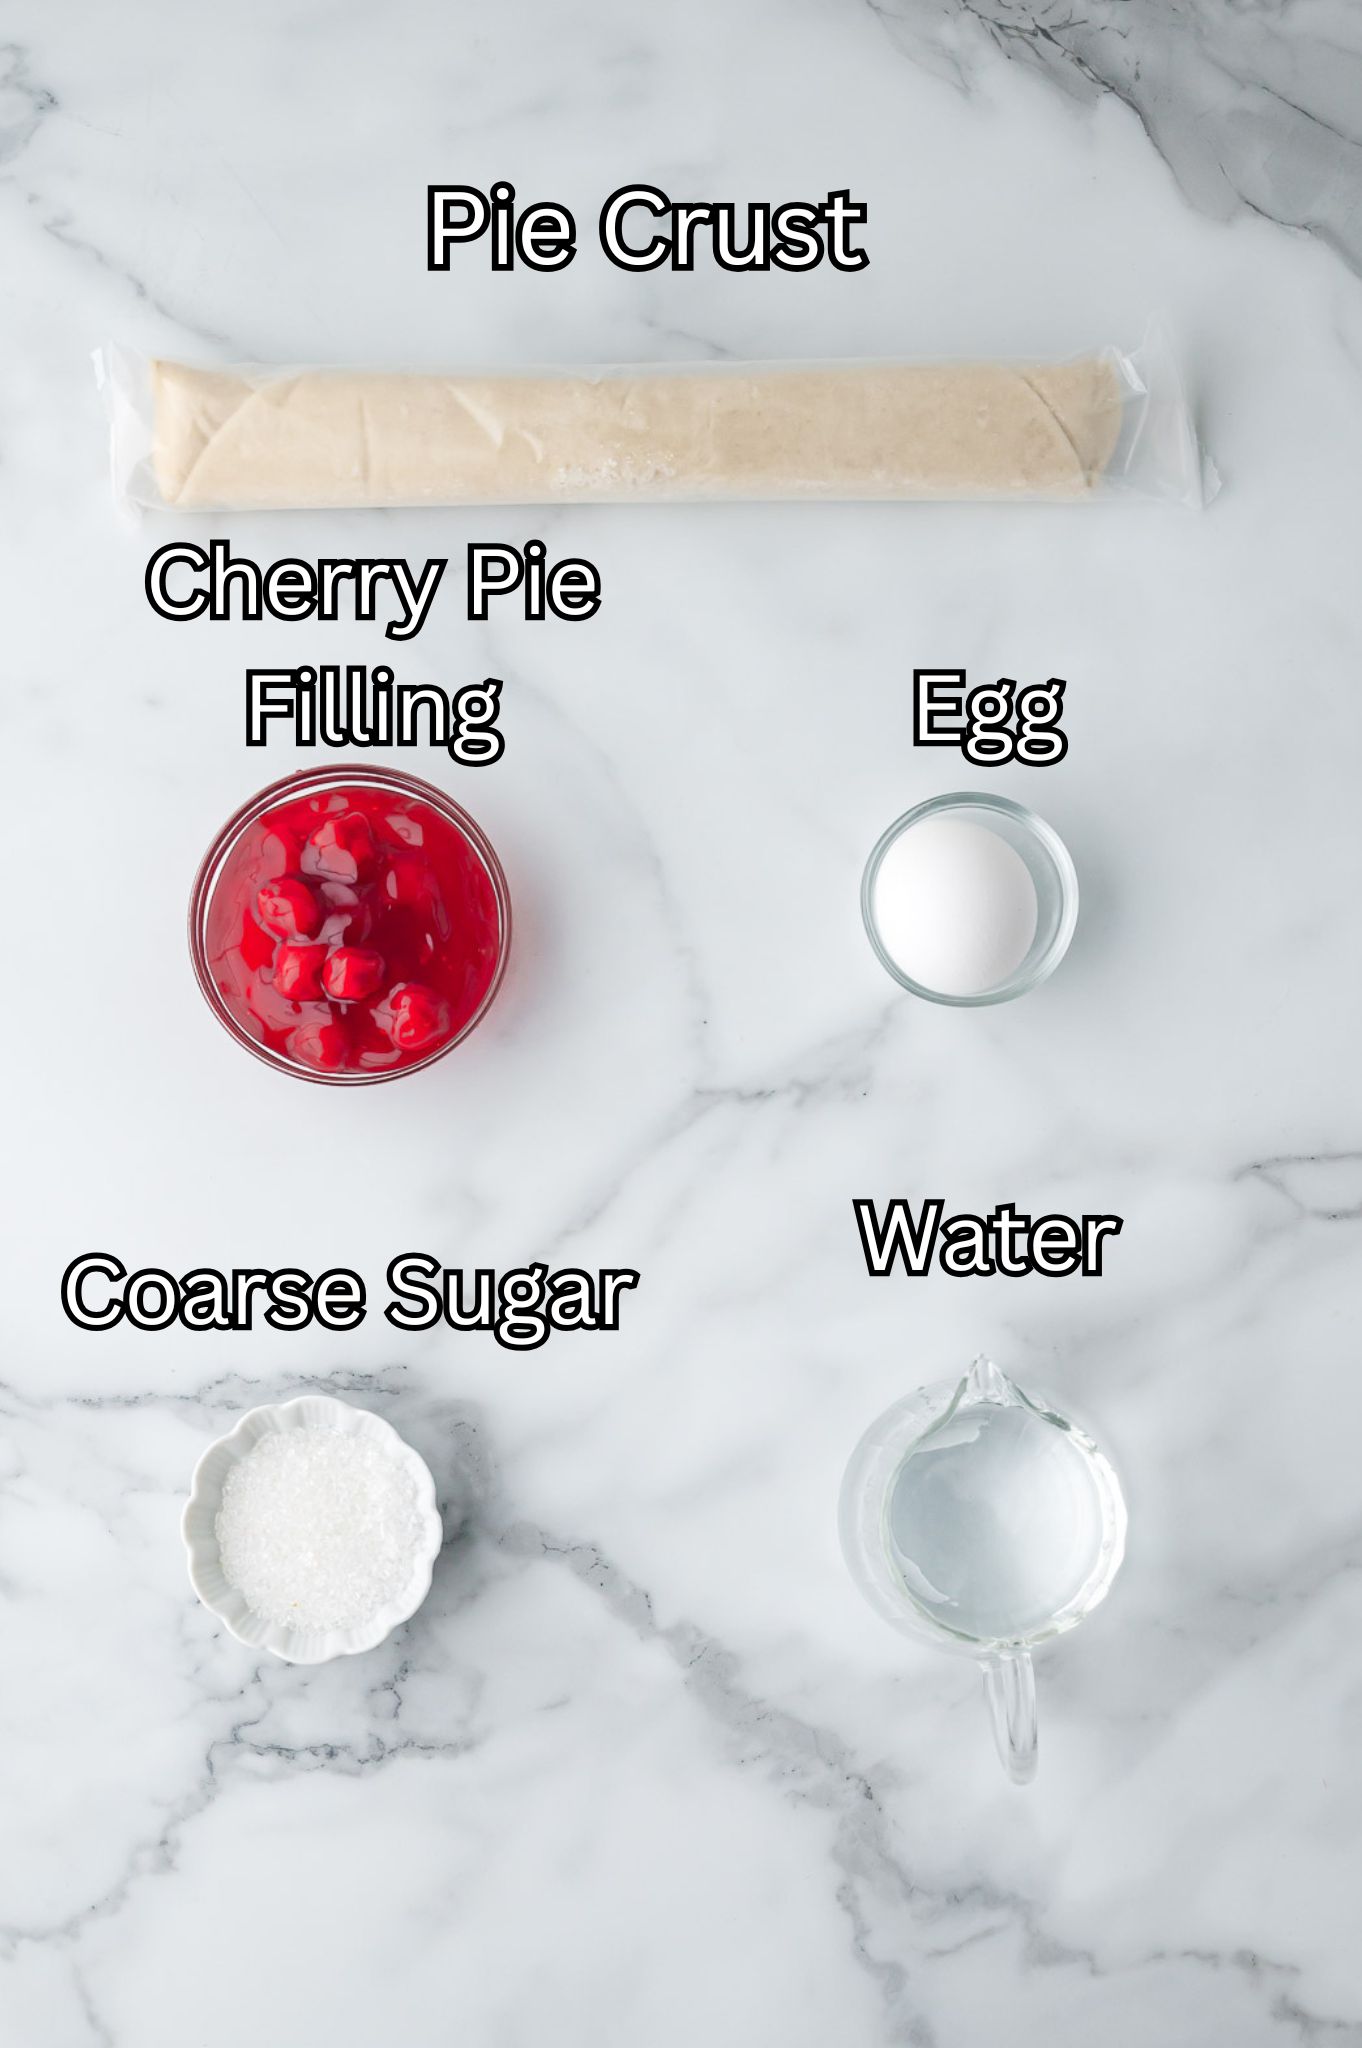
Ingredients Needed for Heart Shaped Cherry Hand Pies
- Refrigerated pie crusts: These keep the recipe simple and give you a flaky texture without extra prep. Let them sit out for a few minutes so they’re easier to roll.
- Cherry pie filling: This is the main flavor here. If the cherries are large, chopping them slightly helps keep the filling from leaking.
- Egg: This is used for brushing the tops so the hand pies bake up lightly golden.
- Water: A small splash mixed with the egg helps thin it out for an even egg wash.
- Coarse sugar : This is optional, but it adds a nice finish.
How to make Heart Shaped Cherry Hand Pies
**For more detailed instructions, please refer to the printable recipe card below.**
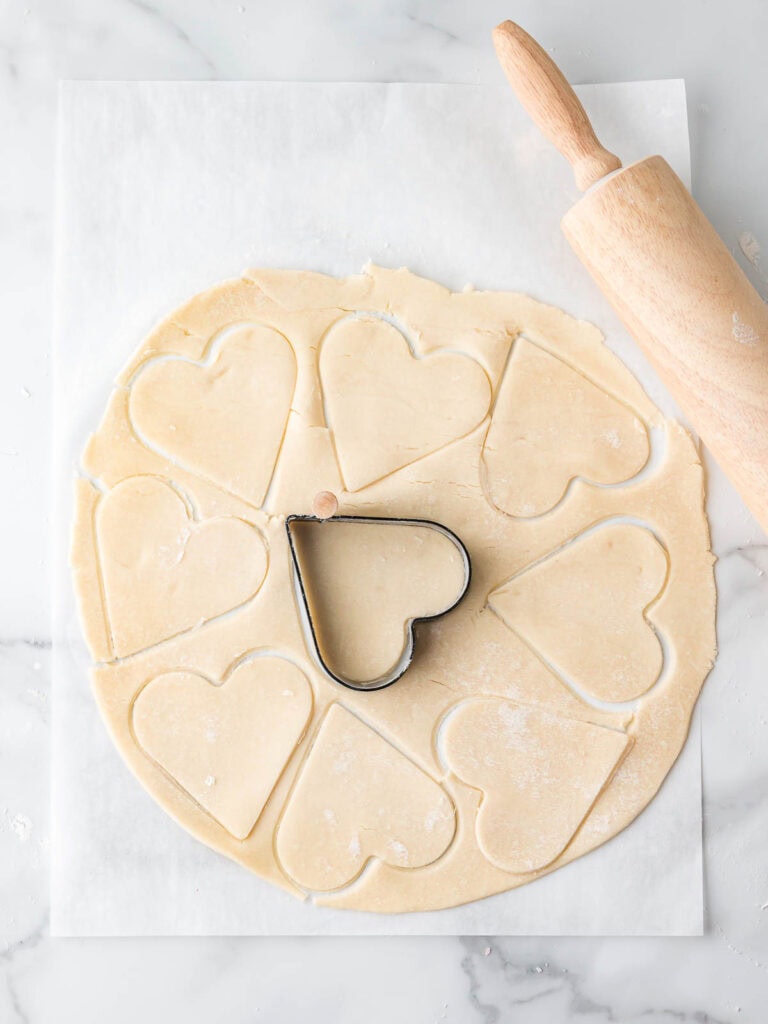
Roll out the pie crusts and cut an even number of heart shapes from the dough.
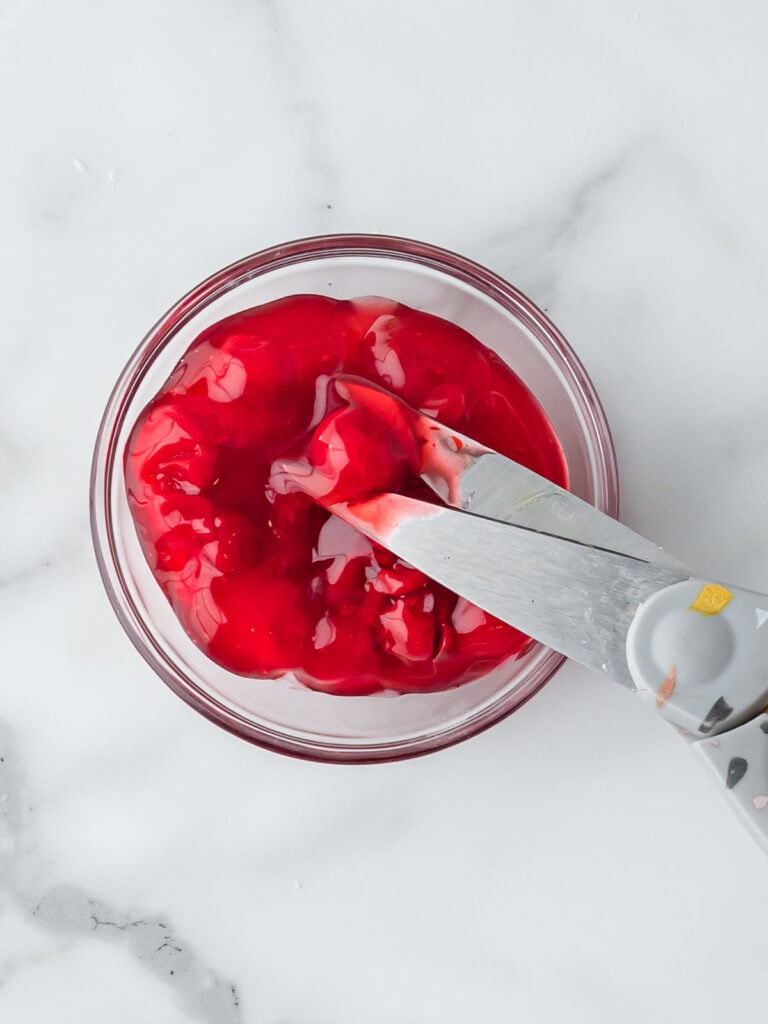
Using kitchen scissors, cut the cherries in the cherry pie filling into smaller pieces so the pies fill evenly.
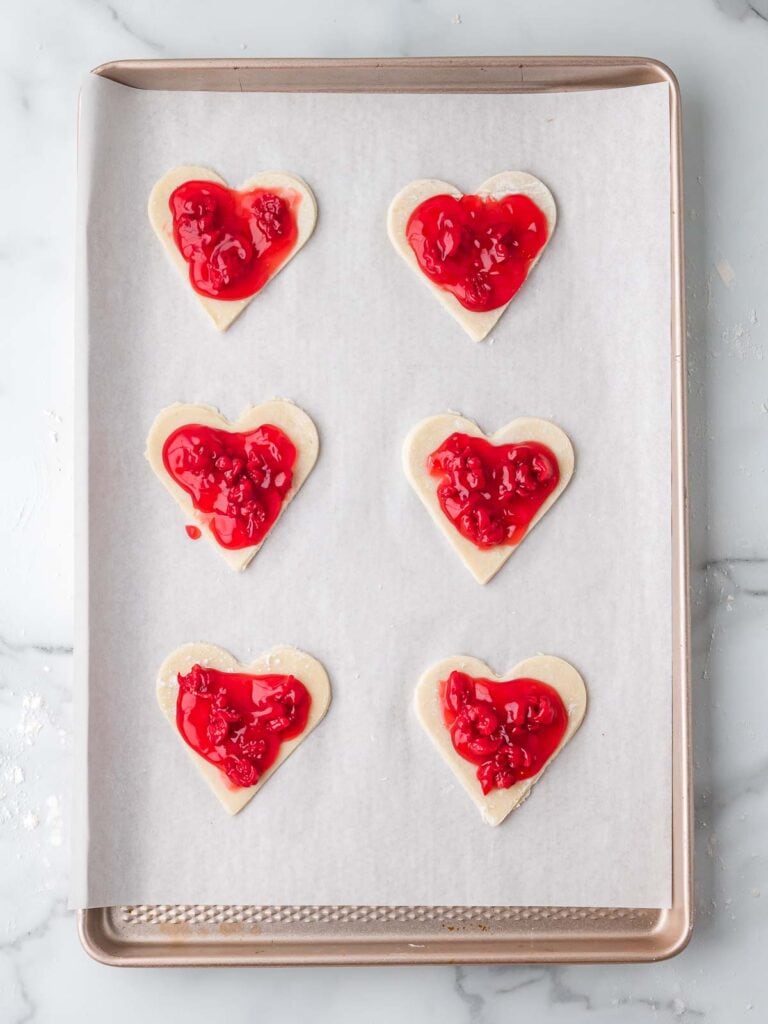
Spoon 2 teaspoons of cherry pie filling into the center of each heart,
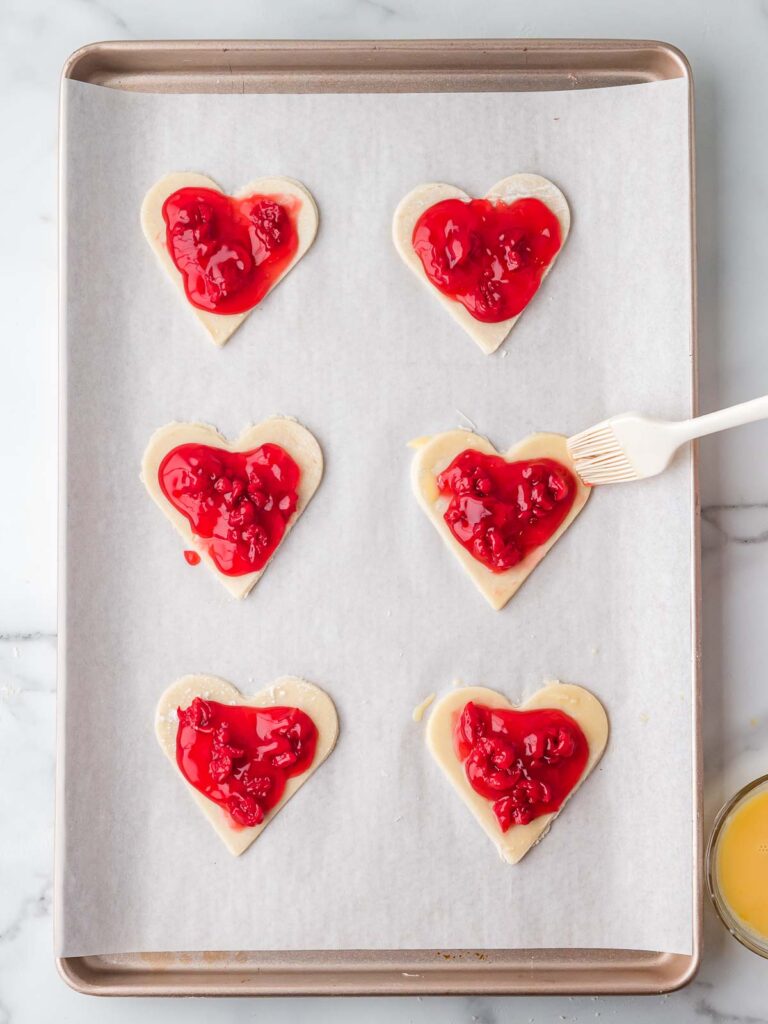
Whisk the egg with a small splash of water and brush lightly around the edges.
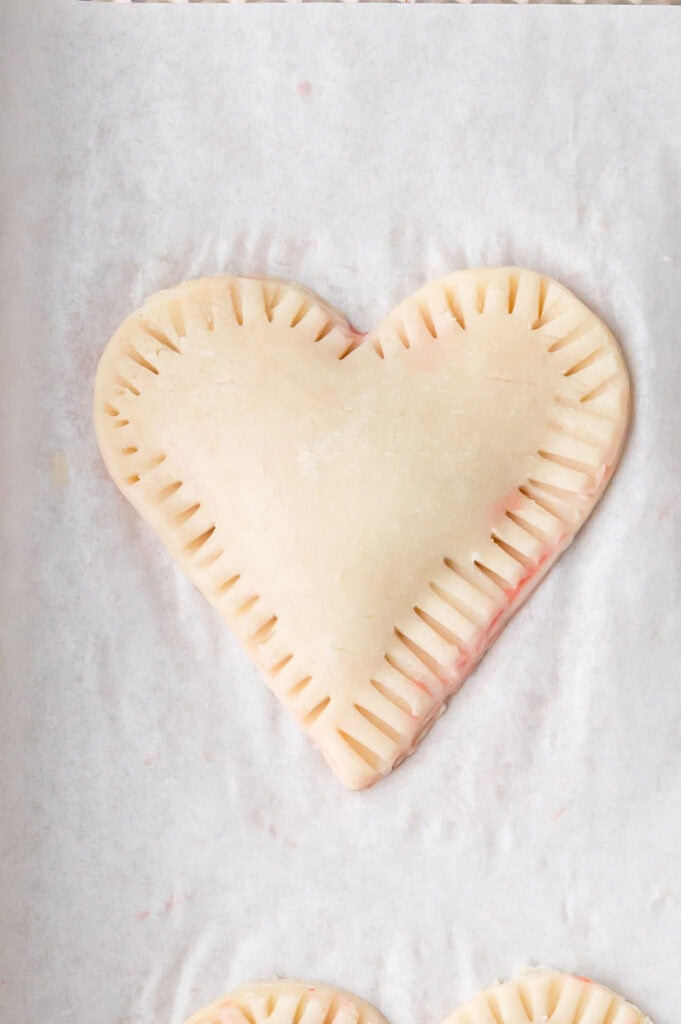
Place a second heart on top of each filled one. Press the edges together gently and seal with a fork. Then chill for 20 minutes.

Brush the egg wash lightly over the tops.
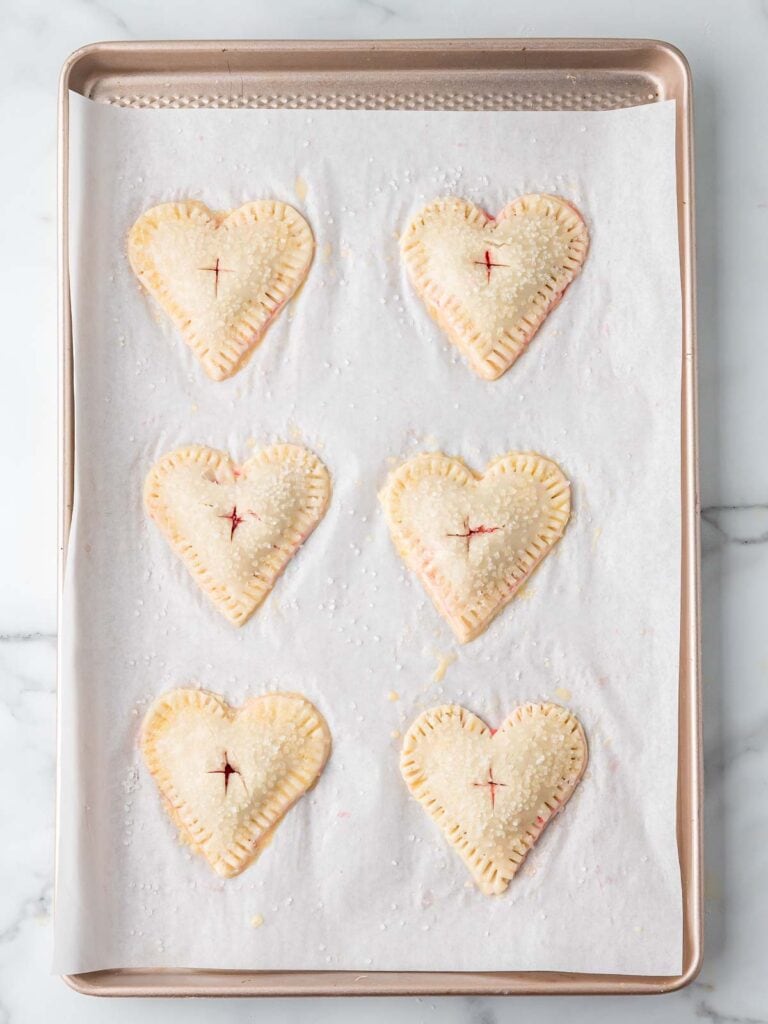
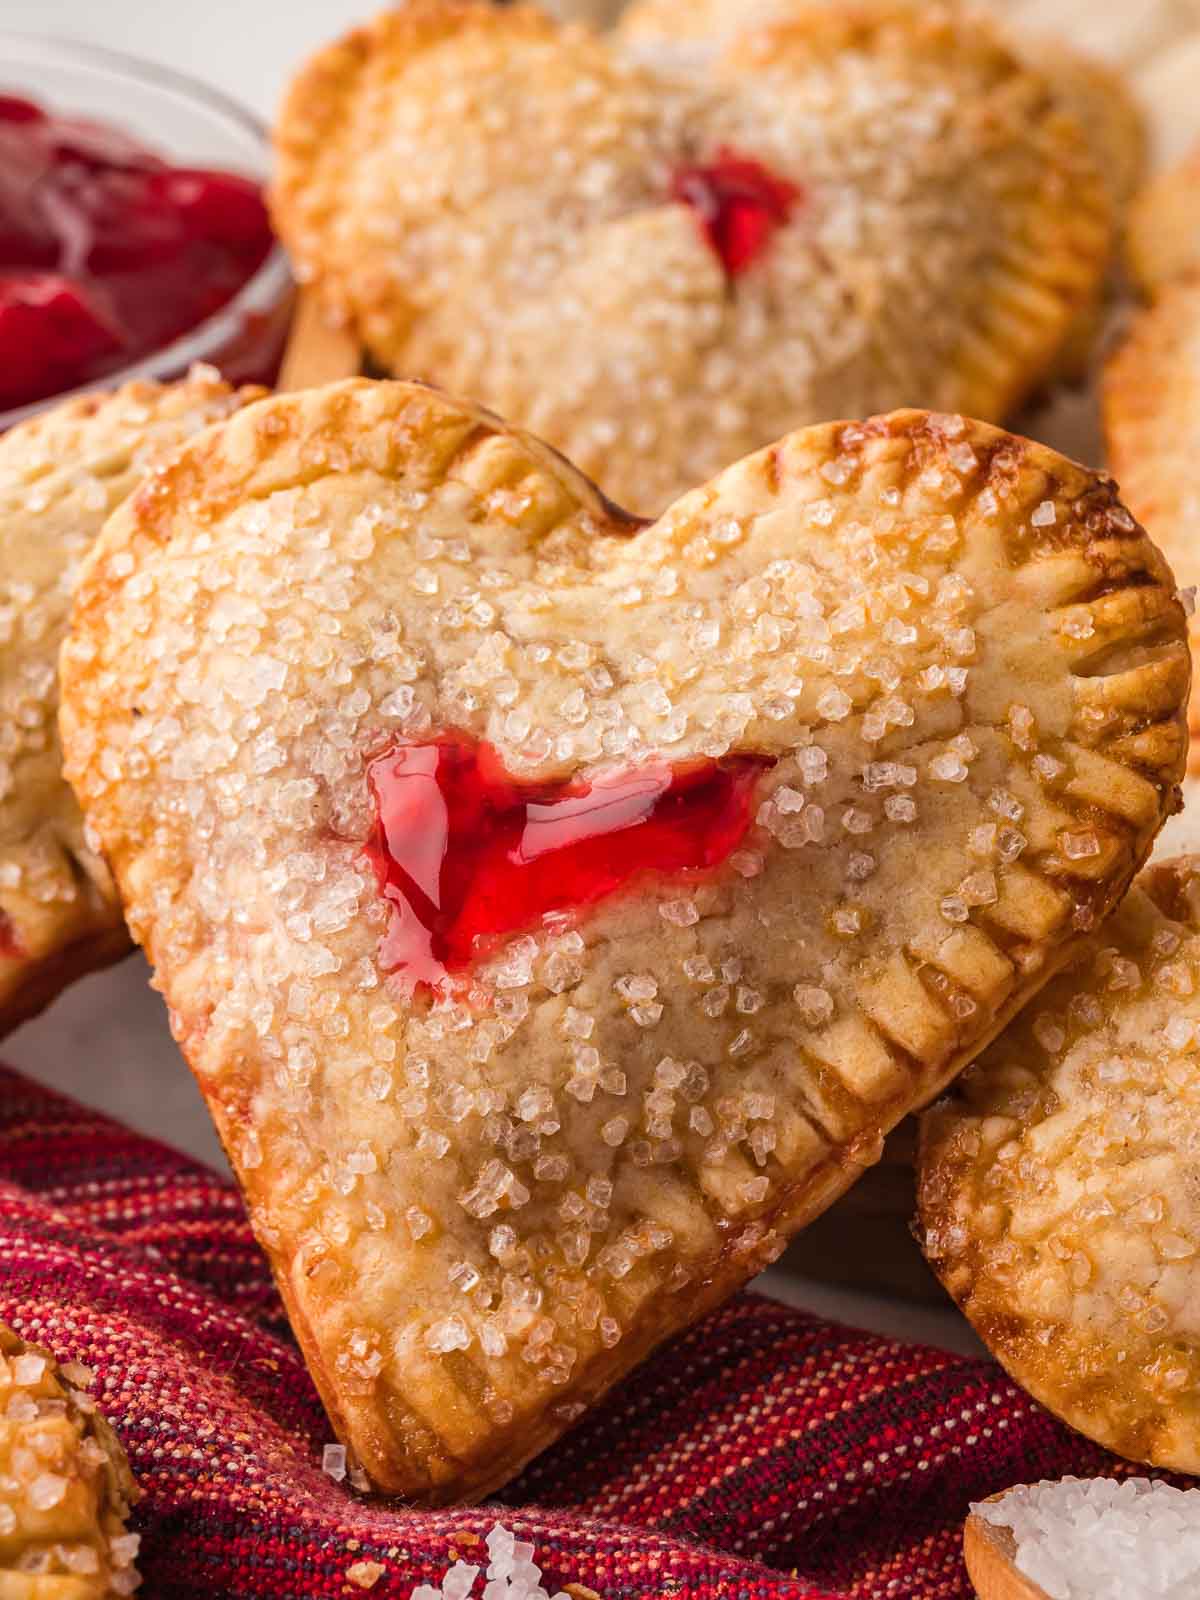
Sprinkle with coarse sugar (if using) and cut a small opening in the center of each pie.
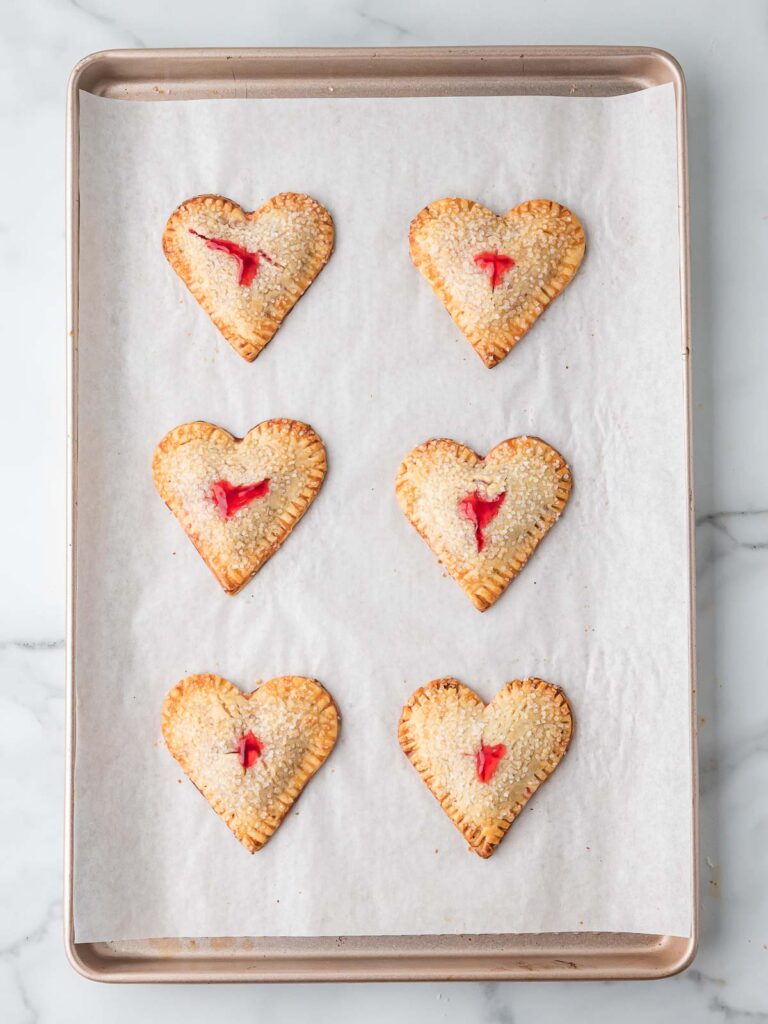
Bake for 18 to 22 minutes, until lightly golden and set.
Variations
- Cherry Almond Hand Pies: Add a small drop of almond extract to the cherry filling for a classic flavor pairing. This works especially well if you like a slightly bakery-style taste.
- Cherry Chocolate Hand Pies: Add a few mini chocolate chips on top of the cherry filling before sealing the pies. If you’re building a chocolate-heavy dessert board, this pairs nicely with Double Chocolate Cake.
- Mixed Berry Hand Pies: Swap part of the cherry filling with raspberry or strawberry filling for a mixed berry version. It still fits Valentine’s Day but gives you a slightly different flavor.
- Glazed Cherry Hand Pies: Skip the sugar before baking and drizzle a simple powdered sugar glaze over the cooled pies instead. This gives them a softer, bakery-style finish.
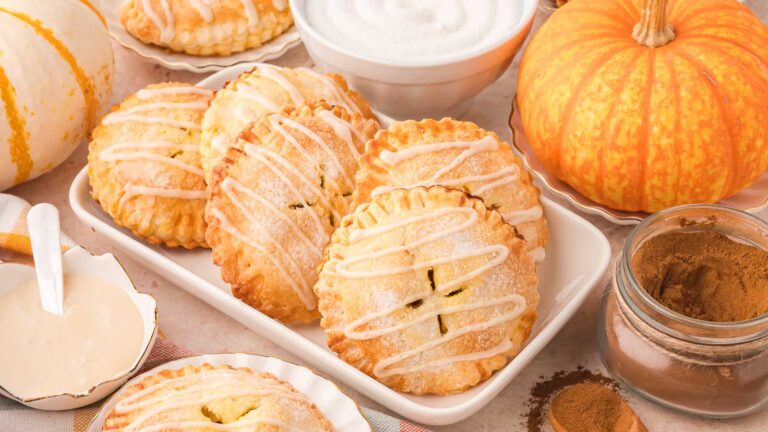
- Pumpkin Hand Pies: If you like the hand pie idea but want a different filling, Pumpkin Hand Pies use the same basic method with a completely different flavor. They’re a good option when you want something less fruit-forward but still easy to make.
Serving Suggestions
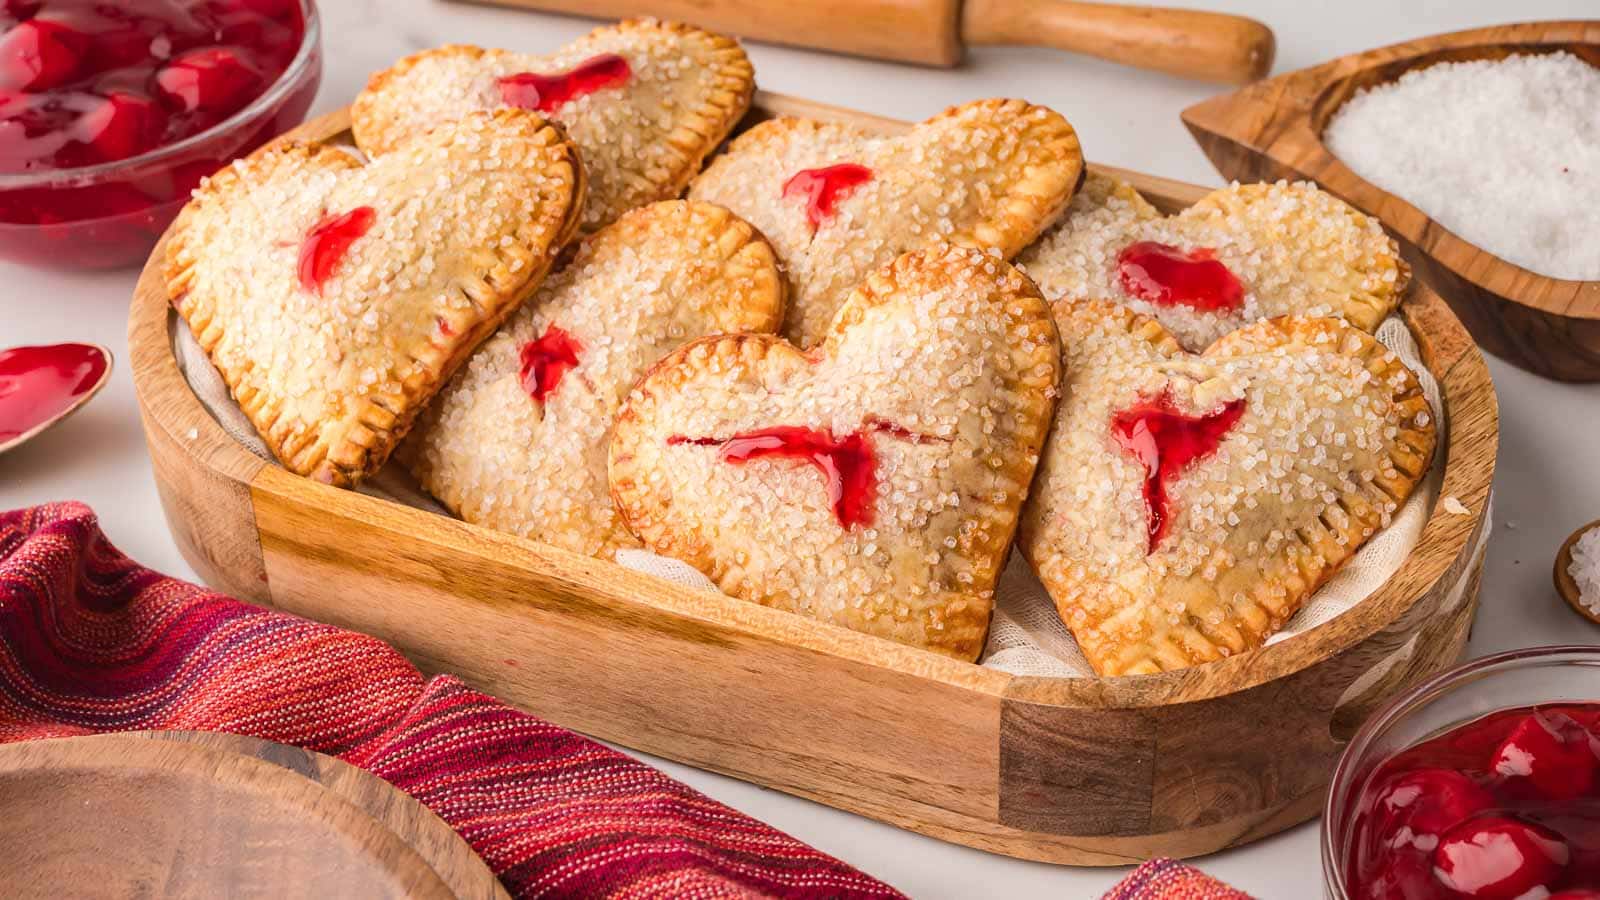
- Valentine’s Dessert Board: Serve these alongside heart shaped cake pops and pinwheel cookies for a mix of textures and flavors. The different shapes make the board look more interesting without extra effort.
- With Coffee or Tea: These are great with a cup of coffee or tea, especially for a casual Valentine’s breakfast or afternoon treat.
- Packaged for Gifting:
Once cooled, these can be boxed or bagged for classroom treats, teacher gifts, or handing out to friends. - Mother’s Day or Baby Showers:
The heart shape also fits spring events like Mother’s Day or baby showers, especially when you want smaller, handheld desserts. - After a Valentine’s Dinner: These work well as a lighter option if you’re already serving a richer dessert like Double Chocolate Cake.
Storage and Freezing
- How should I store Heart Shaped Cherry Hand Pies?
Store the baked hand pies in an airtight container at room temperature for up to one day. For longer storage, keep them in the fridge for up to three days.
- Can I freeze Heart Shaped Cherry Hand Pies?
Yes. Freeze them fully baked and cooled in a single layer, then transfer to a freezer-safe container. Reheat in the oven until warmed through.
Don’t forget to pin this for later!

Tips & Tricks
- Don’t overfill the pies: Because the cutters are small, too much filling will leak. Keeping it to about a teaspoon makes sealing easier.
- Chill before baking: A short chill helps the dough keep its shape and gives you cleaner edges once baked.
- Seal well: Pressing the edges with a fork helps prevent leaks and also adds a nice decorative touch.
- Use parchment paper: This makes cleanup easier and keeps the bottoms from browning too fast.
- Let them cool slightly before moving: They firm up as they cool, so they’re less likely to break when transferring.
Recommended
More Easy Desserts
FAQ

Heart Shaped Cherry Hand Pies
Video
Ingredients
- 2 Refrigerated pie crusts – Two crusts give enough dough for tops and bottoms
- 1 cup Cherry pie filling – Chop large cherries so the filling sits flat
- 1 Egg – For egg wash
- 1-2 tablespoon Water – To thin the egg wash
- ¼ cup of Coarse sugar – Optional finish
Instructions
- Preheat the oven to 375°F and line a baking sheet with parchment paper.
- Roll the pie crusts out slightly thinner than they come from the package.
- Use the heart cutter to cut an even number of hearts from the dough.
- Place half of the hearts on the prepared baking sheet.
- Using kitchen scissors, cut the cherries in the cherry pie filling into smaller pieces so the pies fill evenly.
- Spoon 1 to 1½ teaspoons of cherry pie filling into the center of each heart, keeping it away from the edges.
- Whisk the egg with a small splash of water and brush lightly around the edges.
- Place a second heart on top of each filled one and press together gently, then seal with a fork.
- Chill the assembled hand pies for 20 minutes so they hold their shape while baking.
- Brush the pies with the egg wash. Then sprinkle with coarse sugar (if using) and cut a small opening in the center of each pie.
- Bake for 18–22 minutes, until lightly golden and the edges are set.
- Cool on the baking sheet for a few minutes before transferring to a rack.
Notes
Because the cutters are small, too much filling will leak. Keeping it to about a teaspoon makes sealing easier. Chill before baking:
A short chill helps the dough keep its shape and gives you cleaner edges once baked. Seal well:
Pressing the edges with a fork helps prevent leaks and also adds a nice decorative touch. Use parchment paper:
This makes cleanup easier and keeps the bottoms from browning too fast. Let them cool slightly before moving:
They firm up as they cool, so they’re less likely to break when transferring.


I love how easy these hand pies were to make! They are the perfect Valentine’s or anytime treat, and they taste so good. Thanks for the great recipe!
So glad you loved them!
Love how easy these were to make! They came together so quickly and were so delicious.
I’m glad you loved them!
Wow, these are so cute. I am going to make them for Valentines!
Great! I hope you love them!
Made these for my girls, they loved them!!!!
I love hearing this!!!