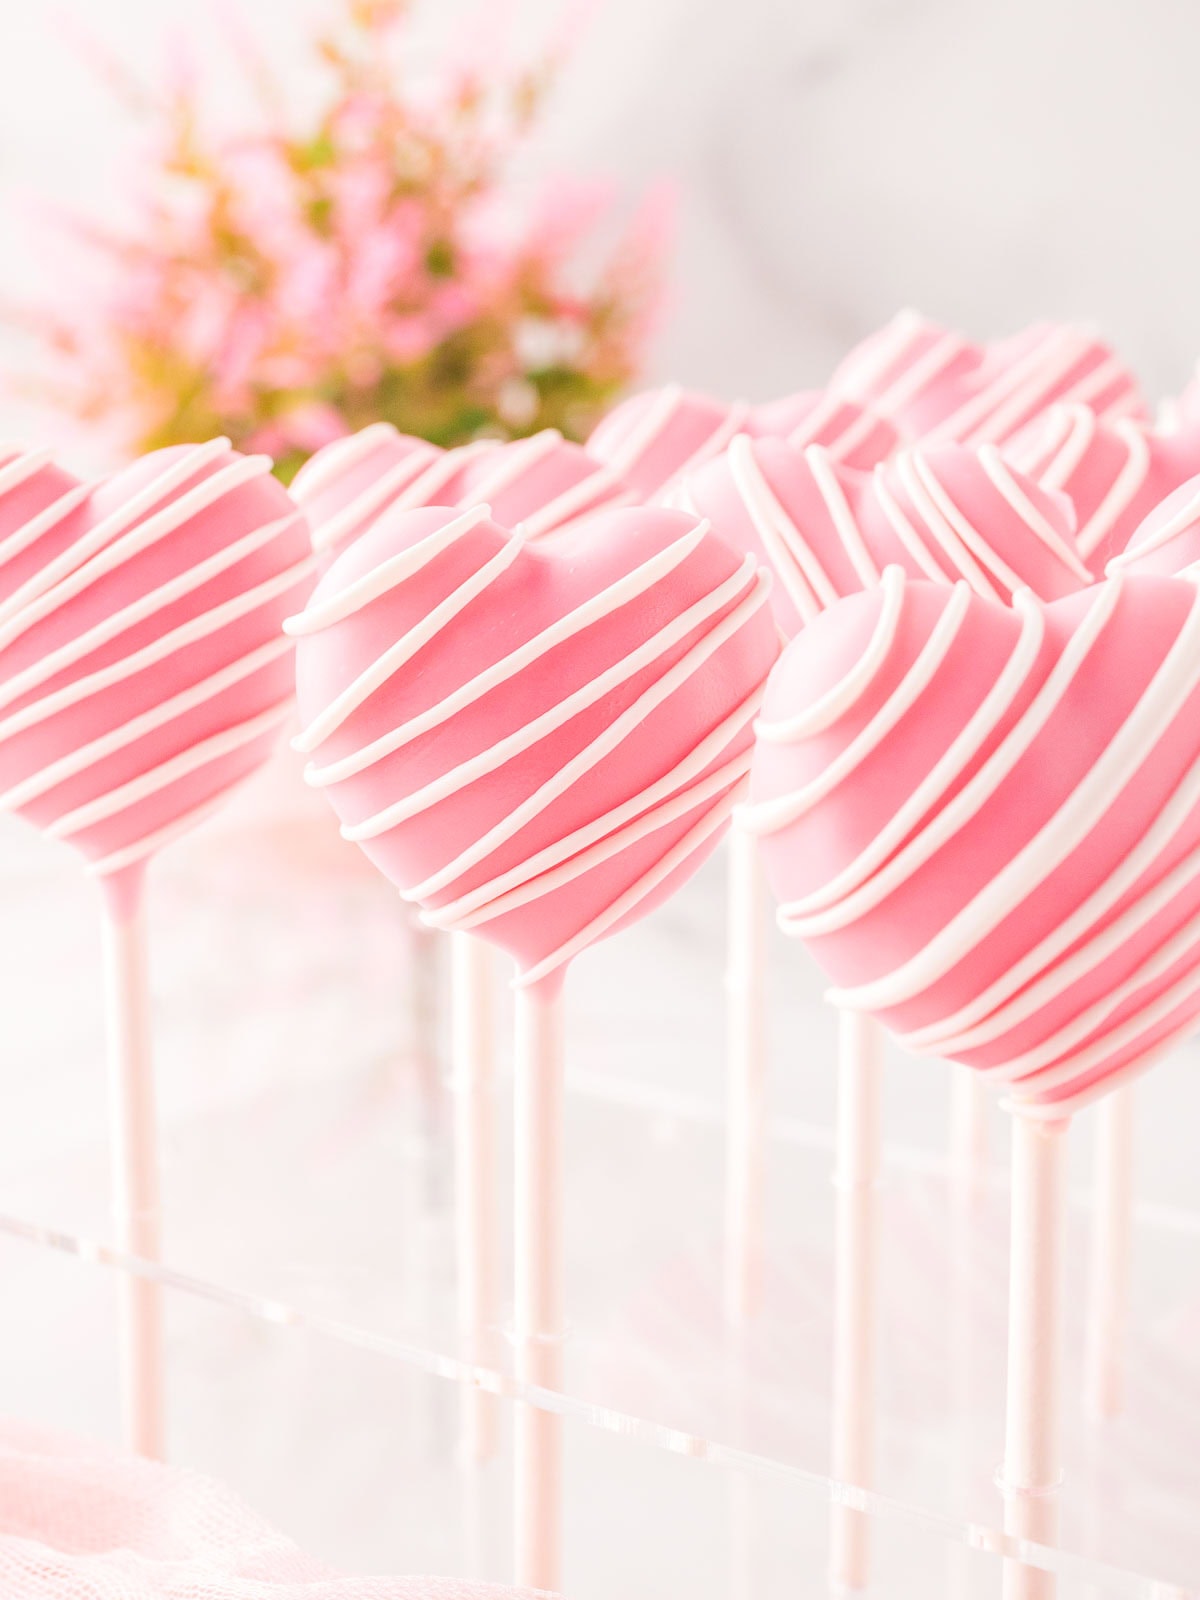
Heart Cake Pops
Got leftover cake? These Heart Cake Pops are one of the easiest ways to turn those crumbs into something super cute. All you need is some frosting, pink and white candy melts, and a heart-shaped mold to bring them together. They’re great for Mother’s Day, Valentine’s Day, birthdays, or any time you want a fun, bite-sized treat. Just like my Strawberries and cream Fudge
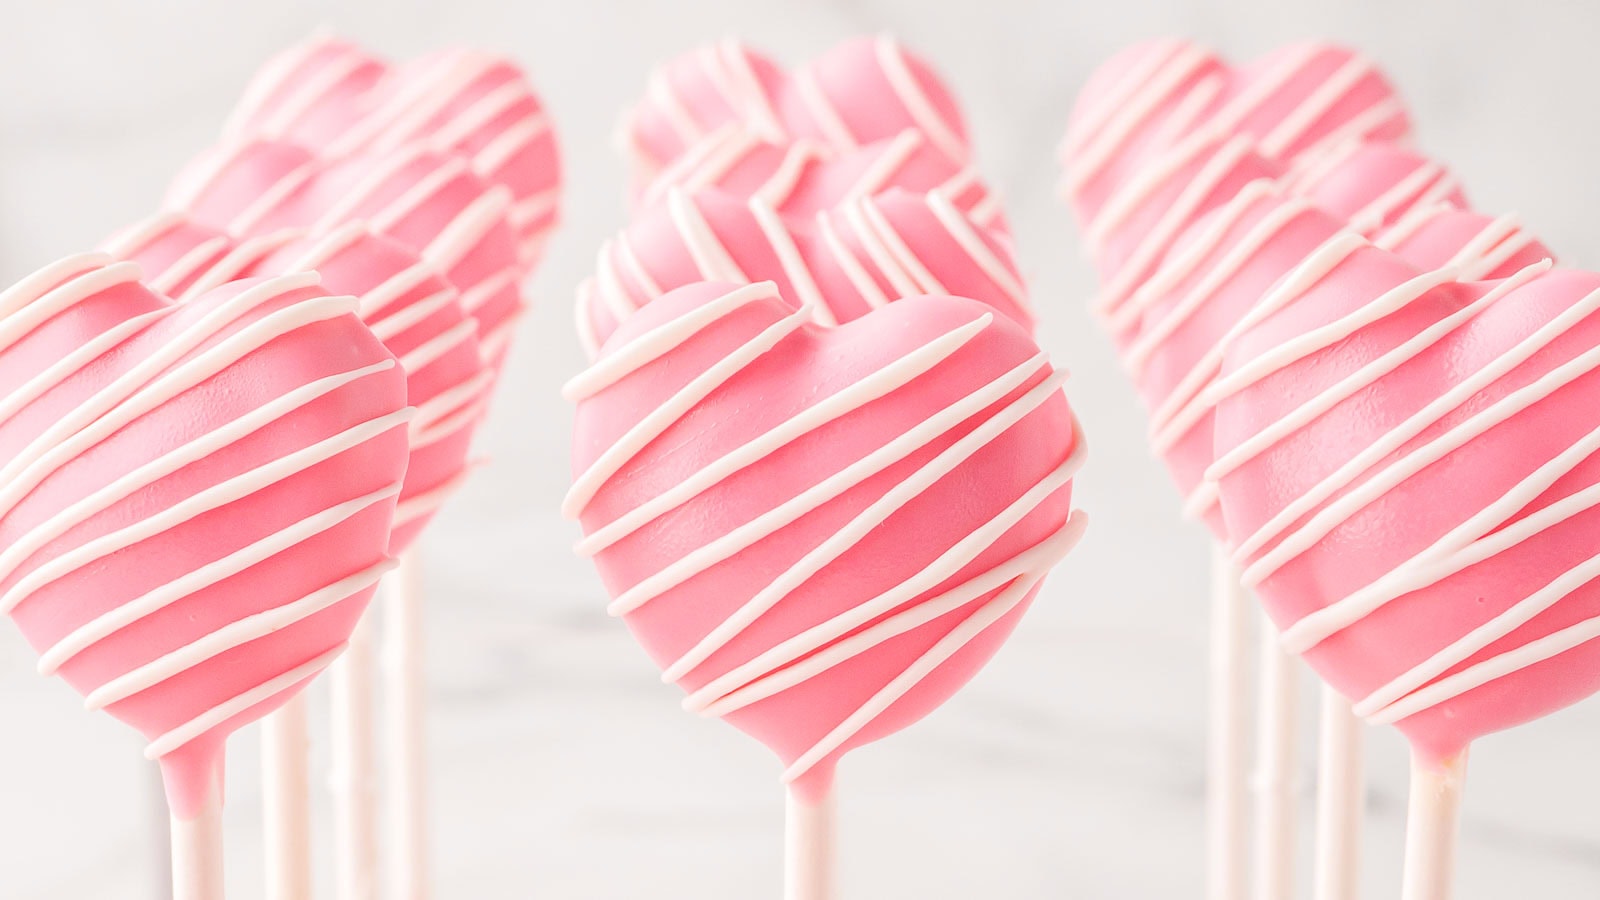
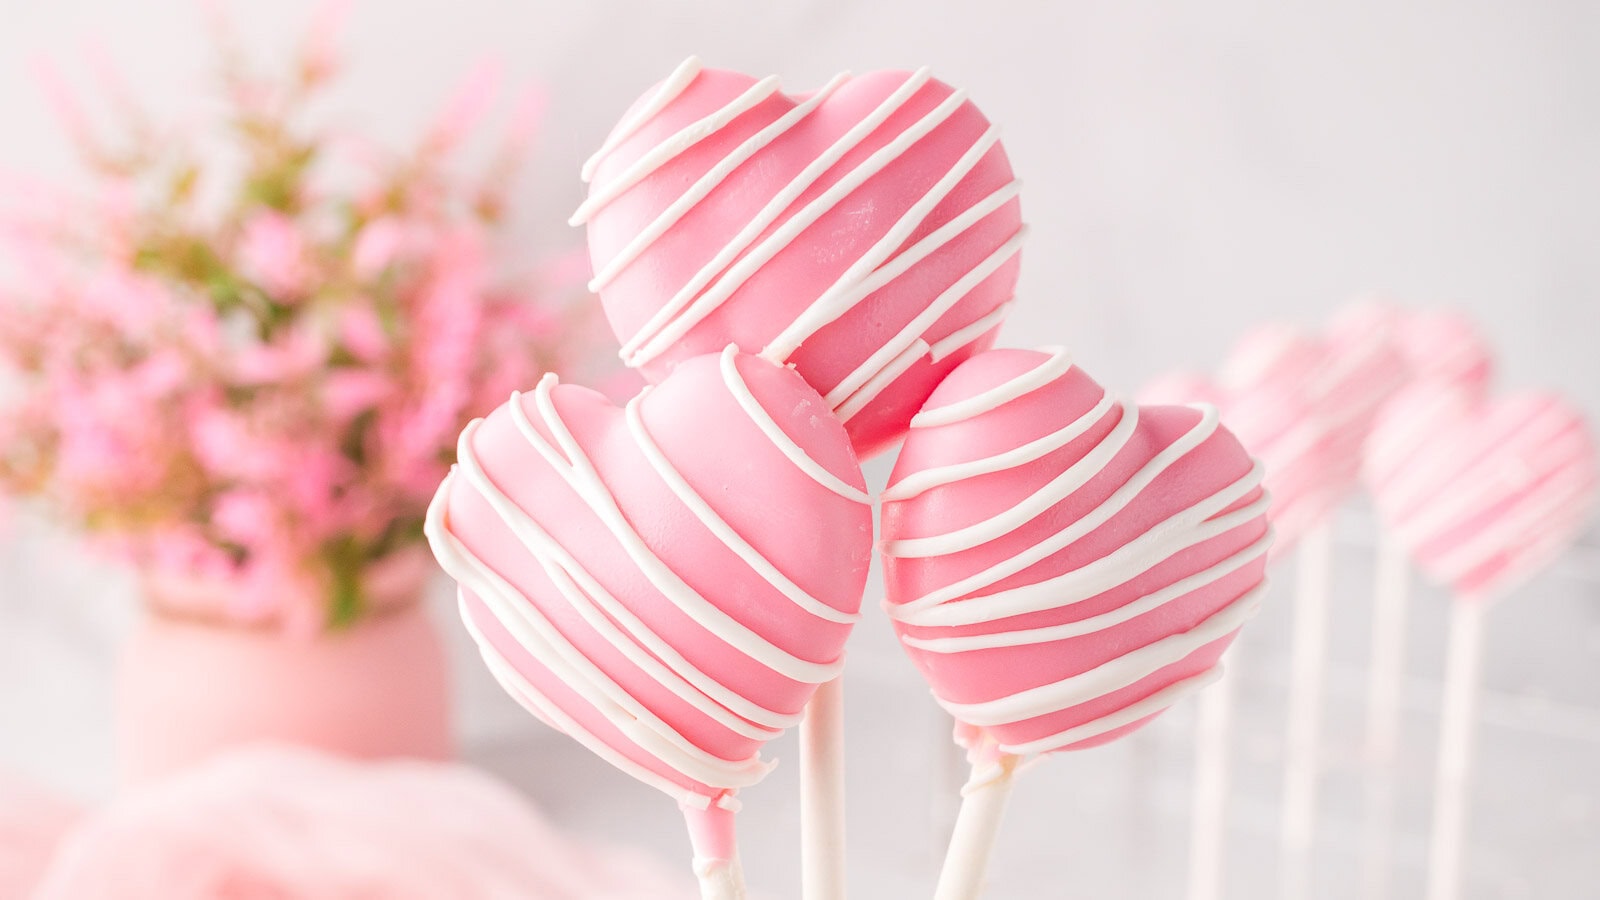
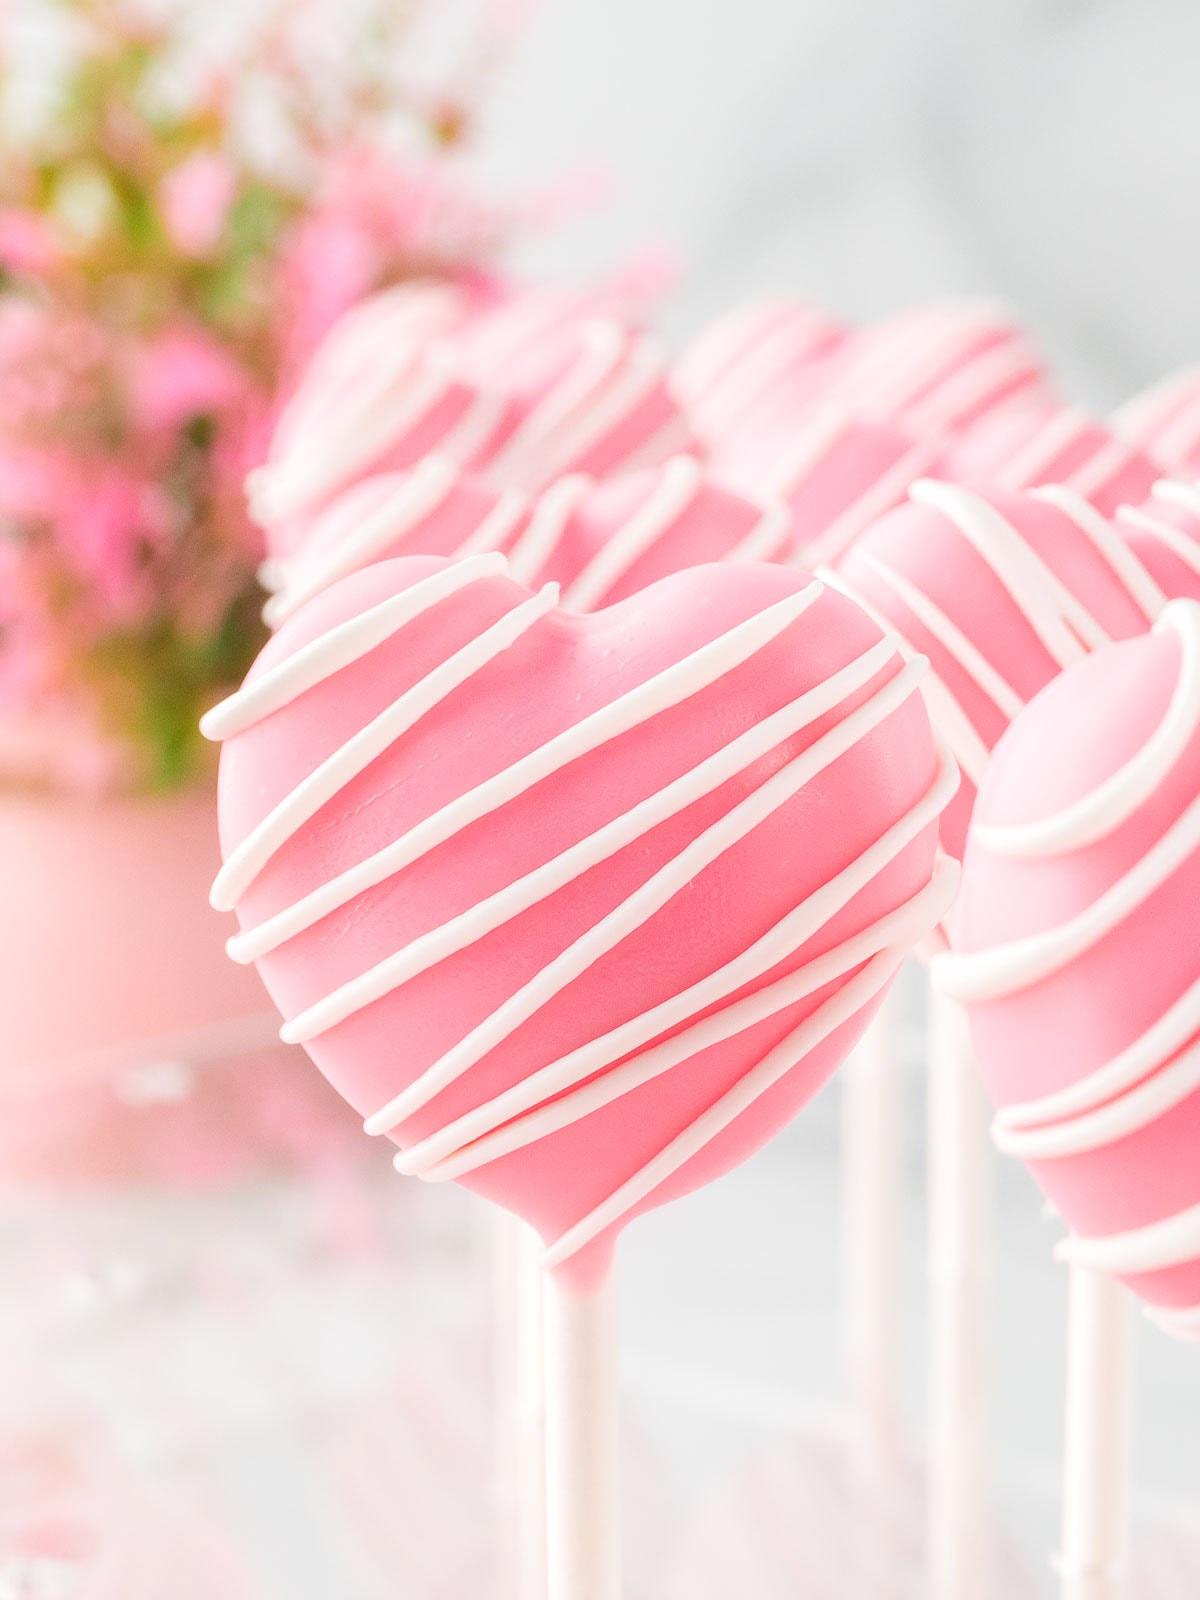
Cake pops are one of those treats that feel like a little bakery-style goodie but are incredibly low-effort. You just crumble up your cake, mix it with a little frosting, press it into a mold, and boom, it’s ready for dipping. These heart-shaped ones are ideal for Valentine’s Day, but they’re just as fitting for Mother’s Day, bridal showers, or birthdays. I used this heart-shaped mold to get that perfect shape without the mess of shaping by hand.
Why you’ll love this Heart Cake Pops
Easy Heart Cake Pops with Leftover Cake
This started as one of those “let’s not waste cake” moments and quickly became one of my favorite ways to dress up leftovers. Once I pressed the mixture into the heart mold and saw how clean and cute they turned out, I was hooked.
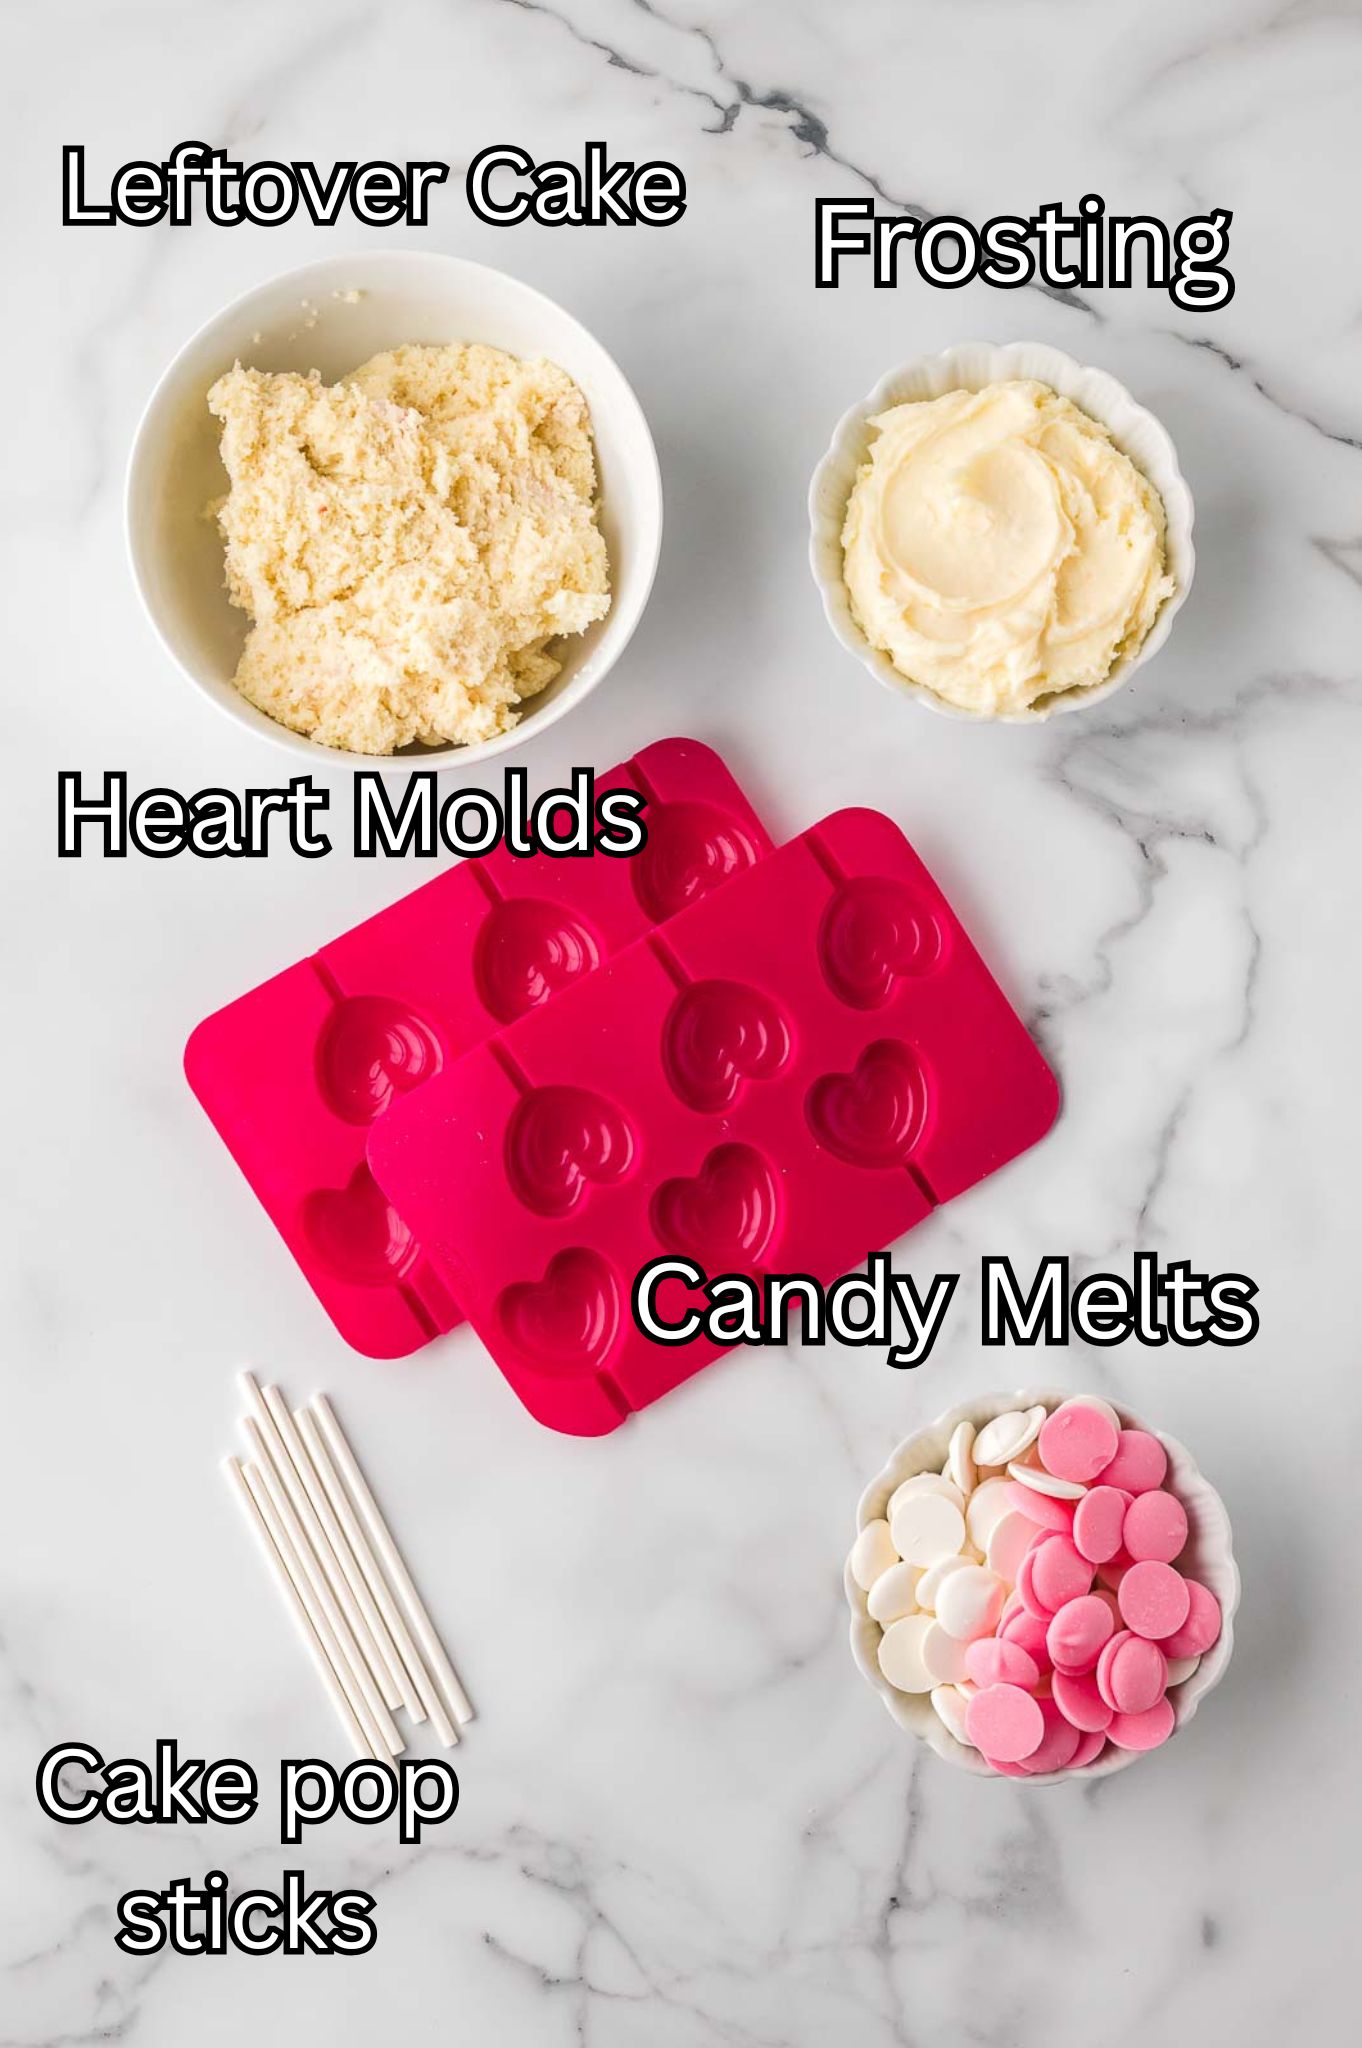
Ingredients Needed for Heart Cake Pops
- Leftover Cake or Prepared Cake Mix: Any flavor works here. Vanilla, chocolate, red velvet. Just make sure it’s fully cooled and crumbled up fine for mixing.
- Frosting: A couple of spoonfuls of store-bought or homemade frosting brings everything together. Use just enough to make a dough-like texture that holds its shape.
- Pink Candy Melts: These melt down into a smooth coating and give the cake pops that vibrant, festive look. You can find them in most baking aisles or online.
- White Candy Melts: A little drizzle on top adds contrast and gives the pops that finished look. You could also swap in white chocolate if you prefer.
How to make Heart Cake Pops
**For more detailed instructions, please refer to the printable recipe card below.**

Crumble the cake into a mixing bowl and add the frosting.
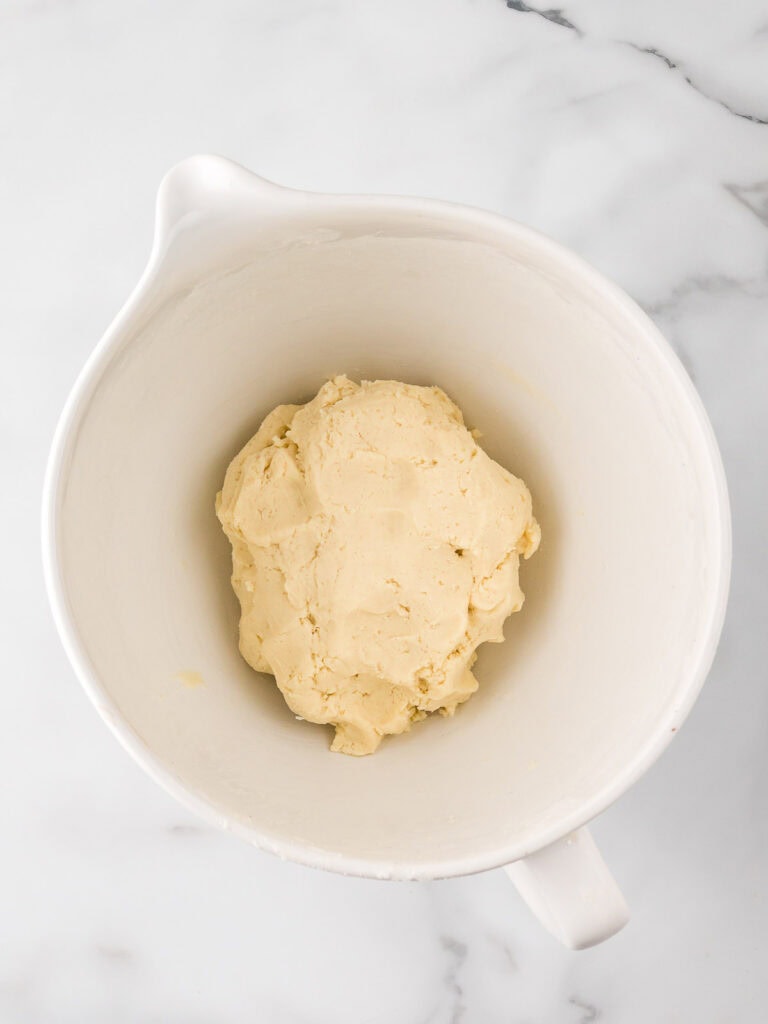
Mix until a soft, dough-like mixture forms
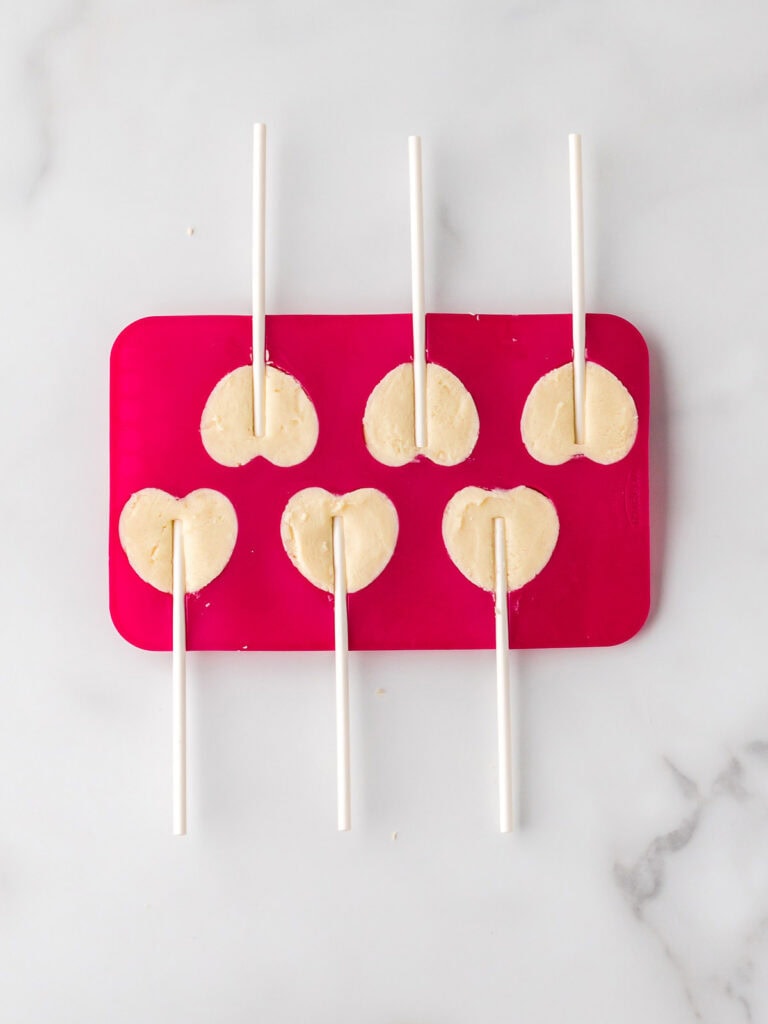
Press the mixture firmly into your heart-shaped mold and insert a cake pop stick into each heart. Freeze for at least 1 hour.
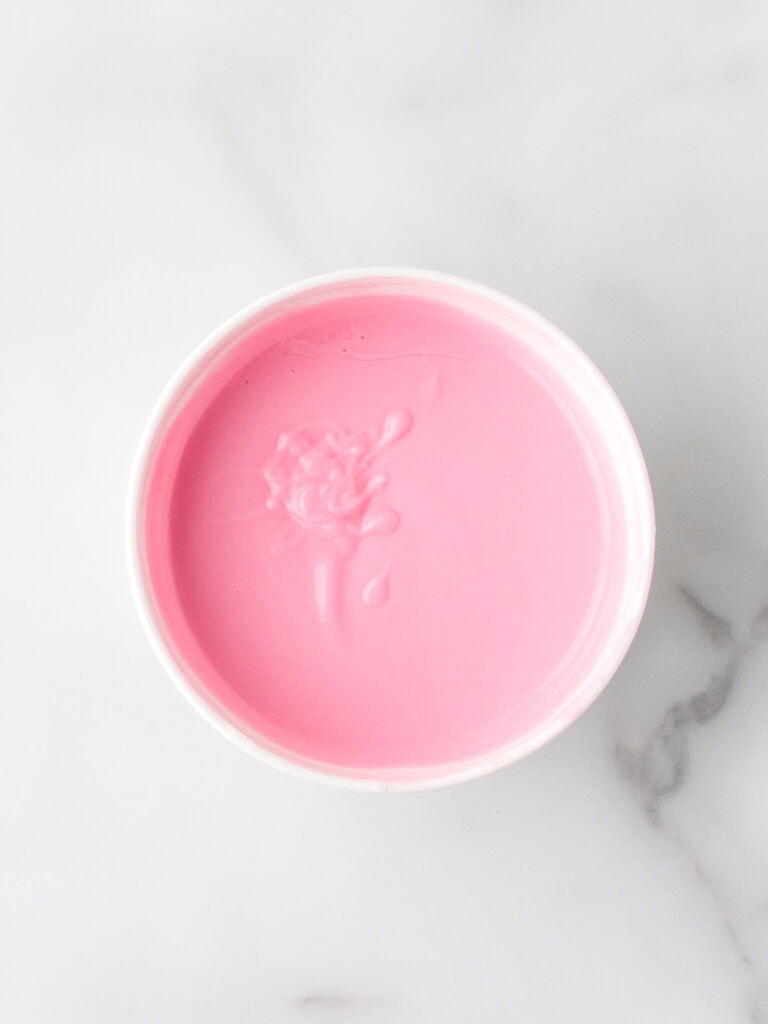
Melt the pink candy melts in a microwave-safe bowl, stirring between 20-second bursts.
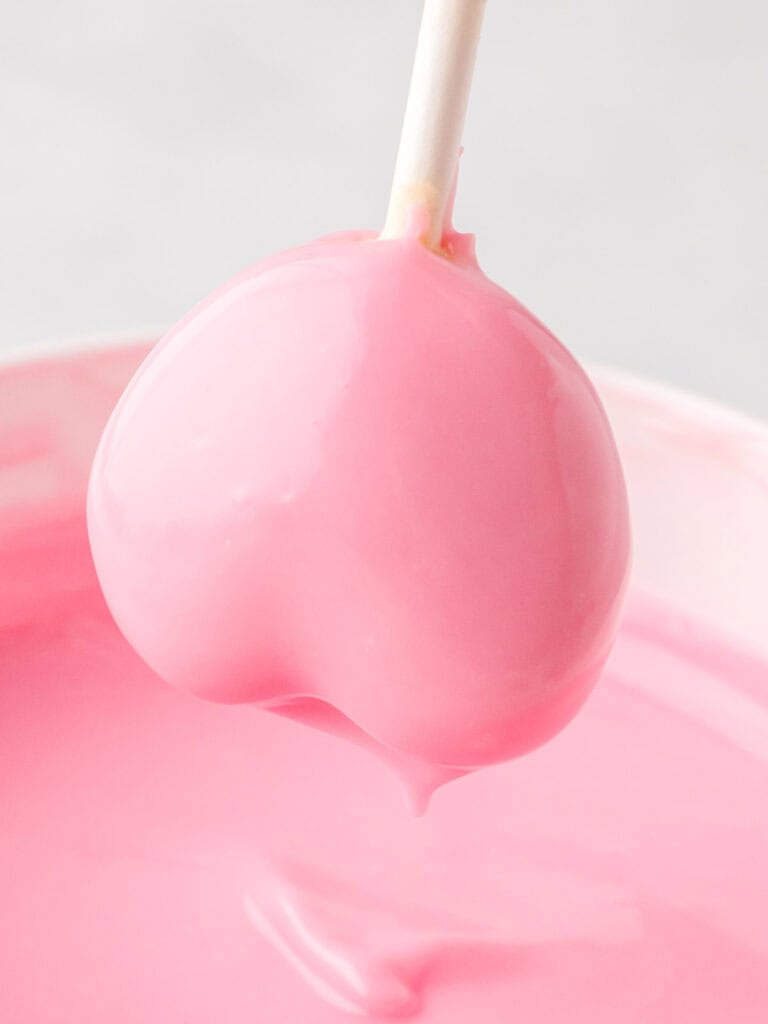
Dip each chilled heart into the pink coating and let any excess drip off. Set the dipped cake pops on parchment paper to harden.
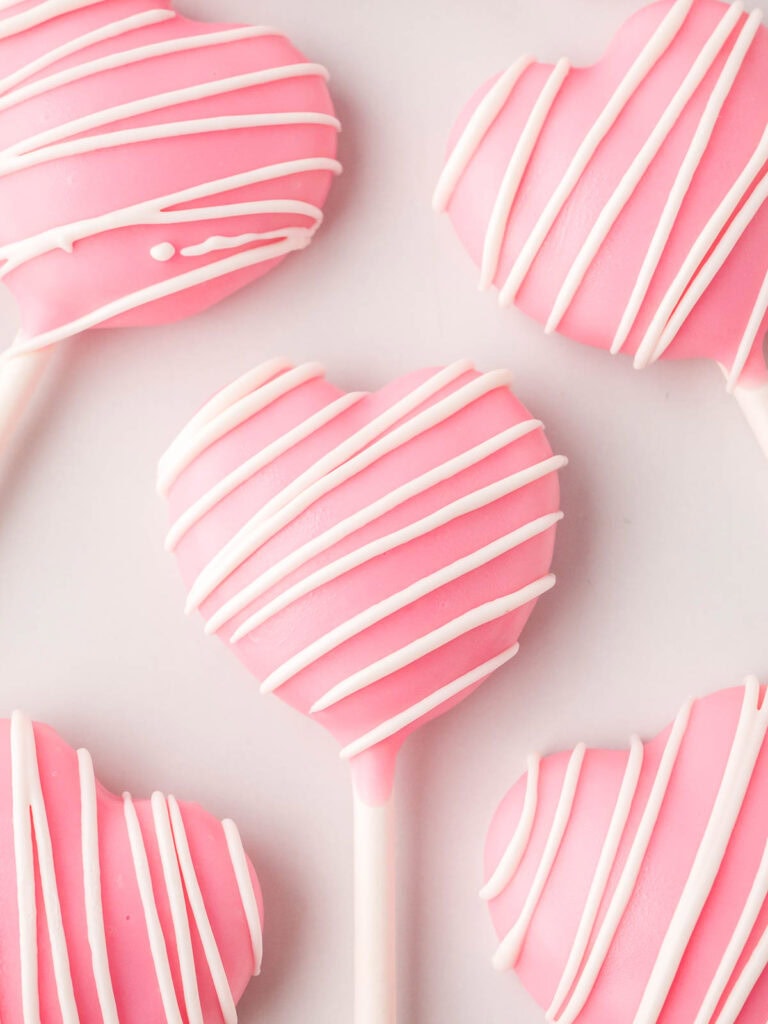
Melt the white candy melts and drizzle over the top for a finishing touch.
Variations
- Chocolate Cake and Dark Chocolate Dip: Use leftover chocolate cake and dip the pops in melted dark chocolate. It’s rich and perfect for anyone who loves a deeper chocolate flavor.
- Carrot Cake with Cream Cheese Frosting: Got leftovers from your Carrot Cake Sheet Cake? Mix the extras with some cream cheese frosting for a spiced, slightly tangy take on these pops. Swap the pink melts for orange, and you’re good to go—perfect for Easter, spring parties, or anyone who loves carrot cake flavor in bite-sized form.
- Funfetti with White Chocolate: Crumble up some funfetti cake and dip in white candy melts. Add colorful sprinkles while the coating is wet for a birthday version.
- Red Velvet with Cream Cheese Frosting: This combo is a classic for a reason. The tangy cream cheese frosting adds a flavor twist and pairs beautifully with either pink or white melts.
- Lemon Cake with Yellow Coating: If you’re aiming for a spring vibe or baby shower treat, lemon cake with pastel yellow melts is bright, sweet, and refreshing.
- Add a Filling Surprise: Roll a tiny bit of jam or Nutella into the center of each ball before pressing it into the mold for an extra bite of flavor inside.
Serving Suggestions
- Add to a Dessert Board: These are perfect little bites to fill in any empty spots on a dessert platter. Their shape and color really pop.
- Wrap as Edible Gifts: Pop each one into a clear bag with a twist tie or ribbon and you’ve got the cutest party favors or sweet thank-you gifts.
- Serve on a Stick Stand: Use a floral foam or a cake pop stand to display them upright at a party. It makes them easy to grab and fun to look at.
- Stick into Cupcakes: Push one cake pop into the center of a frosted cupcake for a double treat. It looks super cute and feels like two desserts in one.
- Pair with Coffee or Tea: Serve alongside a warm drink for a sweet treat that’s great with an afternoon cuppa or after-dinner sip.
Storage and Freezing
- How should I store Heart Cake Pops?
Store cake pops in an airtight container at room temperature for 2 to 3 days, or up to a week in the fridge. Just let them come to room temp before serving so the coating softens slightly.
- Can I freeze Heart Cake Pops?
To freeze, wrap each one in cling film and then place them in a freezer-safe bag or container. They’ll keep well for about a month. When you’re ready to eat, just thaw them in the fridge overnight and let them sit at room temp for 15 minutes before serving.
Don’t forget to pin this for later!

Tips & Tricks
- Don’t Overdo the Frosting: Start with less than you think you need and only add more if the cake mixture feels too crumbly. Too much frosting will make the pops overly soft, and they’ll be harder to shape and dip without falling apart.
- Use a Silicone Mold: A silicone mold gives you clean, consistent shapes every time with way less effort than hand-rolling. This heart-shaped one is easy to press the mixture into and even easier to clean when you’re done.
- Chill, But Don’t Freeze Before Dipping: You want the cake pops to be firm, but not frozen. If they’re too cold, the candy melts can seize or crack once they set. Pop them in the freezer to firm up, but let them sit at room temperature for about 5 minutes before dipping.
- Scrape Off the Back After Dipping: Once you dip the cake pop and let the excess drip off, gently scrape the back side along the edge of the bowl to catch any remaining coating. This helps avoid getting a thick puddle of candy melt when you place it on the parchment to set.
- Thin the Coating if Needed: Candy melts can get a bit thick, especially as they sit. Stir in a small spoonful of coconut oil to loosen them up and make dipping smoother and more even.
- Use a Fork or Skewer for Drizzling: No piping bag? No problem. Just dip a fork or the tip of a skewer into the melted white candy and move it quickly over the cake pops for a nice, casual drizzle effect.
Recommended
More Fun Desserts
FAQ
Heart Cake Pops
Equipment
- Cake pop sticks
- Spoon or spatula
- Piping bag or zip-top bag for drizzling
Ingredients
- 2 cup leftover cake or ½ box of prepared cake mix
- 3 tablespoons frosting homemade or store-bought
- 1 cup pink candy melts
- ½ cup white candy melts
Instructions
- Crumble the cake into a mixing bowl.
- Add a few spoonfuls of frosting and mix until it forms a dough-like consistency you can shape with your hands.
- Press the mixture firmly into your heart-shaped silicone mold and insert the cake pop sticks.
- Freeze for at least 1 hour, or until firm enough to remove cleanly. Let them sit at room temp for about 5 minutes before dipping so the coating doesn’t seize.
- Melt pink candy melts in a microwave-safe bowl, heating in 20-second bursts and stirring in between until smooth.
- Dip each chilled cake pop into the pink coating and let the excess drip off. Gently scrape the back of the pop against the bowl to avoid a pool of coating underneath when you place it on parchment to set.
- Place the pops on parchment paper to set.
- Melt white candy melts in a microwave-safe bowl, and drizzel over the top .