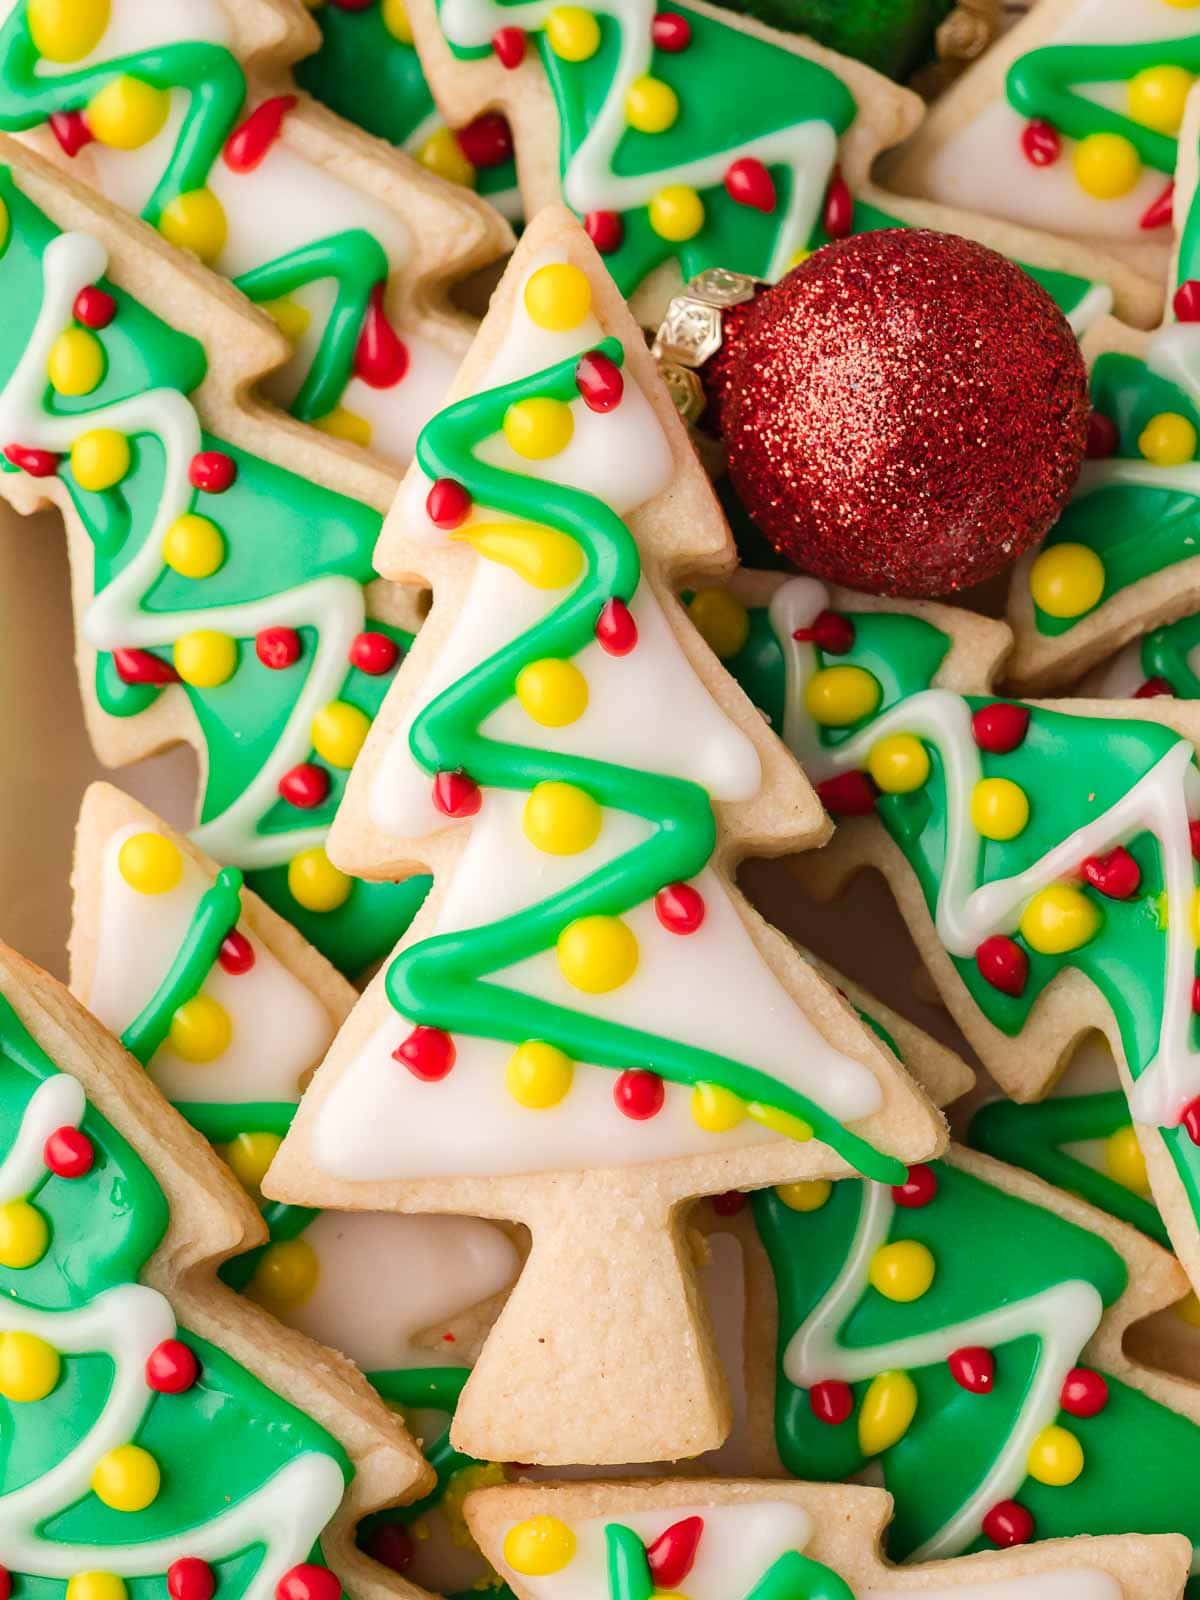
Christmas Sugar Cookies
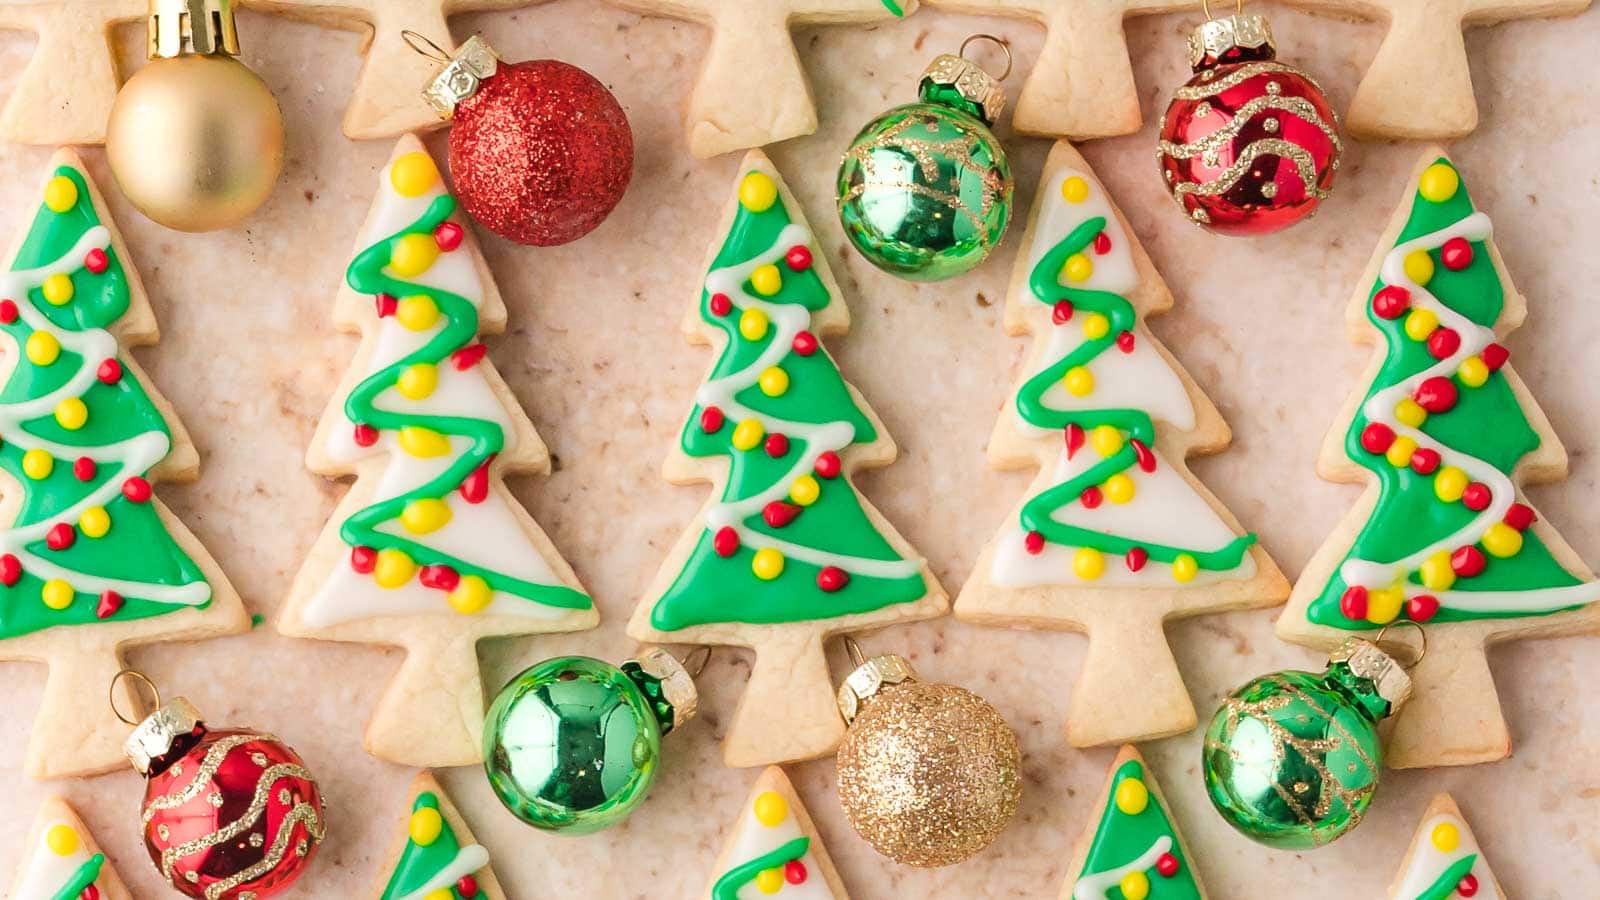
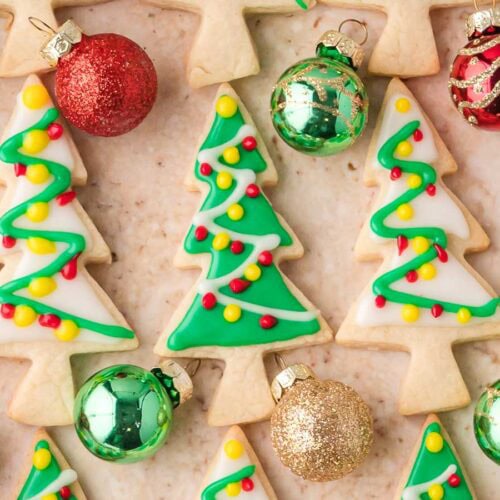
These Easy Christmas Sugar Cookies are soft, buttery, and perfect for decorating. The dough is perfect for cut-out sugar cookies, and the glaze gives them a light, glossy finish. These are my go-to cookies when I want something festive, simple, and fun to decorate with a few sprinkles or colored icing.

This recipe makes beautiful decorated Christmas cookies that hold their shape and bake evenly. You can chill the dough ahead of time, which makes baking day easier and less messy. I love to make a few batches, decorate them with friends, and package them up for gifts. Or do a dessert tray with Gingerbread Cheesecake Cookies, Chocolate Christmas Trees and Coconut Snowball Cookies.
Why you’ll love these Christmas Sugar Cookies
Sugar Cookies For A Holiday Tradition
I love how cookies are a huge part of holiday traditions over here in America. I’m just getting into the swing of it and love how it brings everyone together in the kitchen, even if half the icing ends up on the counter. Every year, I make a big batch of these cookies and let everyone decorate their own. The Christmas trees always come out different, but that’s part of the fun.
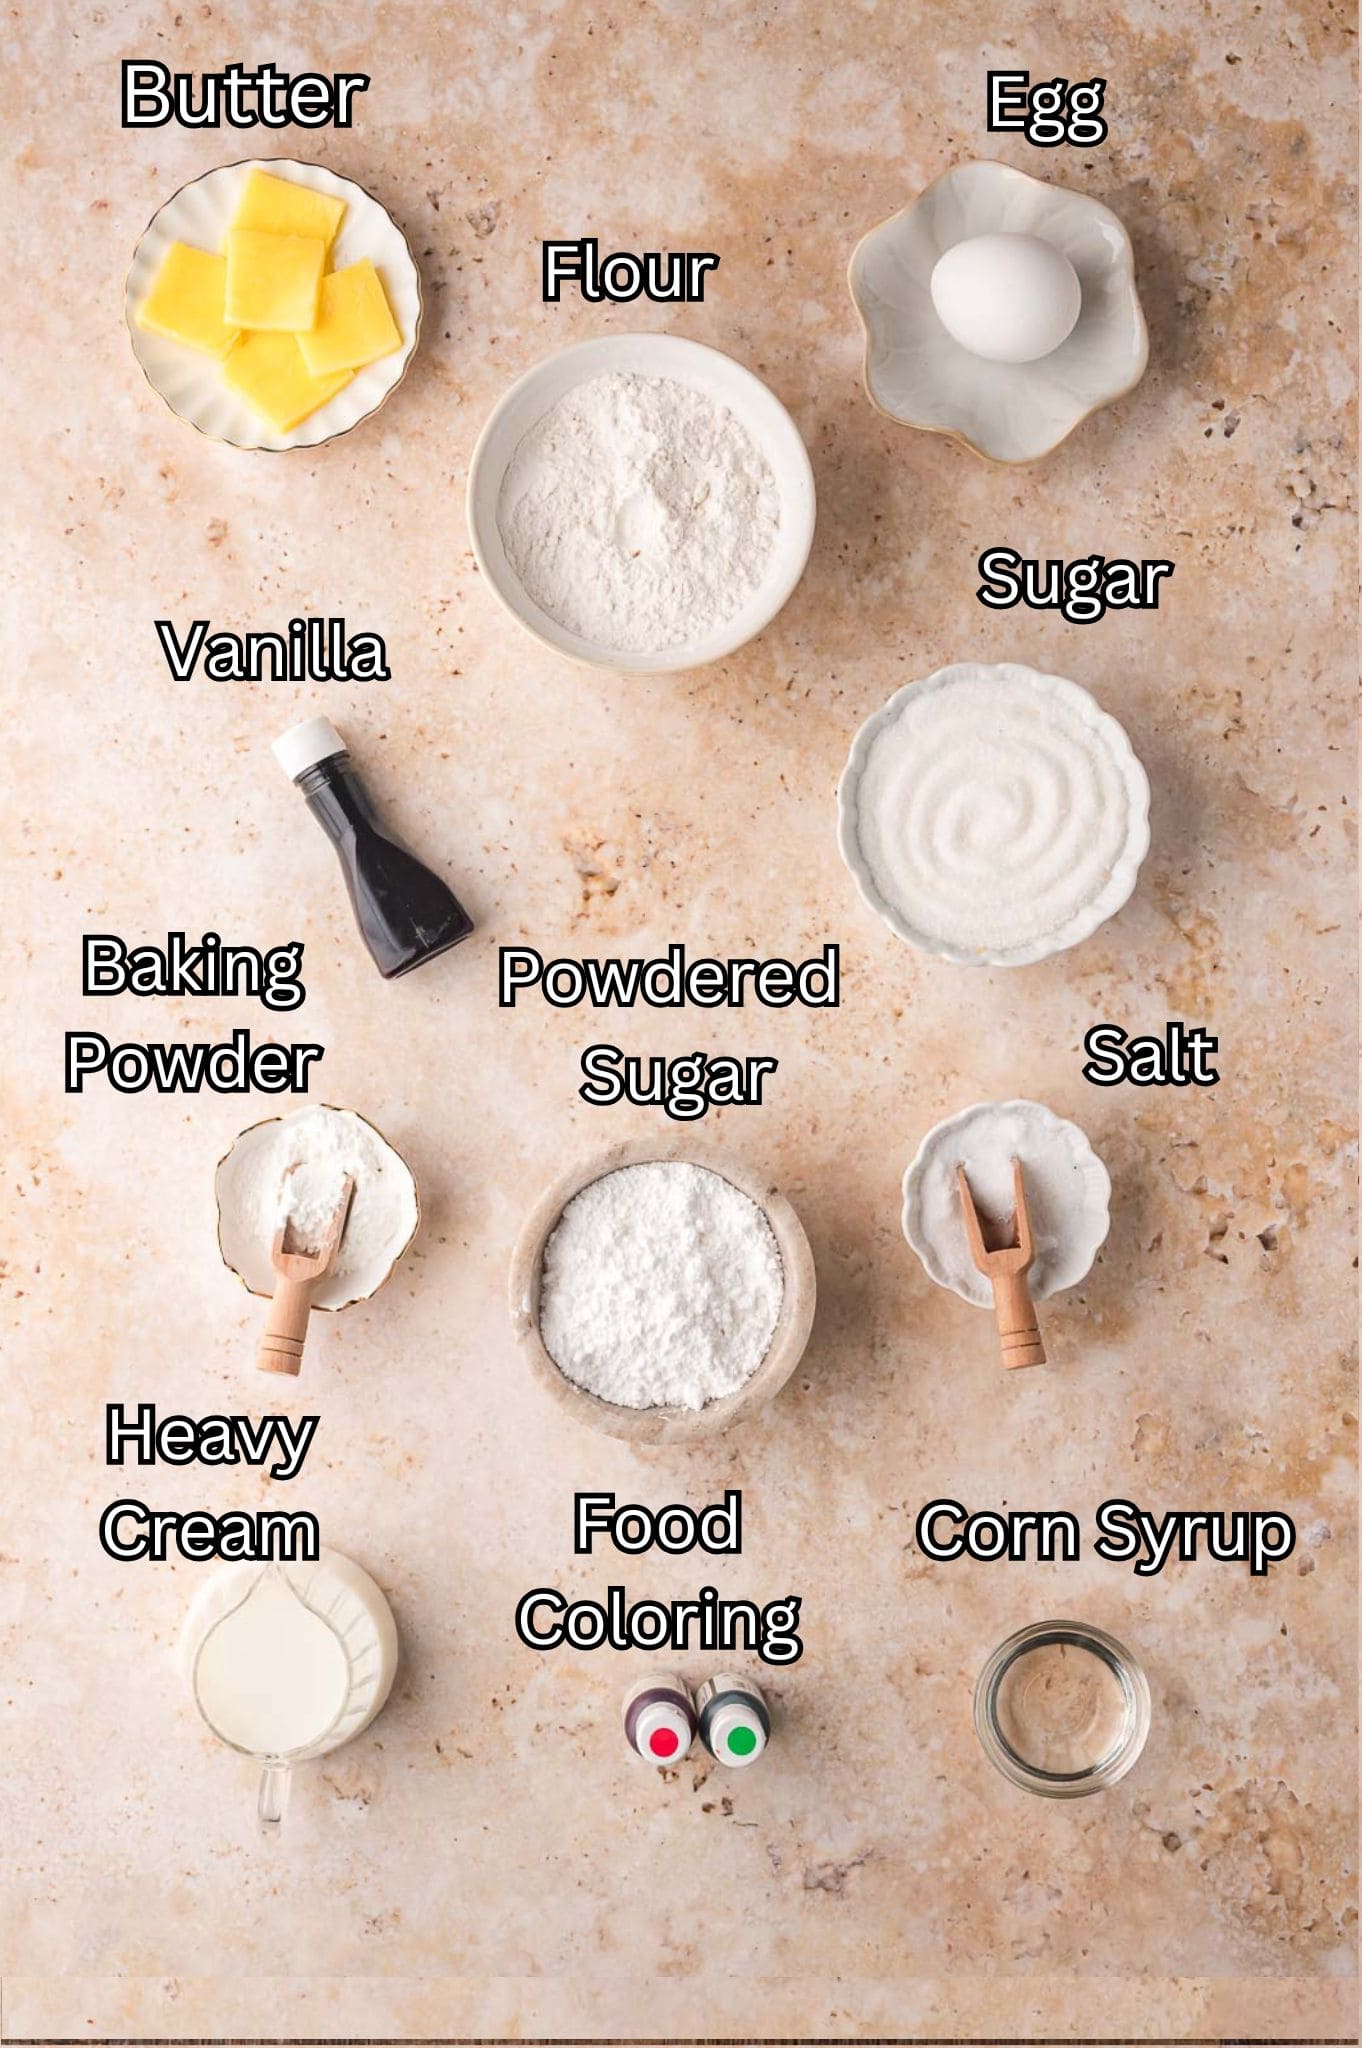
Ingredients Needed for Christmas Sugar Cookies
- Butter: Use softened unsalted butter for the best texture and flavor.
- Sugar: Regular granulated sugar gives the cookies sweetness and structure.
- Egg: Adds richness and helps bind everything together.
- Vanilla and almond extract: A mix of the two gives these cookies that bakery-style flavor.
- Flour: All-purpose flour keeps them light and easy to roll out.
- Baking powder and salt: Help the cookies rise slightly and balance the sweetness.
- Powdered sugar: The base for the glaze, sifted for smooth icing.
- Milk: Controls the thickness of the glaze and makes it creamy.
- Light corn syrup: Adds shine to the icing.
- Food coloring: Green for trees, yellow for stars, or whatever colors fit your holiday theme.
How to make Christmas Sugar Cookies
**For more detailed instructions, please refer to the printable recipe card below.**
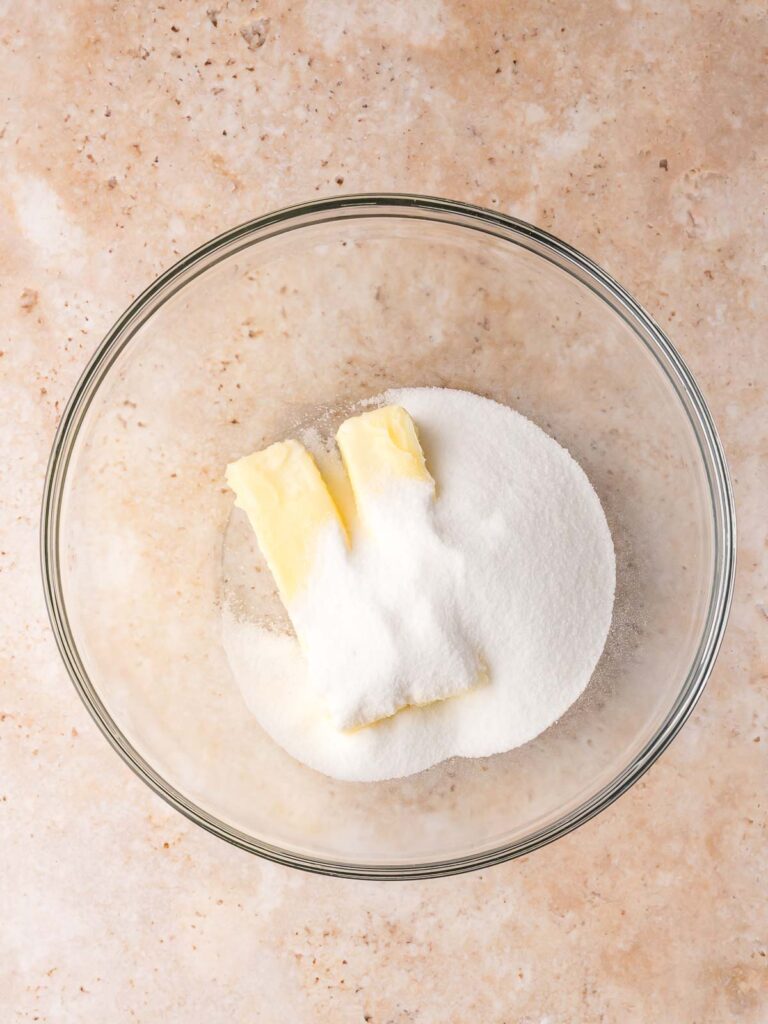
Beat butter and sugar until light and fluffy.
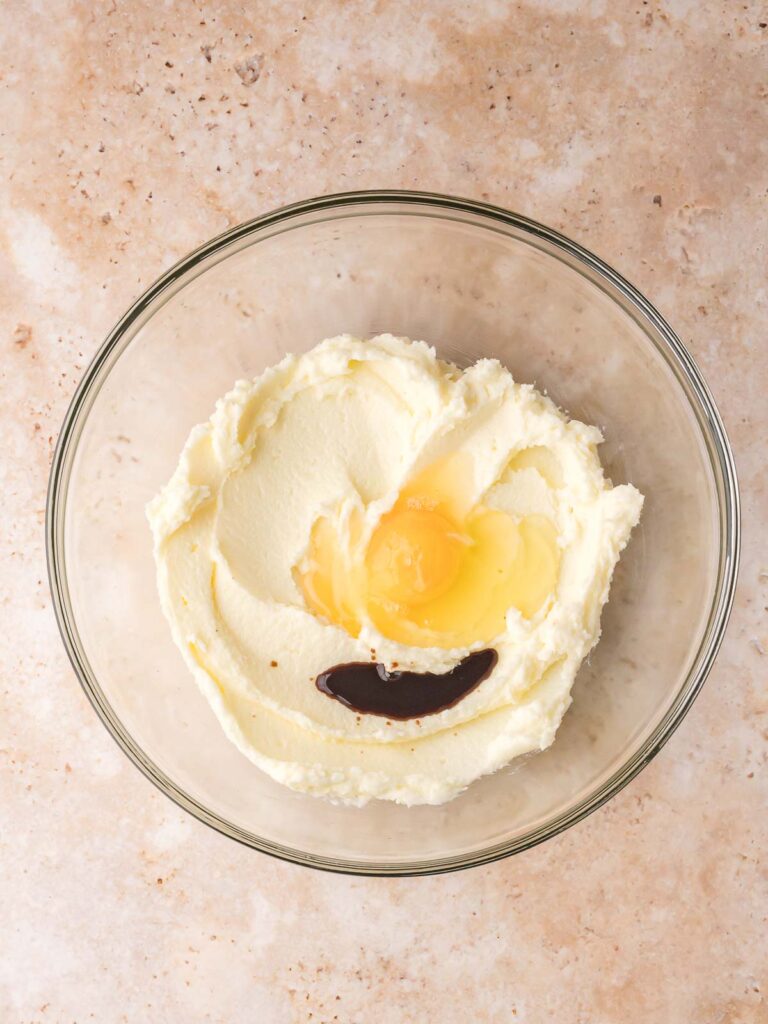
Add the egg and vanilla extract, mixing until smooth.
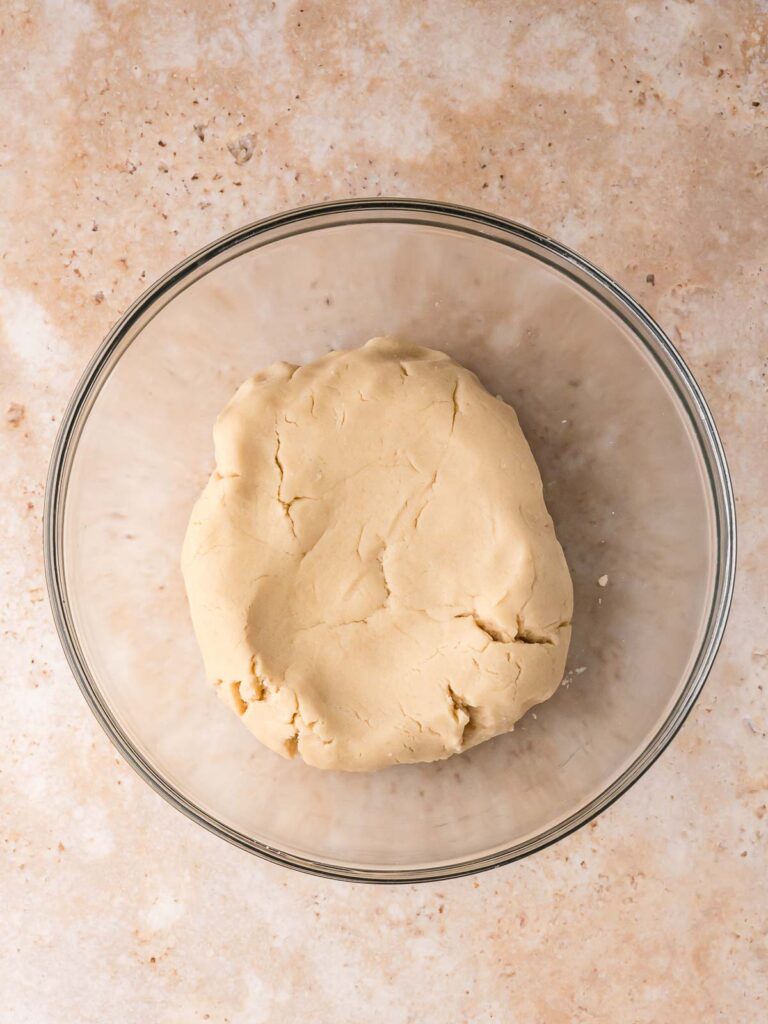
Gradually mix in flour, baking powder, and salt until a dough forms.
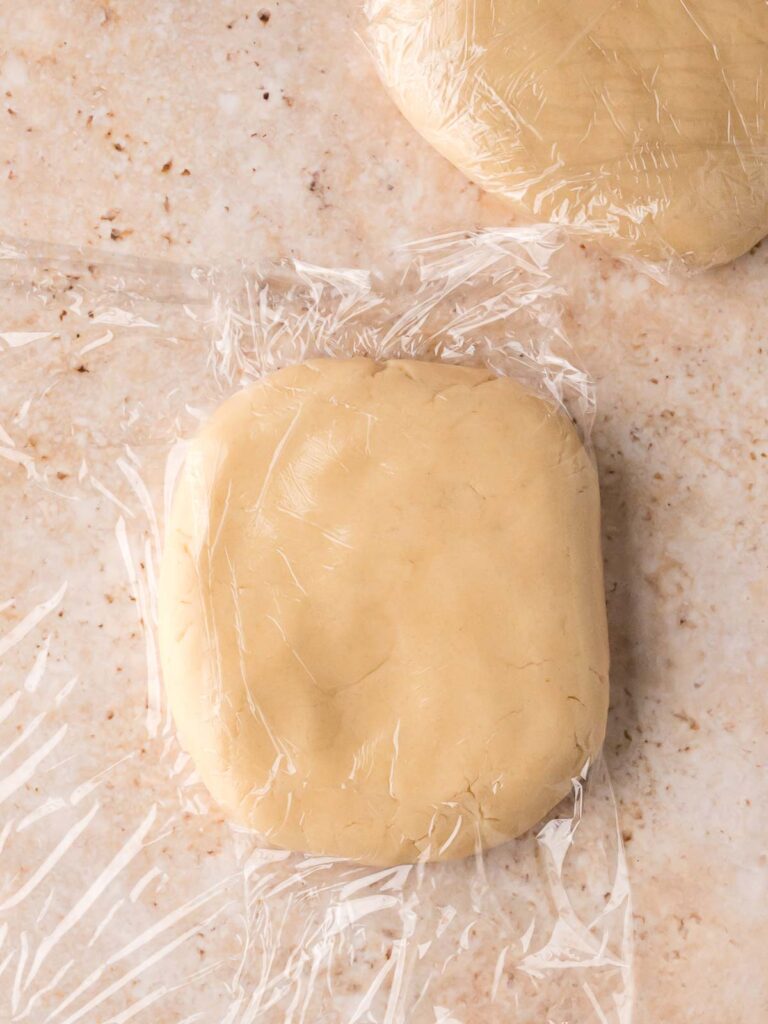
Divide the dough into two discs, wrap them, and chill for at least one hour.
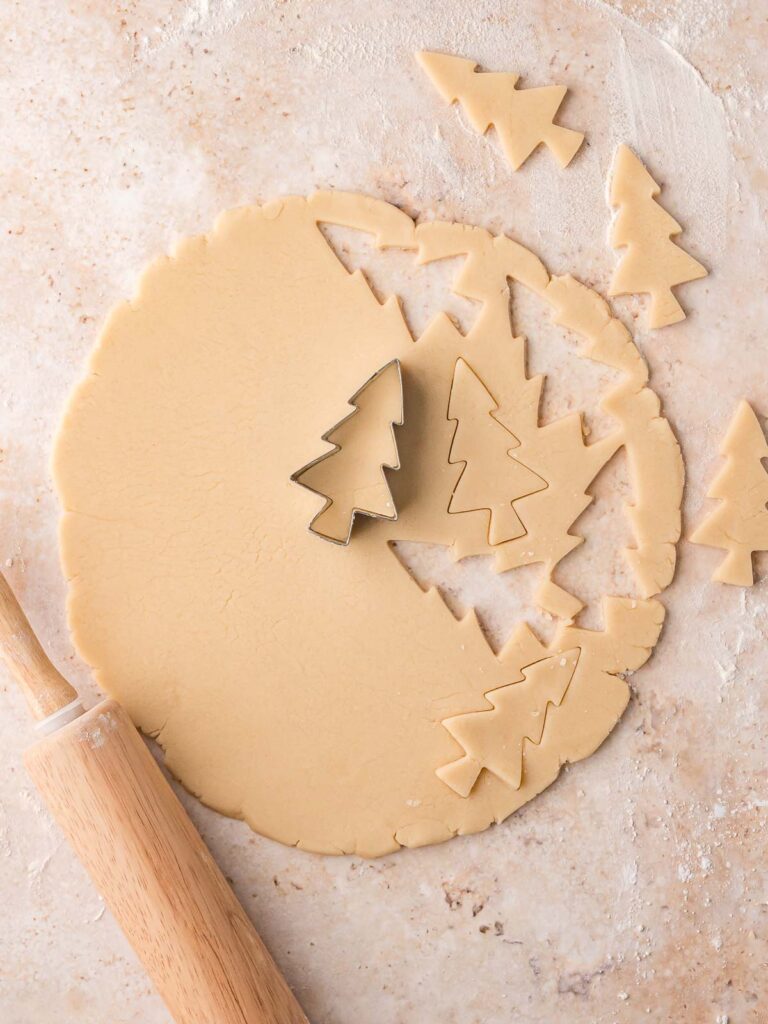
Roll out the dough on a floured surface to about ¼ inch thick. Cut into Christmas tree shapes.
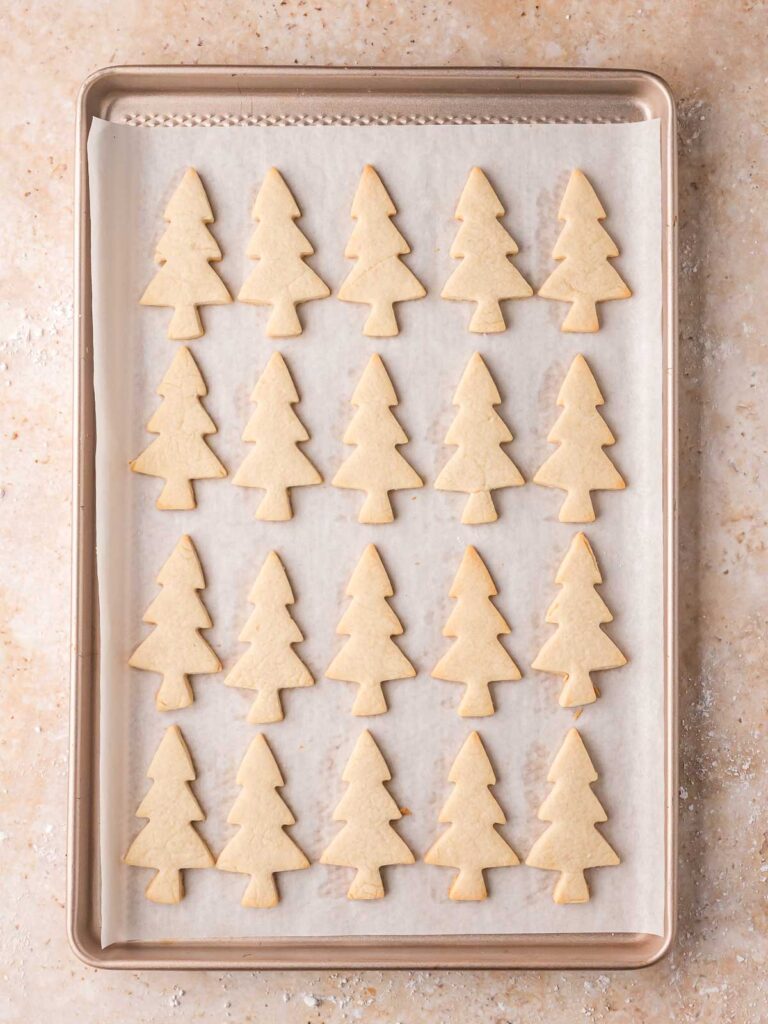
Bake for 8 to 10 minutes until the edges are just set. Cool completely before icing.
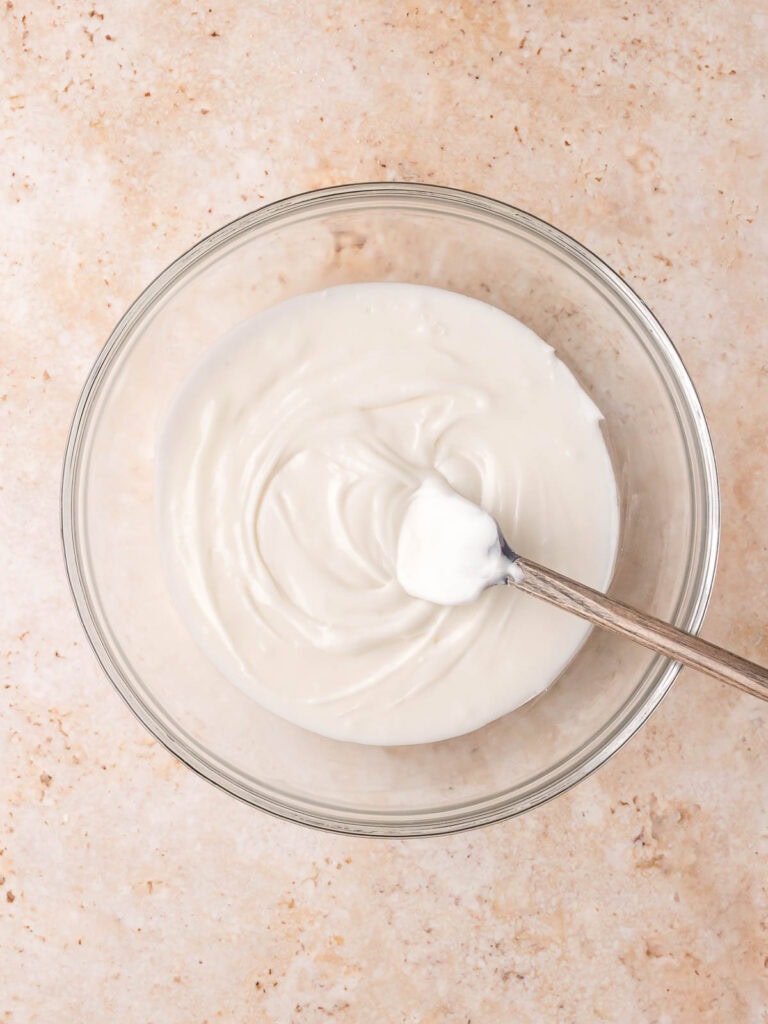
Whisk powdered sugar, milk, and corn syrup until smooth.
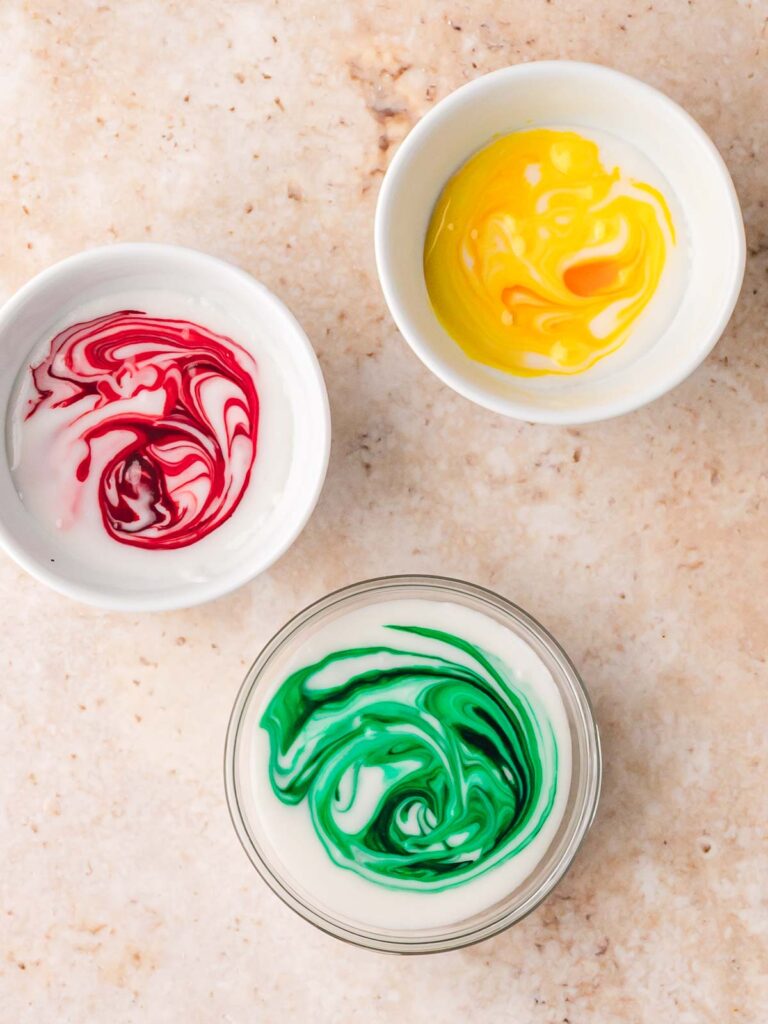
Divide icing into bowls and tint with desired colors. Adjust thickness as needed for outlining or flooding.
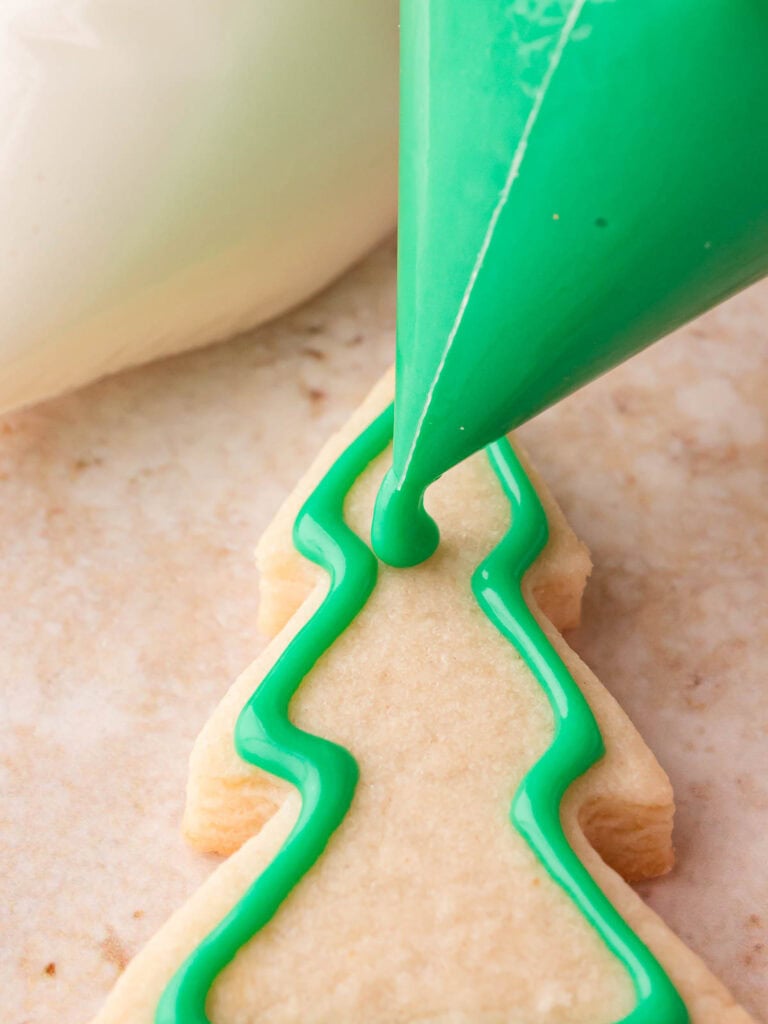
Outline the cookies first, then fill in with the icing. I used these Piping Bags.
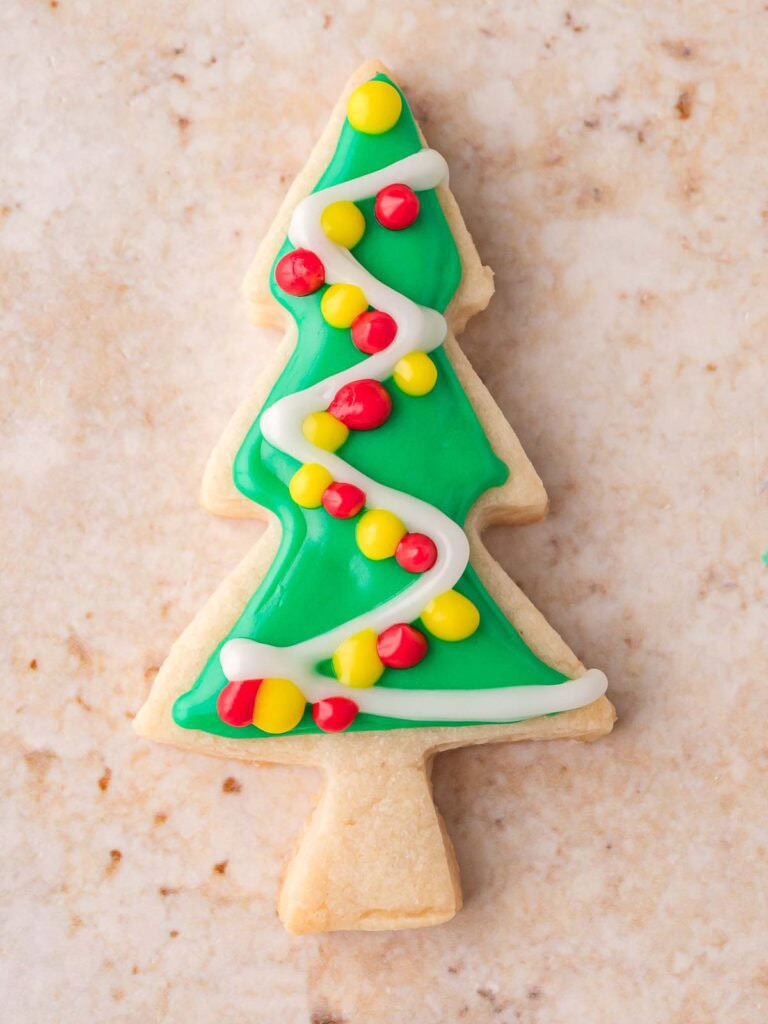
Decorate with the other colors, creating decorations on each Christmas Tree. Let icing set completely before serving or storing.
Variations
- Classic sugar cookies: Skip the almond extract for a purely vanilla flavor that pairs beautifully with the buttery dough.
- Lemon twist: Add a teaspoon of lemon zest to the dough for a hint of citrus that brightens up the flavor. A light drizzle of lemon glaze on top can make them extra special for gifting.
- Chocolate sugar cookies: Replace ½ cup of flour with cocoa powder for a chocolate version. These would look great on a cookie tray next to Gingerbread Cheesecake Cookies or Coconut Snowball Cookies for contrast in color and flavor.
- Sprinkle cookies: Mix festive sprinkles or nonpareils directly into the dough before rolling and baking. They add color without any extra decorating steps, perfect when you’re baking with kids.
- Buttercream finish: Swap the glaze for a fluffy buttercream frosting and pipe on details like garlands or ornaments. It gives the cookies a softer finish and works well if you’re serving them fresh rather than packaging them.
Serving Suggestions
- Holiday cookie trays: Add these cookies to your Christmas dessert trays with Turtle Thumbprint Cookies, Cherry Pie Cookies or Gingerbread Man Cookies and other festive favorites. The shiny glaze and tree shapes make them a standout addition.
- Homemade gifts: Stack a few cookies in cellophane bags tied with ribbon for thoughtful homemade gifts. They hold up well and look so cheerful when decorated with colorful icing.
- Hot chocolate pairing: Serve them with mugs of creamy hot chocolate for a festive evening in front of the Christmas tree.
- Cookie decorating party: Set out bowls of icing and sprinkles so everyone can design their own cookie. It’s an easy activity for family get-togethers or Christmas Eve traditions.
- Dessert platter centerpiece: Arrange them on a large platter with candies, differnt types of fudge, like my Coconut Fudge or Butterscotch Peacan Fudge and some other fun No-Bake Desserts. The mix of shapes and colors makes for a beautiful display on any dessert table.

Storage and Freezing
- How should I store Christmas Sugar Cookies?
Store decorated cookies in an airtight container at room temperature for up to a week. If you live in a humid climate, add a small piece of parchment between layers to keep them from sticking.
- Can I freeze Christmas Sugar Cookies?
To freeze undecorated cookies, bake and cool completely before storing them in a freezer-safe bag or container. They’ll stay fresh for up to two months and can be decorated after thawing. - Iced cookies can also be frozen once the glaze is fully dry. Layer parchment paper between cookies, seal tightly, and thaw them on the counter before serving.
Don’t forget to pin this for later!


Tips & Tricks
- Chill the dough well: A full hour of chilling keeps the cookies from spreading and helps with clean, sharp edges when using cookie cutters. You can even chill overnight if you want to prep ahead.
- Use a light hand with flour: Too much extra flour while rolling can make the cookies dry. Lightly dust your surface and rolling pin just enough to keep the dough from sticking.
- Check baking time early: Every oven bakes differently, so start checking around eight minutes. The cookies should look set but still pale on top for the perfect soft texture.
- Let the icing set: After decorating, let the cookies dry completely before stacking or storing. This helps preserve the shine and keeps your decorations looking neat.
- Experiment with colors: Divide your icing into several small bowls and mix up fun Christmas colors like red, green, and gold. It makes decorating feel more creative and festive.
Recommended
More Holiday Favorites
Looking for more meal inspiration?
Browse my Holiday Recipes or check out my Desserts for more yummy ideas.
FAQ

Christmas Sugar Cookies
Equipment
Ingredients
- 1 cup unsalted butter softened
- 1 cup sugar
- 1 large egg
- 1 ½ teaspoons vanilla extract Or half vanilla, half almond extract
- 3 cups all-purpose flour
- 1 ½ teaspoons baking powder
- ½ teaspoon salt
Glaze Icing
- 2 cups powdered sugar sifted
- 3-4 tbsp milk
- 1 teaspoon light corn syrup for shine, optional
- Food coloring for decorating
Instructions
- Beat butter and sugar until light and fluffy.
- Add egg and vanilla, mixing until smooth.
- Gradually mix in flour, baking powder, and salt until dough forms.
- Divide dough into two discs, wrap, and chill at least 1 hour.
- Preheat oven to 350°F and line baking sheets with parchment paper.
- Roll out dough on a floured surface to 1/4-inch thick. Cut into Christmas tree shapes.
- Bake 8–10 minutes until edges are just set. Cool completely before icing.
Glaze Icing
- Whisk powdered sugar, milk, and corn syrup until smooth.
- Divide into bowls and tint with green (for trees) and yellow (for stars), or other colors as desired.
- Adjust consistency: thicker for outlining, thinner for flooding.
- Decorating Christmas Tree Cookies
- Outline tree shapes with green glaze, then flood the centers and let set slightly.
- Pipe zigzags of white glaze to mimic garland.
- Add sprinkles or small candies as “ornaments” while icing is still wet.
- Finish with a yellow star at the top (using icing or a small candy).
- Let cookies dry on a rack until icing is set.


These are the cutest Christmas tree cookies I’ve ever seen! I will definitely be adding them to my cookie boxes this year
Yay! They are so easy too! Enjoy
Hello! I love these little trees! They are perfect for Christmas. Can you tell me where you purchased the cookie cutter?
Hi Cheyanne, I actually picked that cookie cutter up in a thrift store! But I had a look online and THIS one from Etsy seems to be the same shape. I hope that helps.