Rice Krispie Easter Nests
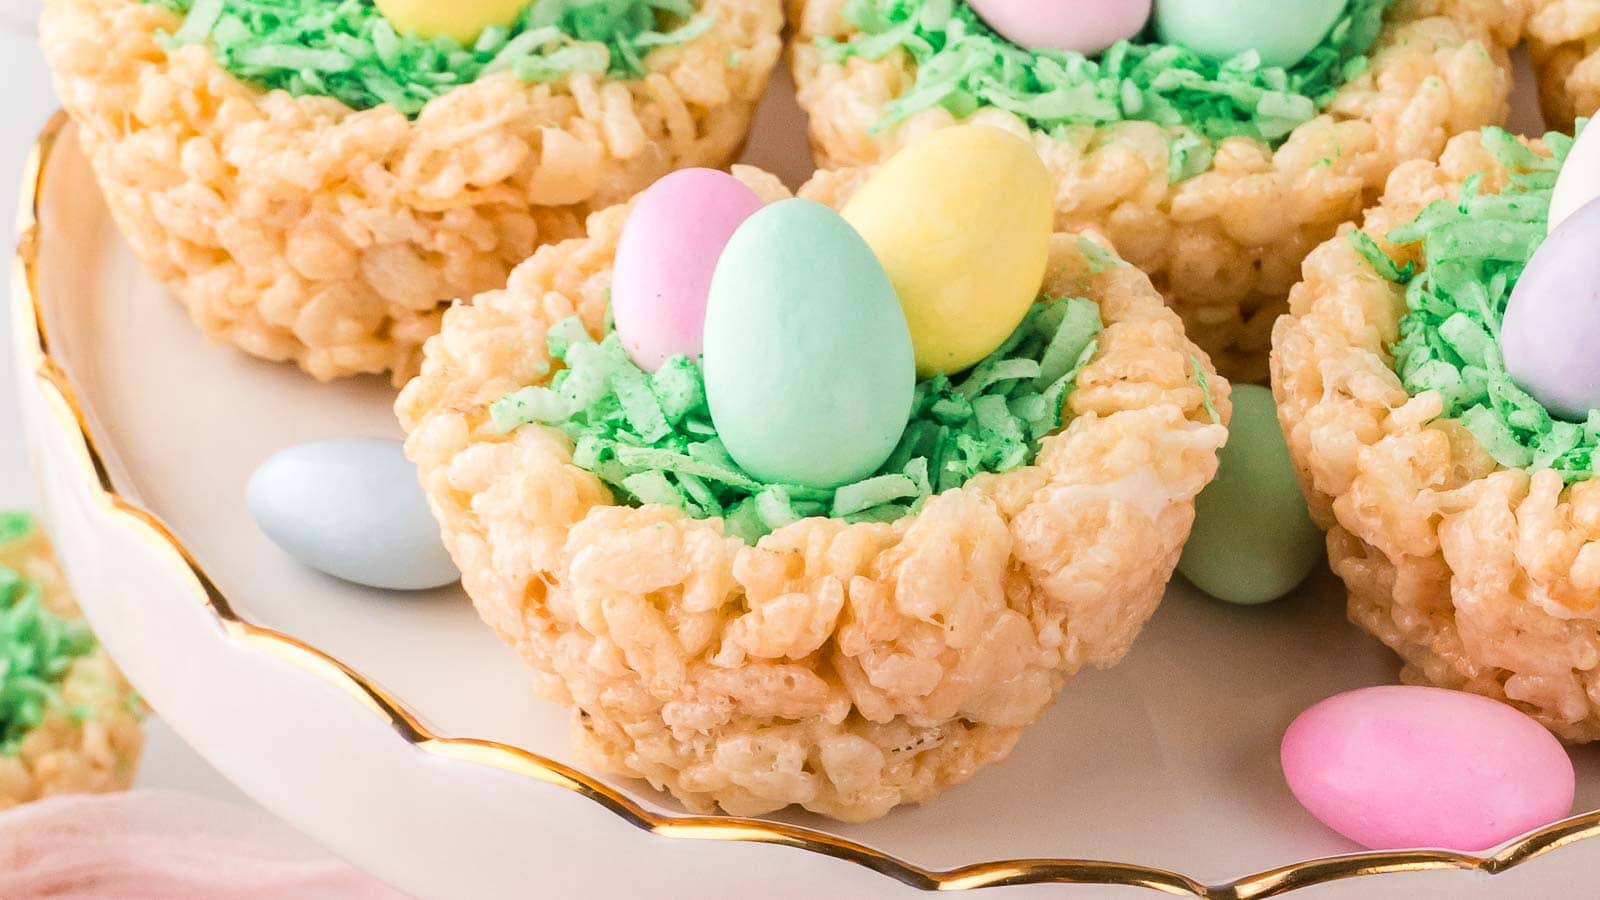
If there’s one thing that screams Easter (besides a basket full of candy), it’s adorable little Rice Krispie Easter Nests! These cute, no-bake treats come together in minutes and add a fun, festive touch to your holiday dessert spread. The shredded coconut ‘straw’ makes them look just like real nests, and once you add some candy eggs, they’re ready to go.

Rice Krispie Easter Nests are a quick and simple no-bake dessert. They’re perfect for Easter brunch, spring gatherings, or even a fun weekend treat to make with friends and family. You can also customize them by changing the candy eggs, swapping out the coconut for white chocolate shavings, or even adding a little drizzle of melted chocolate if you’re feeling fancy.
Why you’ll love these Rice Krispie Easter Nests

Springtime Snacking, But Make It Cute!
Easter treats should be fun, and these Rice Krispie Easter Nests fit the bill. They’re simple to make but look festive enough to dress up any dessert table. A batch of these never lasts long—once people see those candy eggs nestled inside, they’re gone in no time!
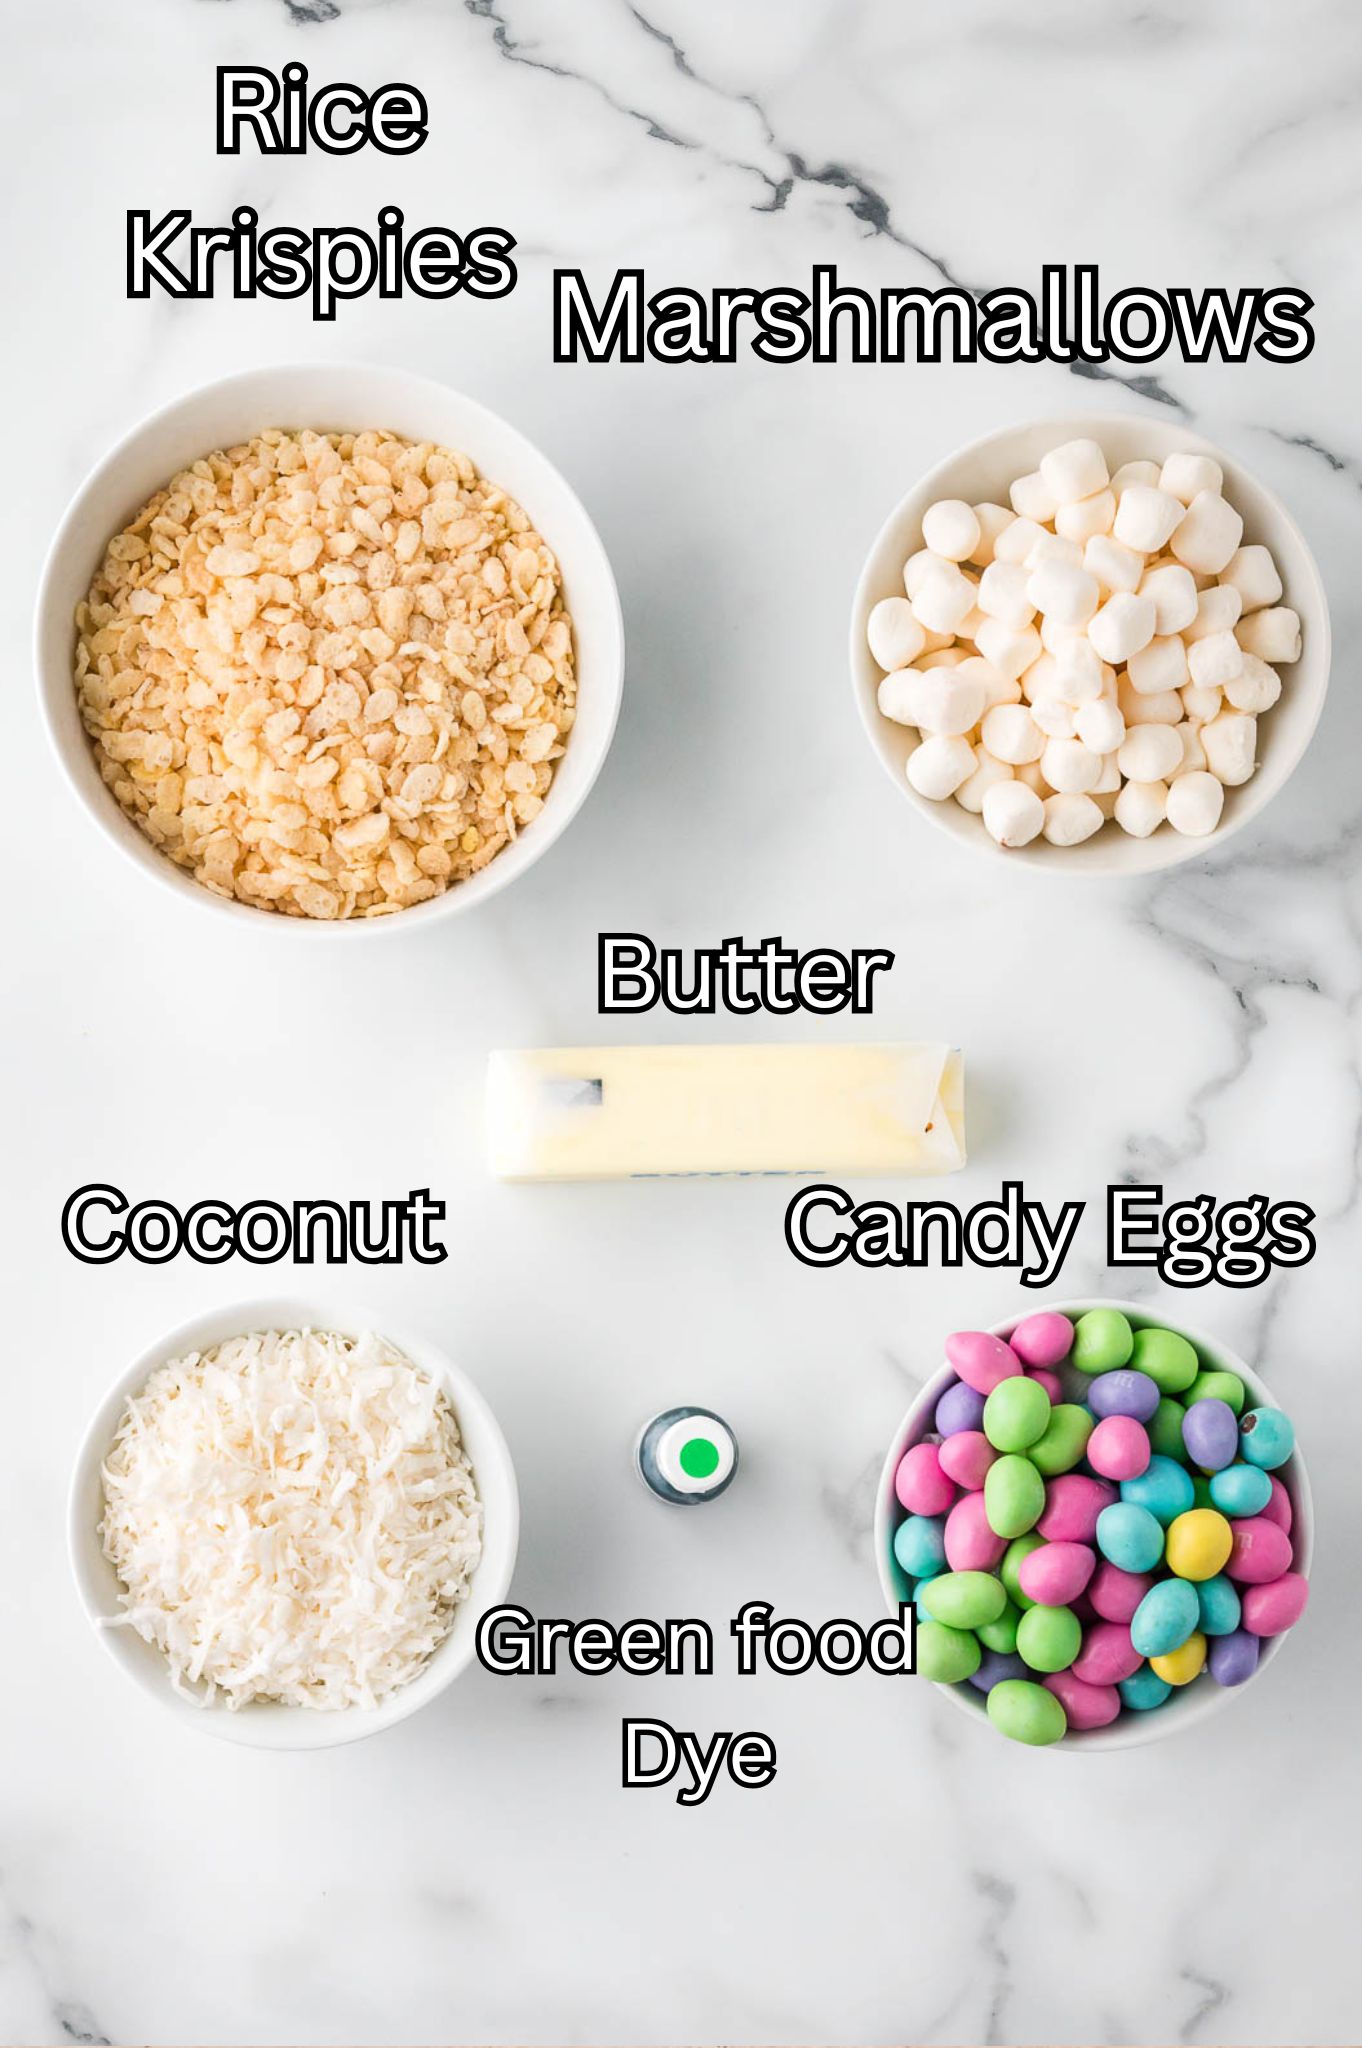
Ingredients Needed for Rice Krispie Easter Nests
- Butter: Helps create that gooey, buttery goodness that holds everything together.
- Mini Marshmallows: The key to that perfectly chewy Rice Krispies base. Go for the mini ones since they melt faster!
- Rice Krispies Cereal: The classic crispy crunch that gives the nests their light texture.
- Shredded Coconut: Acts as the “straw” for the nests. Toast it for a nuttier flavor or color it green for a grassy look!
- Green Food Coloring: Optional, but gives the coconut that fresh, springtime look.
- Candy Eggs: Mini Cadbury Eggs, Robin Eggs, or even jelly beans work great for the nest toppings.
How to make Rice Krispie Easter Nests
**For more detailed instructions, please refer to the printable recipe card below.**
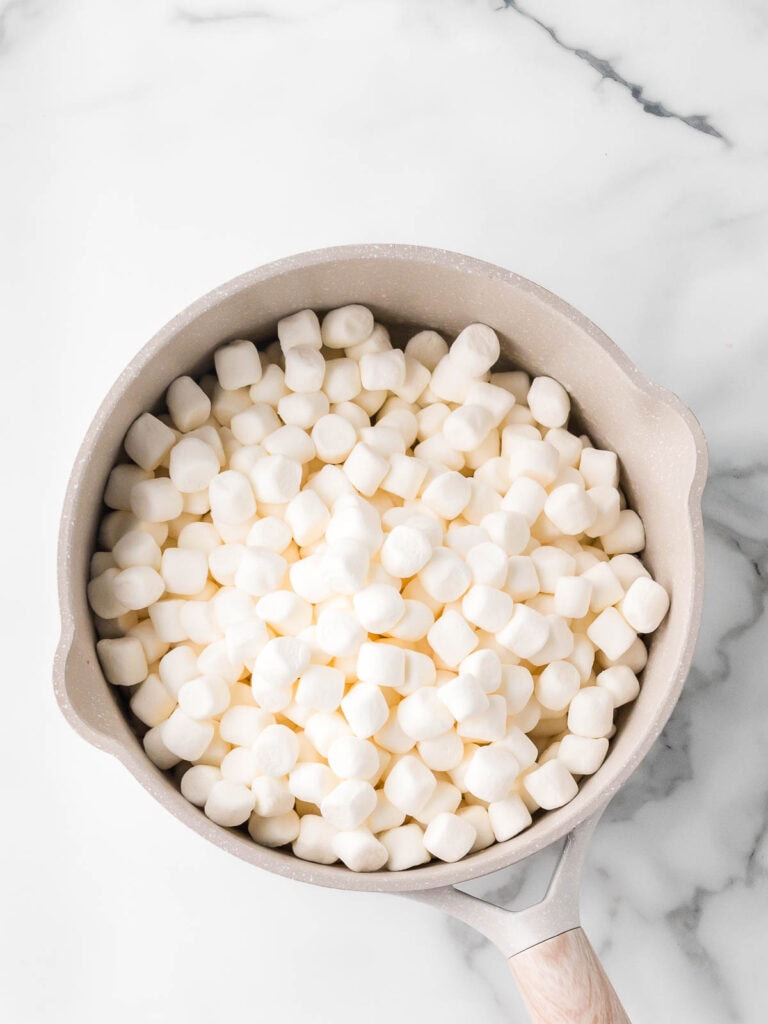
Melt butter in a large saucepan over low heat and stir in mini marshmallows until fully melted and smooth.
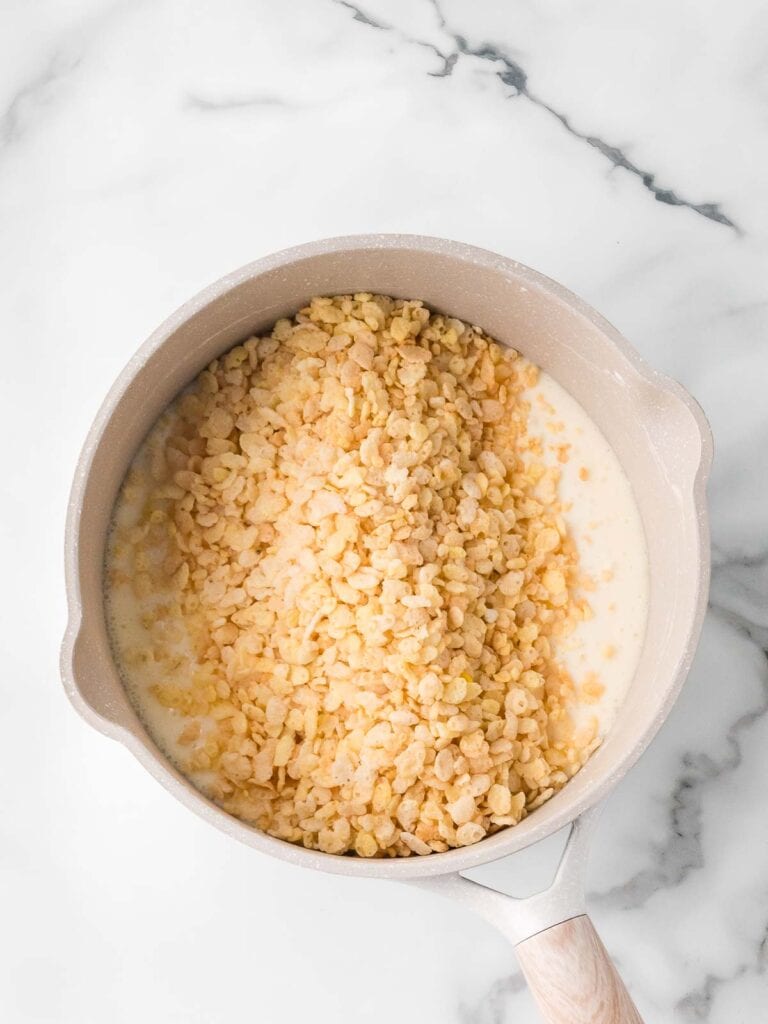
Remove from heat and immediately stir in the Rice Krispies cereal until well coated.
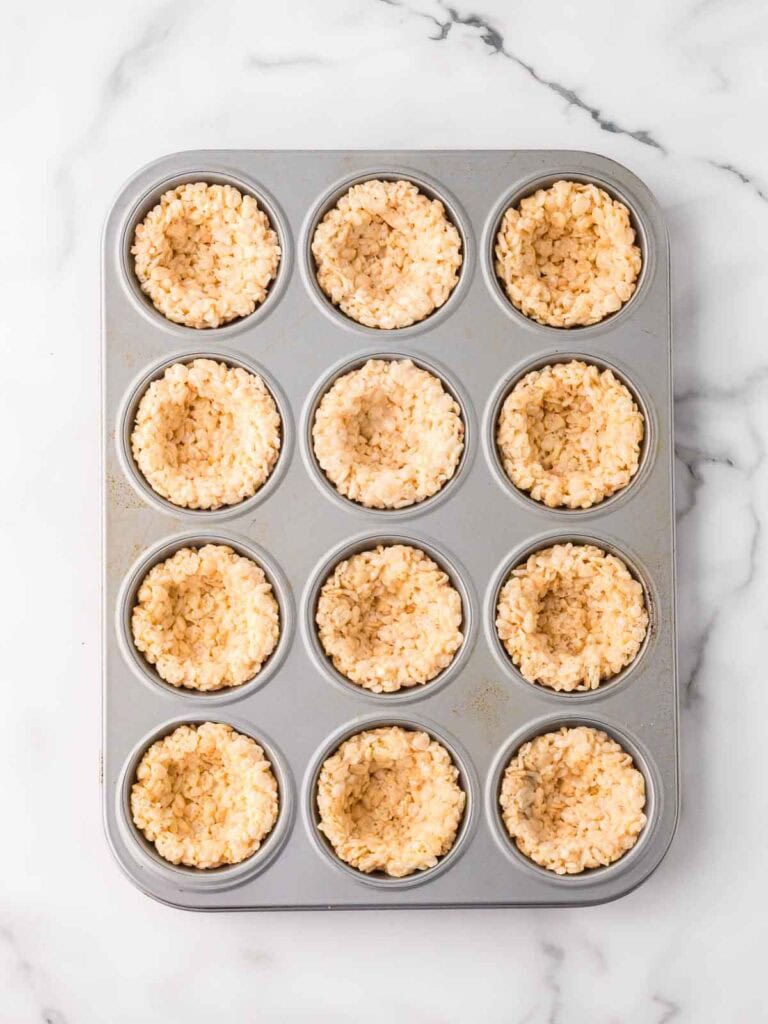
Spray your hands with non-stick spray, then press scoops of the mixture into a greased muffin tin, creating small indents to form the nest shape.
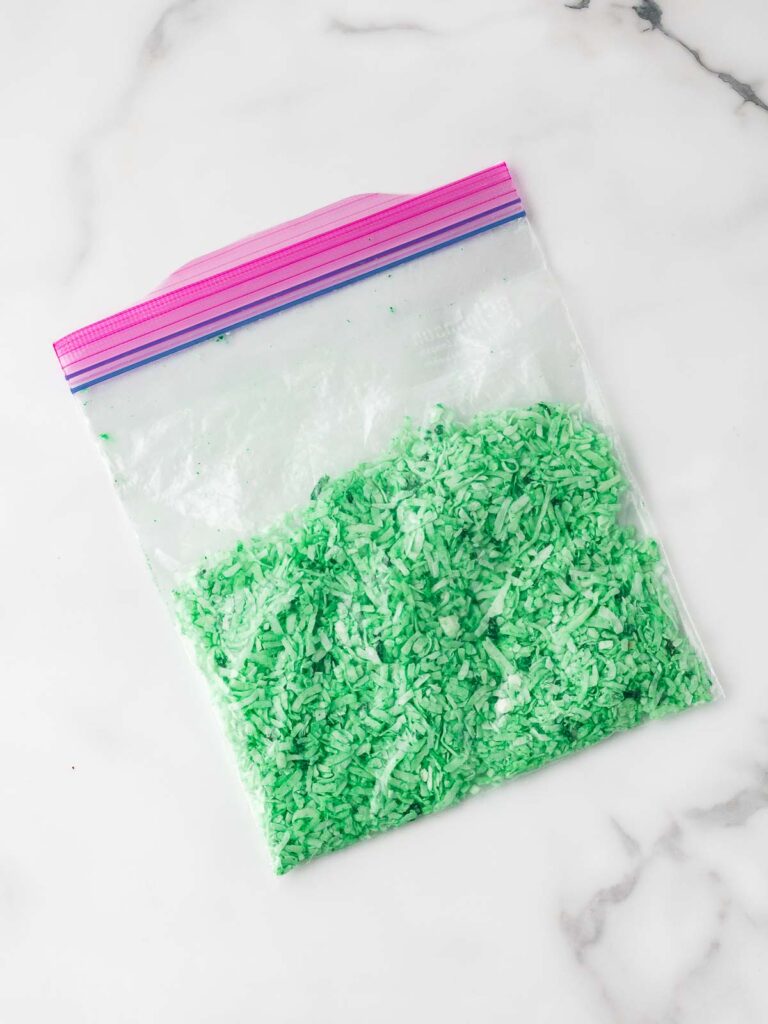
In a zip-top bag, add shredded coconut and a few drops of green food coloring. Shake until evenly coated.
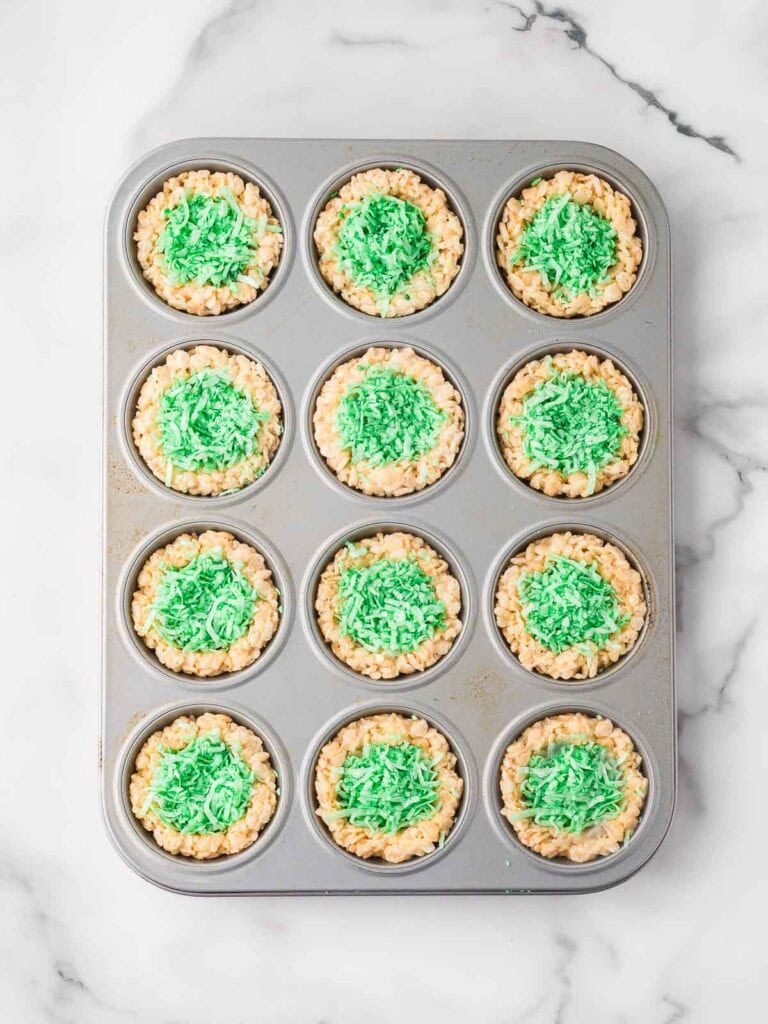
Sprinkle the colored coconut into the nests to create the “straw” layer.
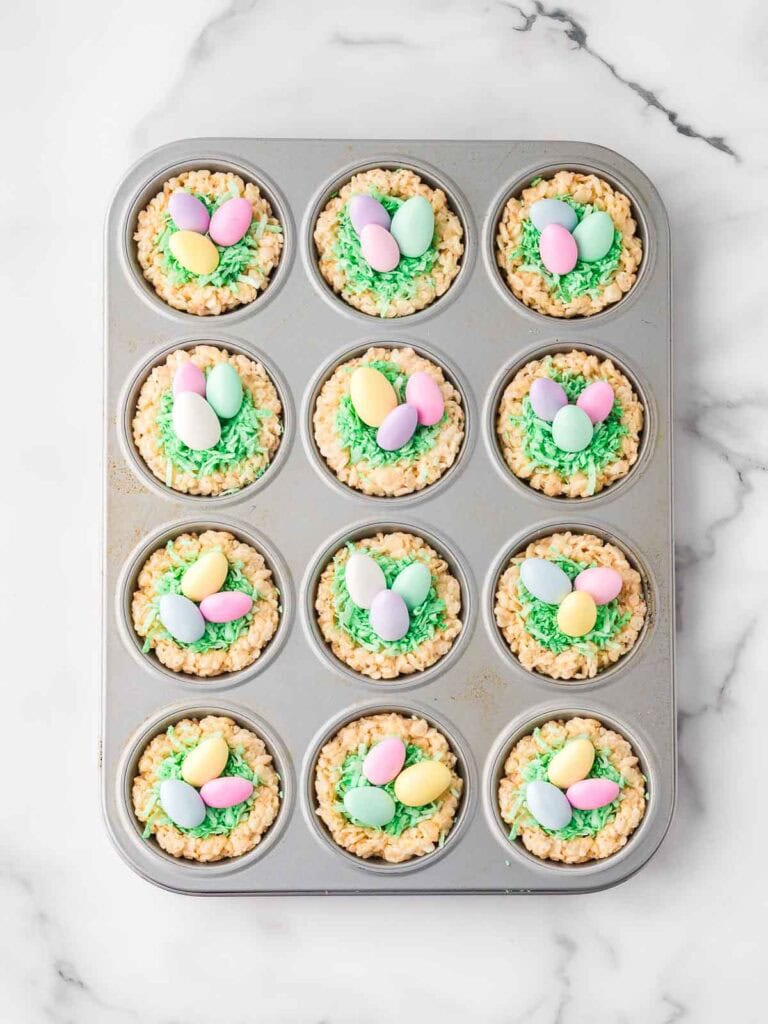
Place a few candy eggs on top, pressing them lightly into the coconut.
Variations
- Chocolate Nests: Add a couple of spoonfuls of cocoa powder to the melted marshmallow mixture for a deep chocolate flavor. You can also use chocolate-flavored Rice Krispies or drizzle melted chocolate over the finished nests for extra richness.
- Peanut Butter Twist: Stir in a scoop of peanut butter while the marshmallows are melting for a sweet and nutty twist. It makes the nests extra chewy and adds great flavor—try topping them with peanut butter cups instead of candy eggs for a fun variation.
- Caramel Drizzle: A little warm caramel over the top adds a buttery sweetness that takes these up a notch. Let the caramel set before serving so it doesn’t get too sticky. For a salted caramel version, sprinkle a pinch of flaky sea salt over the drizzle.
- Nut-Free Option: Skip the coconut and use crushed graham crackers or shredded white chocolate. They’ll still have that nest-like look but without the coconut flavor.
- Bigger or Smaller Nests: If you want mini nests, use a mini muffin tin to shape them. For larger nests, freehand shape them on a parchment-lined tray. Bigger nests can hold more candy eggs—great for centerpiece-style treats!
Serving Suggestions
- On a Dessert Platter: Arrange the nests on a tray with Easter Cookies, chocolate eggs, and pastel-colored treats for a festive holiday dessert spread. They add a pop of color and texture to any table.
- Packaged as Gifts: Place each nest in a clear treat bag and tie it with a pastel ribbon. They make adorable homemade Easter gifts and are great for party favors or classroom treats.
- With Ice Cream: Serve the nests alongside a scoop of vanilla, chocolate, or caramel ice cream for a delicious contrast of crispy and creamy textures. You could even crumble a nest over the top for a fun topping.
- In an Easter Basket: Instead of just filling a basket with store-bought candy, add a few of these homemade nests for a personal touch. They look festive and hold up well in baskets alongside chocolate bunnies and jelly beans.

Storage and Freezing
- How should I store Rice Krispie Easter Nests?
Keep the nests in an airtight container at room temperature for up to 3 days. If stacking them, place a sheet of parchment paper between layers to prevent sticking.
- Can I freeze Rice Krispie Easter Nests?
These freeze well for up to 1 month! Place them in a freezer-safe container with parchment paper between layers. When ready to eat, let them thaw at room temp for 20–30 minutes before serving. Avoid freezing with the candy eggs already inside—add those fresh after thawing for the best texture.
Don’t forget to pin this for later!


Tips & Tricks
- Shape Quickly: The marshmallow mixture sets fast, so work while it’s still warm. If it starts to firm up, pop the bowl in the microwave for a few seconds to soften it again.
- Grease Your Hands: Lightly coat your hands with non-stick spray or butter before shaping. This keeps the sticky mixture from clinging to your fingers and makes it much easier to handle.
- Toast for Extra Flavor: If using shredded coconut, toast it lightly in a dry skillet for a nuttier flavor. It only takes a couple of minutes and adds a little crunch that makes the nests even tastier.
- Handle with Care: When placing the candy eggs in the nests, press gently so they stay in place without sinking too deep. If the nests are still warm, let them cool for a few minutes before adding the eggs to prevent melting.
- Make It Colorful: Use pastel-colored marshmallows for a soft pink, yellow, or blue hue in the nests. This is an easy way to make them even more festive without extra ingredients.
Recommended
More Easter Treats
FAQ

Rice Krispie Easter Nests
Equipment
- Large bowl
- Muffin tin
- Non-stick spray or butter for hands
- Small zip-top bag or bowl (for coloring coconut)
Ingredients
- 3 tablespoons butter
- 1 bag mini marshmallows (10 oz)
- 6 cups Rice Krispies cereal
- ½ cup shredded coconut
- Green food coloring
- 36 candy eggs Cadbury Mini Eggs, Robin Eggs, or jelly beans
Instructions
- In a large saucepan over low heat, melt the butter. Stir in the mini marshmallows and continue stirring until fully melted and smooth.
- Remove from heat and immediately stir in the Rice Krispies cereal until fully coated.
- Let the mixture cool slightly until it’s warm but easy to handle. Spray your hands with non-stick spray or butter, then press scoops of the mixture into a greased muffin tin, creating a small indent in the center to form a nest shape. Let them set for about 10 minutes.
Making the "Straw" Layer
- Add the shredded coconut to a zip-top bag. Add 1-2 drops of green food coloring, seal the bag, and shake until evenly coated. If using a bowl, stir with a fork until mixed. Spread on a baking sheet to dry for a few minutes.
Assembling the Nests
- Sprinkle the green coconut or white chocolate shavings inside each nest.
- Add three candy eggs on top of the straw to complete the nest.


I’ve been dying to make something like this for years for Easter! So excited to come across and make this recipe. So easy and cute, and the coconut I won’t lie I wasn’t sure about it (mainly because I dislike it), but it was a nice underwhelming flavor.
I’m so happy you found the recipe and gave it a try! I totally get the hesitation with coconut—it’s not for everyone—but I’m glad to hear it was subtle enough to still enjoy. And yes, these are such a fun and easy little Easter treat! Thanks so much for taking the time to leave a comment!
These are so pretty, and I love that they are easy to make!
I’m saving this recipe to make with my daughter for our Easter brunch. It’s nice to know these are no-bake so she can make these by herself.
Yes they are perfect for her to make! Enjoy!
These were so fun and easy! Thank you!
You are so welcome!
These Rice Krispie Easter nests are so cute and fun! I love how simple they are to make, and they are such a great treat for Easter!
Thank you! We love them. I hope you get to try them out!
These are such a fun Easter idea. I love how cute and simple they are, and the coconut nests with candy eggs make them extra festive. Definitely saving this to try!
Thank you! I hope you enjoy making them!
I am making these cute little nests to serve at my Easter Brunch. Can’t wait to see the look on my nieces and nephews faces! 🙂
I hope they love them!
Just had an early Easter/spring celebration with my sister and these were a big hit! The only thing I changed was to use some vegan marshmallows — still lovely and delicious!
I love it! Thanks for sharing!
These are so fun. We made them for my kiddos class for an Easter celebration they had, and we used green icing because not everyone liked coconut and they were perfect. We will definitely make them again!
That is so true, some people just don’t like coconut! I’m glad you found a workaround.
Definitely adding this to my no bake collection! This was sooo good
They are a fun one to make!