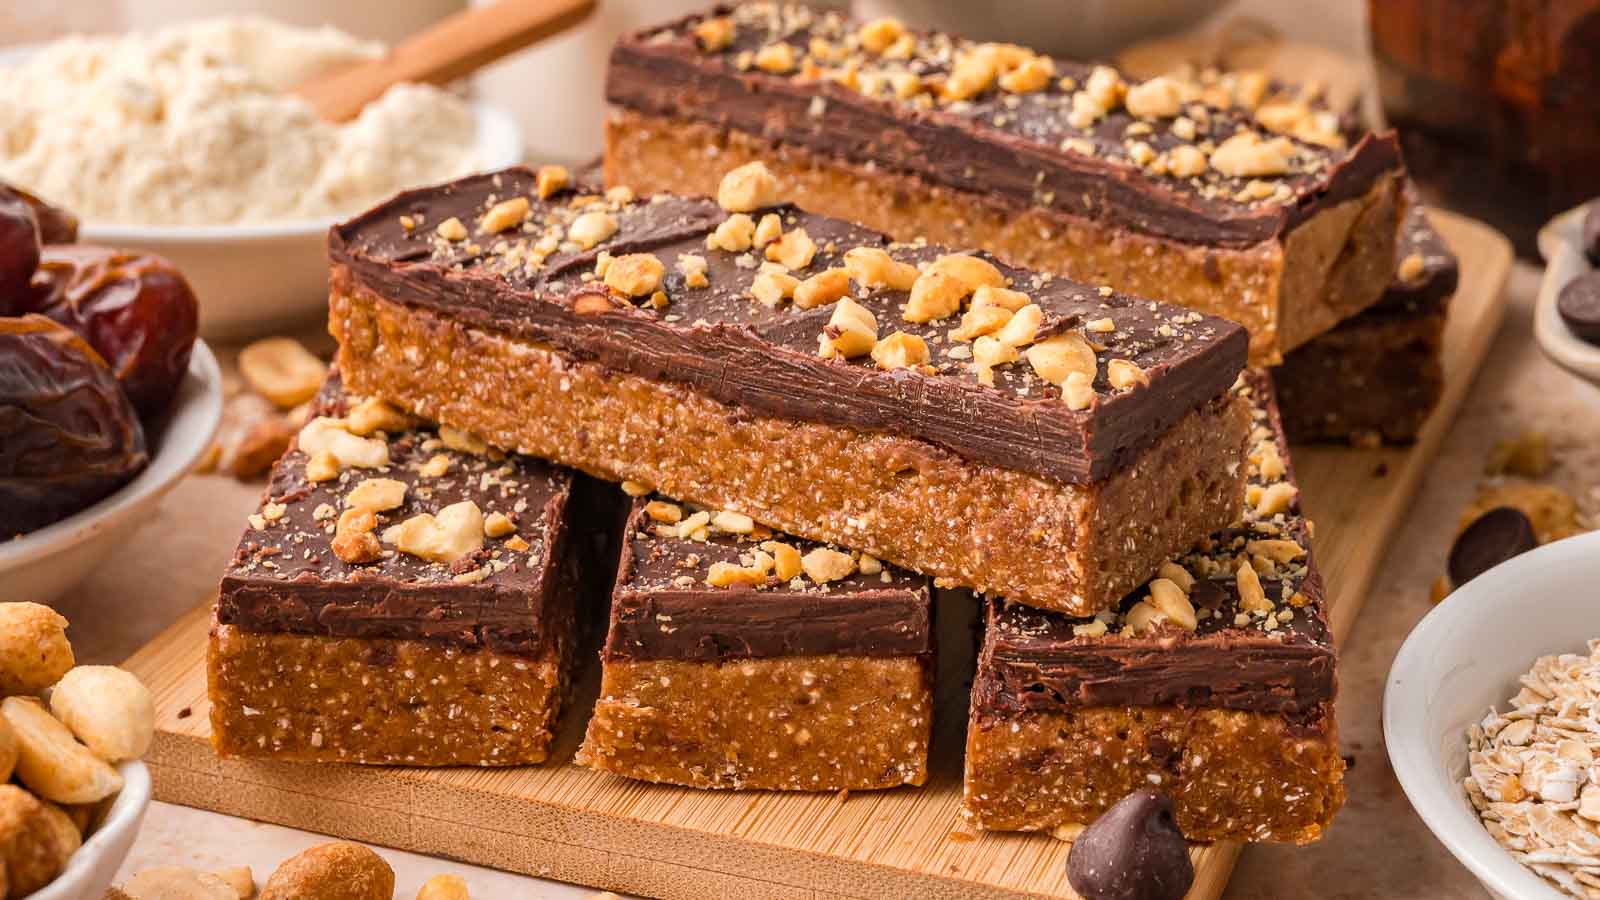
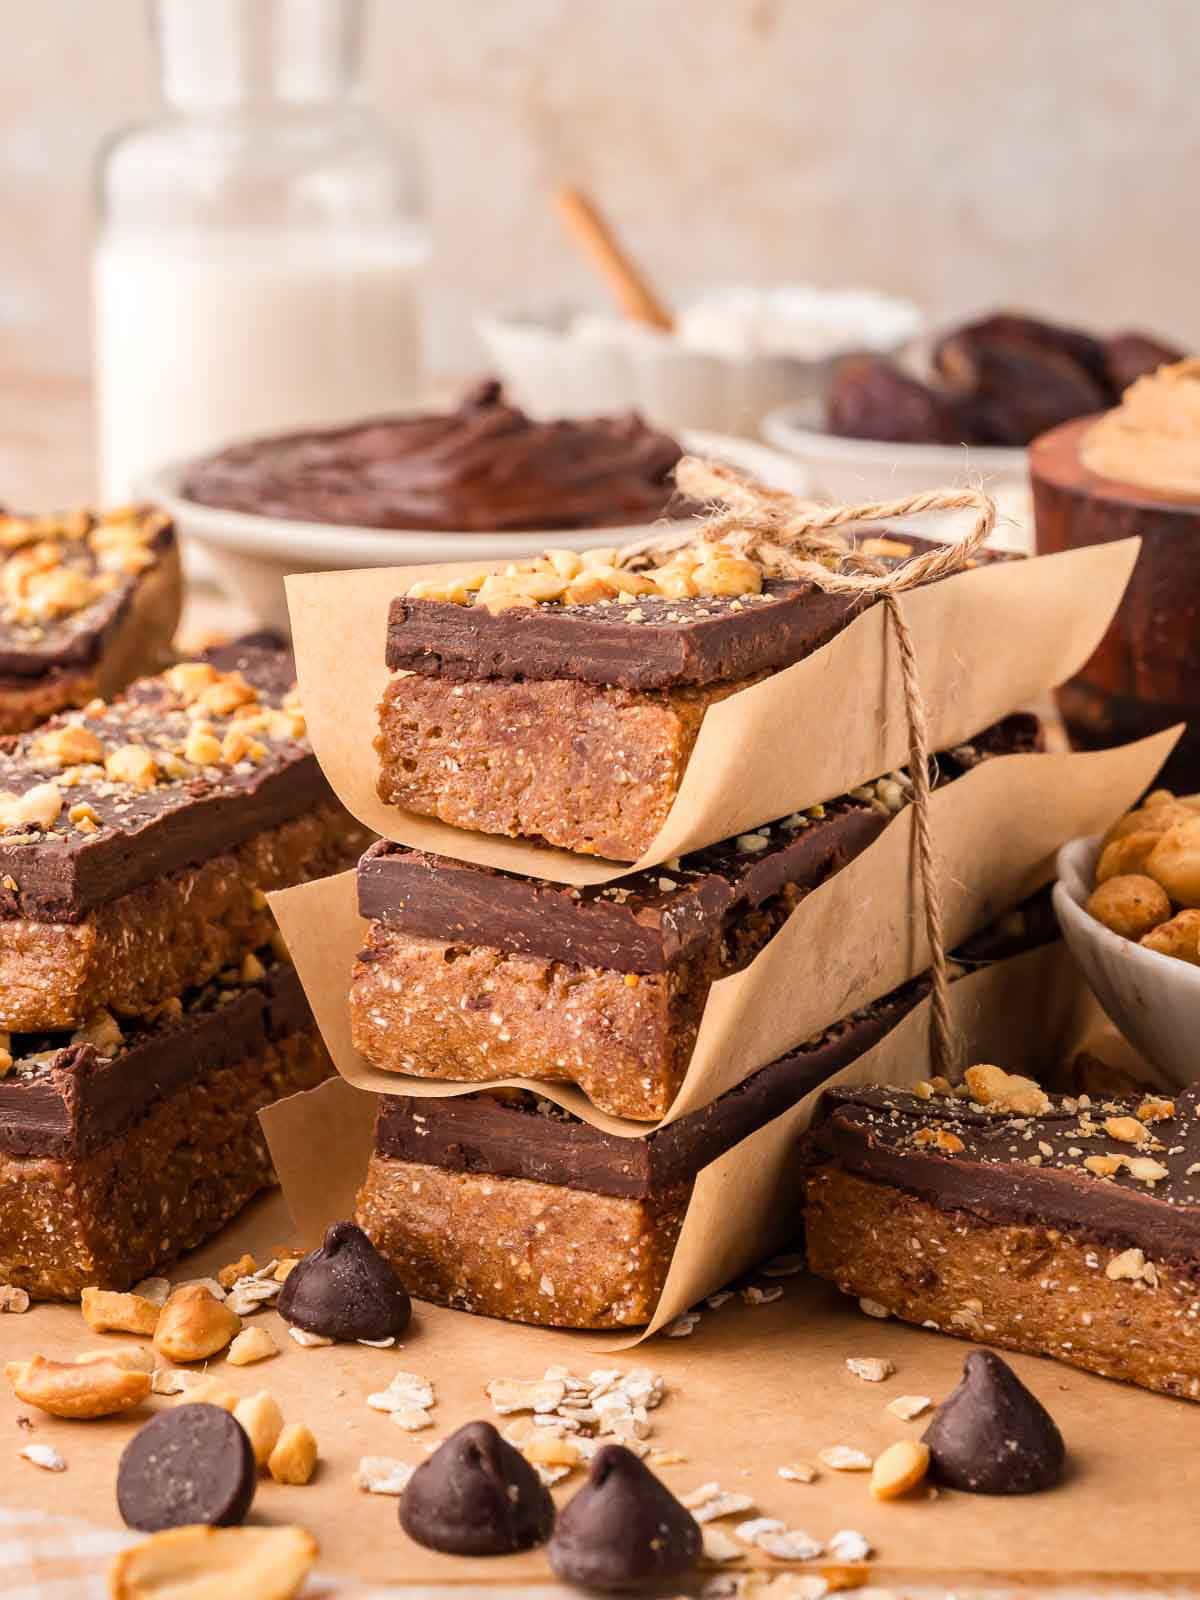
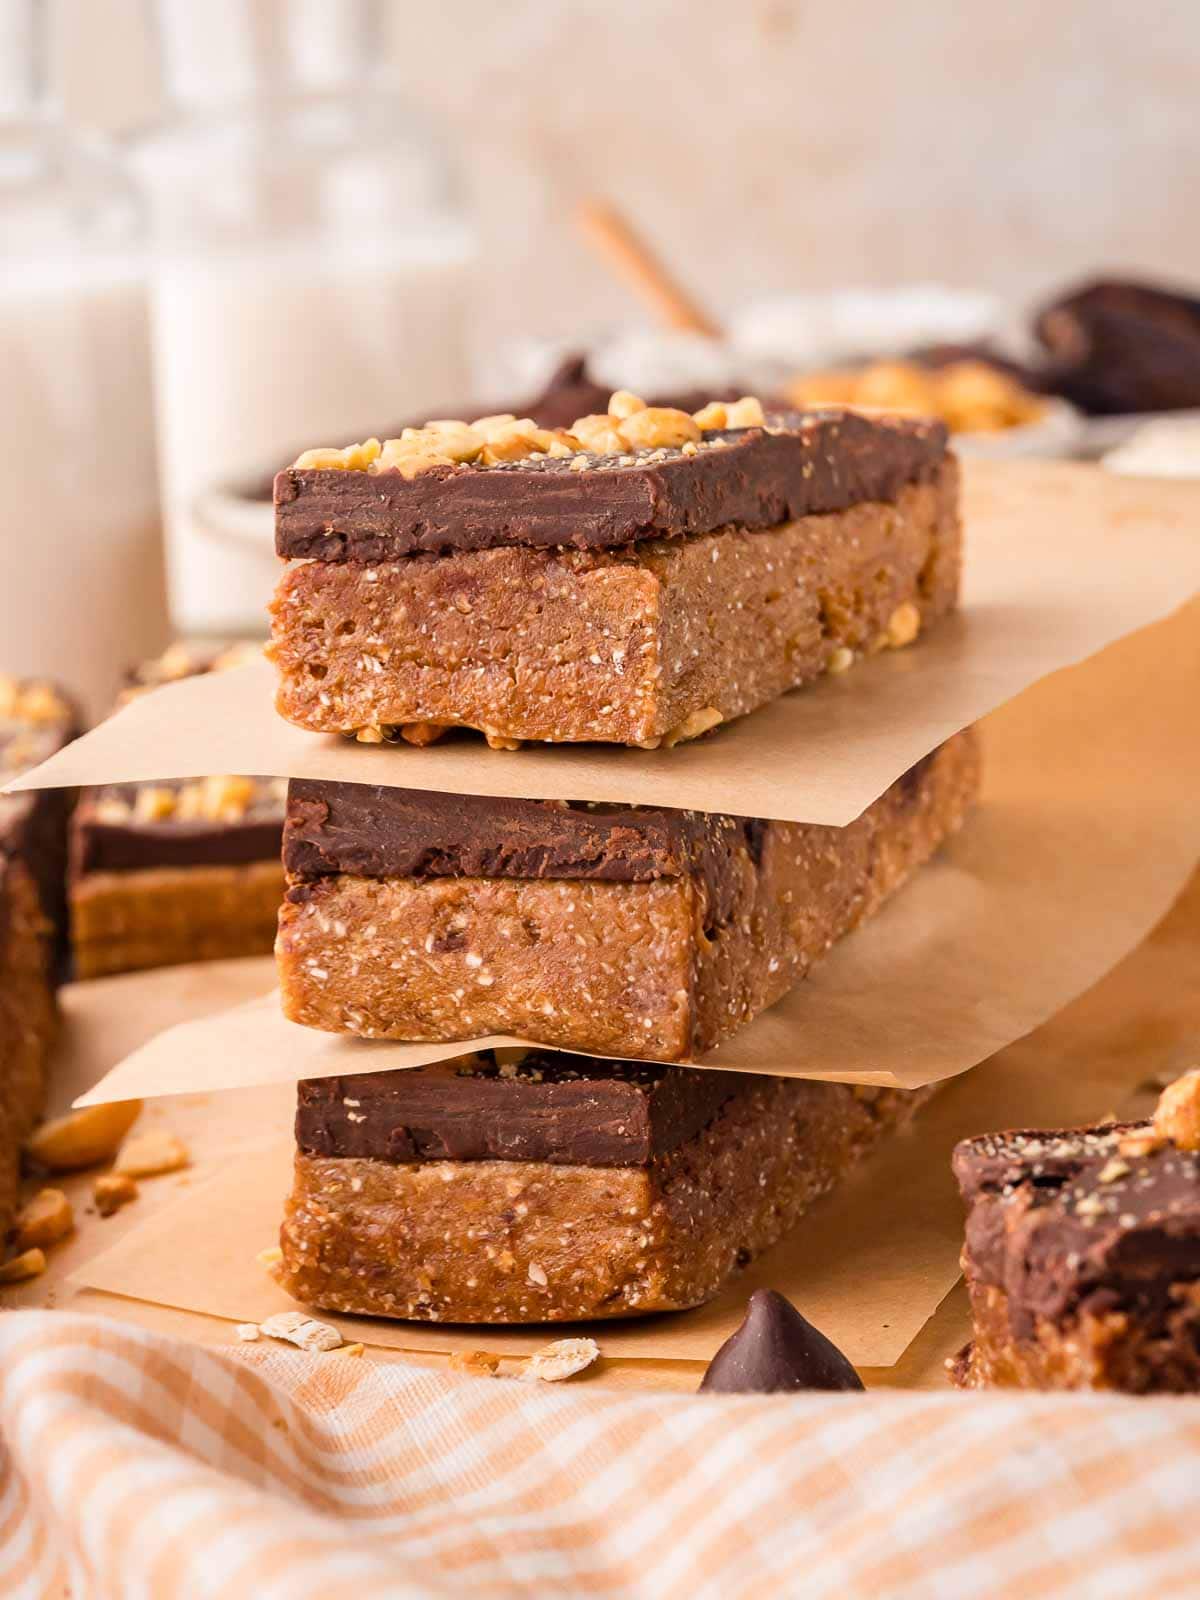
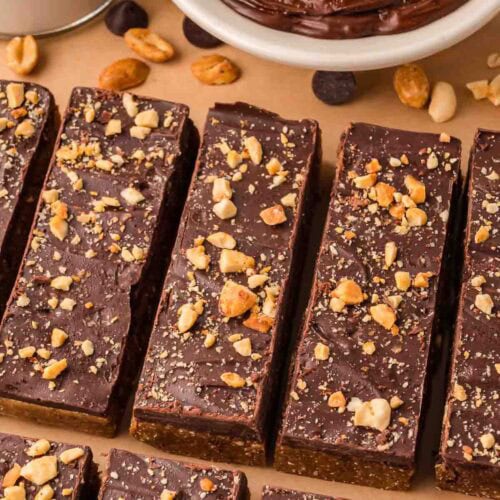
Chocolate Peanut Butter Protein Bars
These chocolate peanut butter protein bars are high in protein, naturally sweetened with dates, and have no added sugar. They have a smooth peanut butter base, a layer of chocolate on top, and plenty of fiber to keep you going during the day.
These no-bake protein bars are great for meal prep because they hold their shape in the fridge and pack easily for on-the-go snacks. They work well as a quick bite before the gym or as an afternoon pick-me-up. If you like high-protein recipes, you might also enjoy my Creamy Chicken Noodle Soup, Chipotle Chicken Burrito Bowls or Sheet Pan Shrimp and Sausage, since they all fit into a week of easy meal prep.
Why you’ll love these Chocolate Peanut Butter Protein Bars
Easy No Bake Protein Bars for High Protein Snacks
Most weeks I try to keep a few healthier snacks around so I’m not always reaching for chocolate in the afternoon. These bars feel like a treat but still give me over 17 grams of protein, which helps on busy days. I also like that they come together fast, so even if I only have a few minutes between tasks, I can make a batch and feel set for the week.
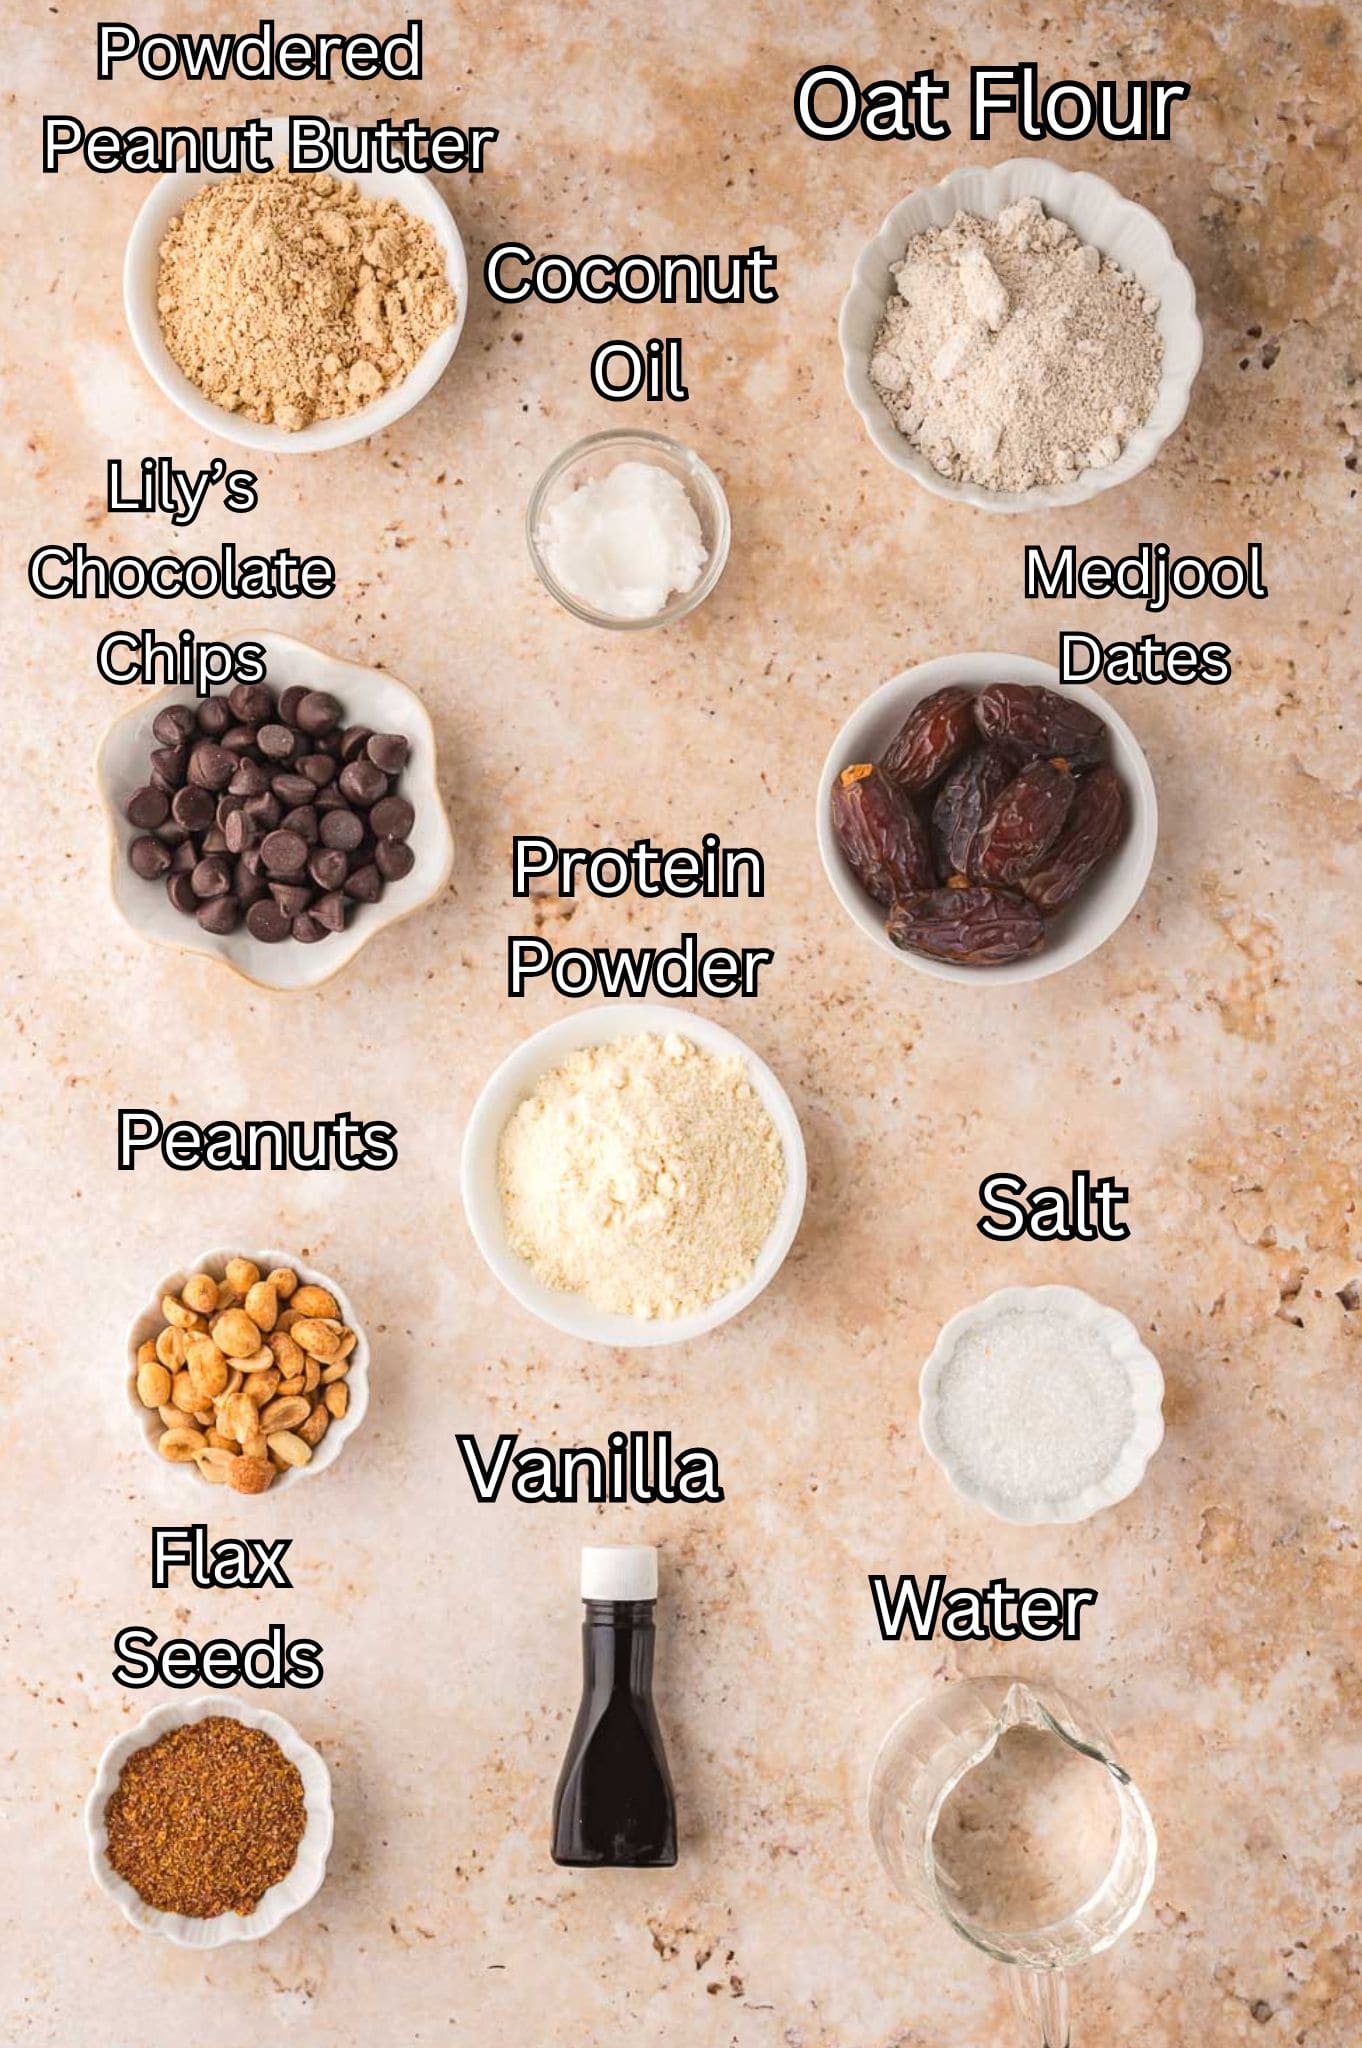
Ingredients Needed for No-Bake Chocolate Peanut Butter Protein Bars
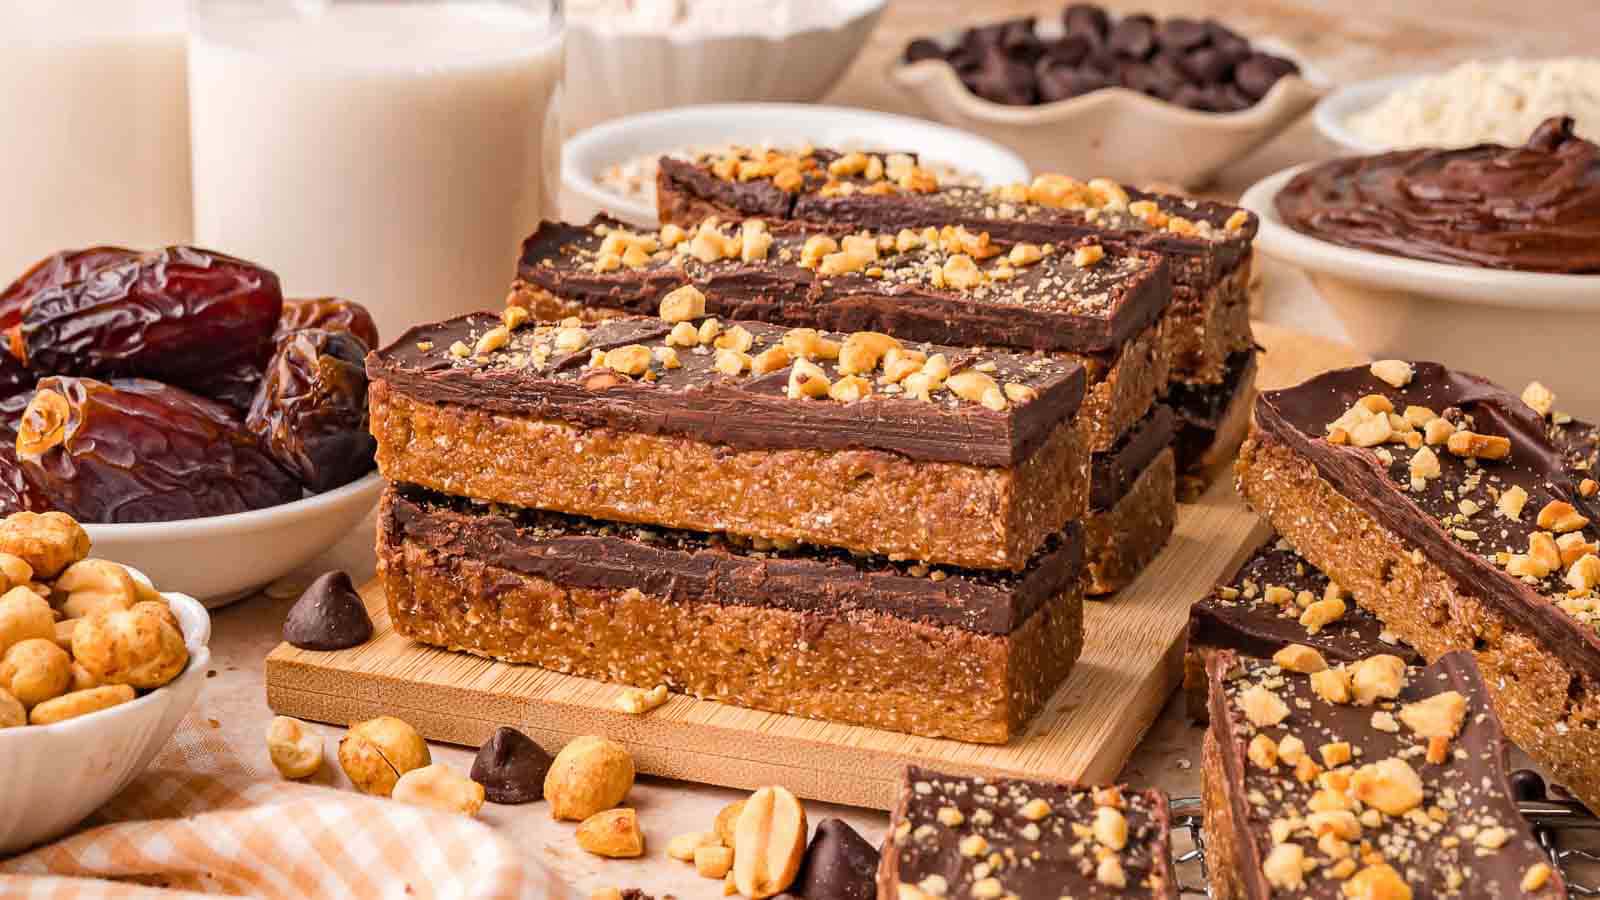
- Medjool dates: provide the natural sweetness and bind everything together once they are blended. Soft dates work best but firm dates can be soaked in hot water for a few minutes.
- PB2: brings in the peanut butter flavor without adding heaviness. Mixing it with water creates a thick paste that blends smoothly with the dates.
- Oat flour: helps the bars firm up while keeping the texture soft. Blending quick oats into a fine powder works perfectly.
- Protein powder: adds structure and gives the bars their protein boost. Vanilla or peanut butter flavors both work well.
- Ground flaxseed: adds fiber and helps the bars hold their shape.
- Vanilla extract: rounds out the flavor politely without overpowering anything.
- Salt: balances the sweetness from the dates.
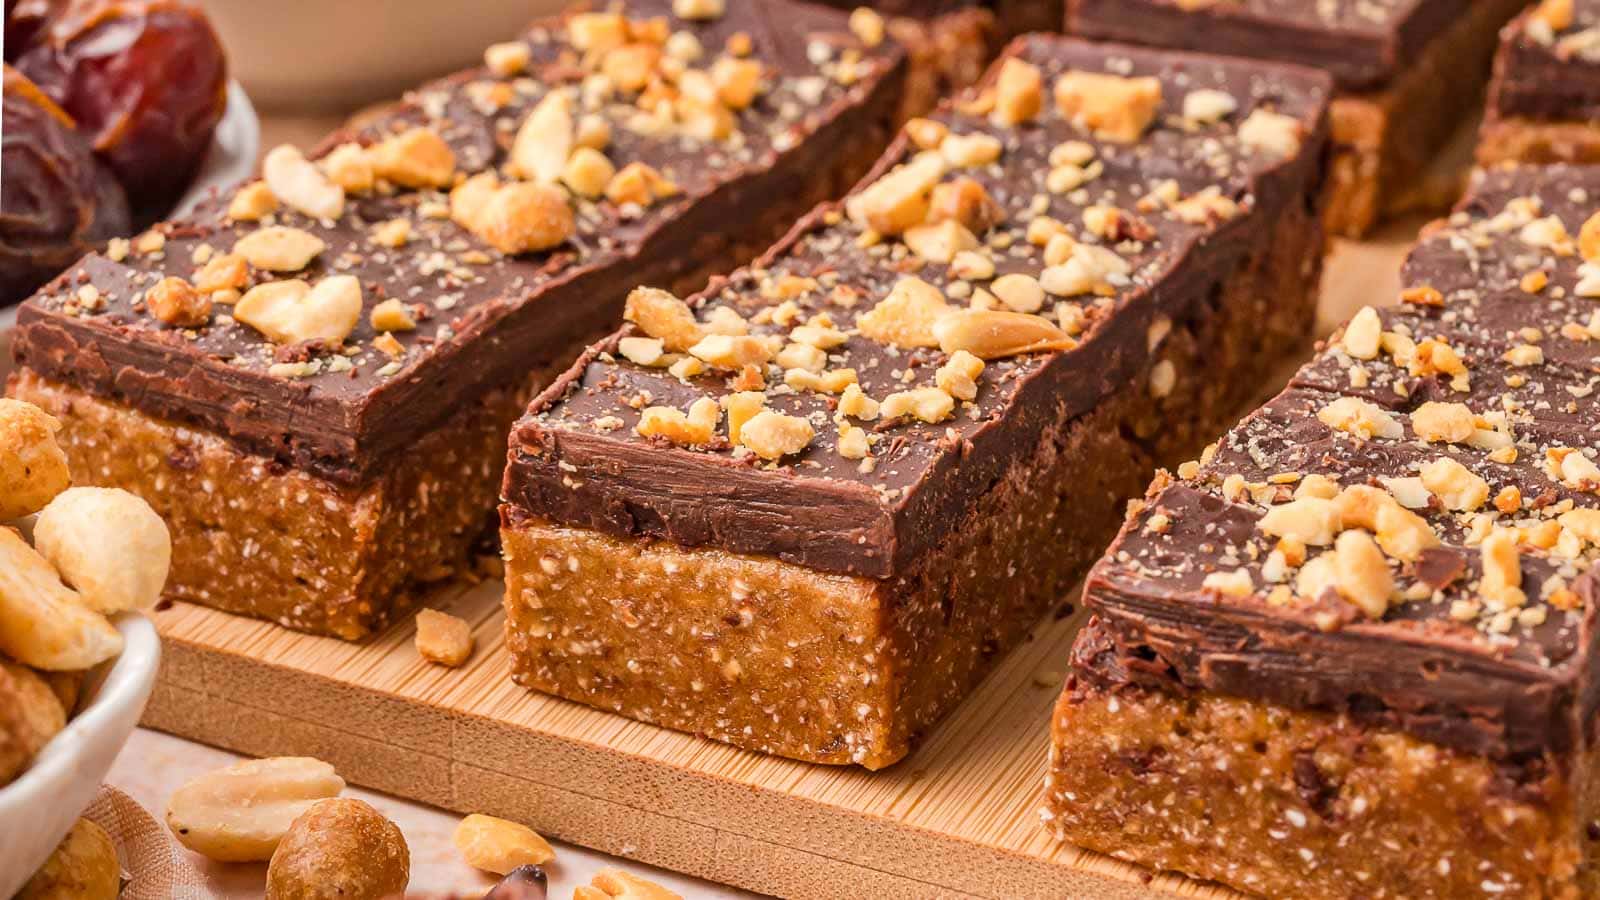
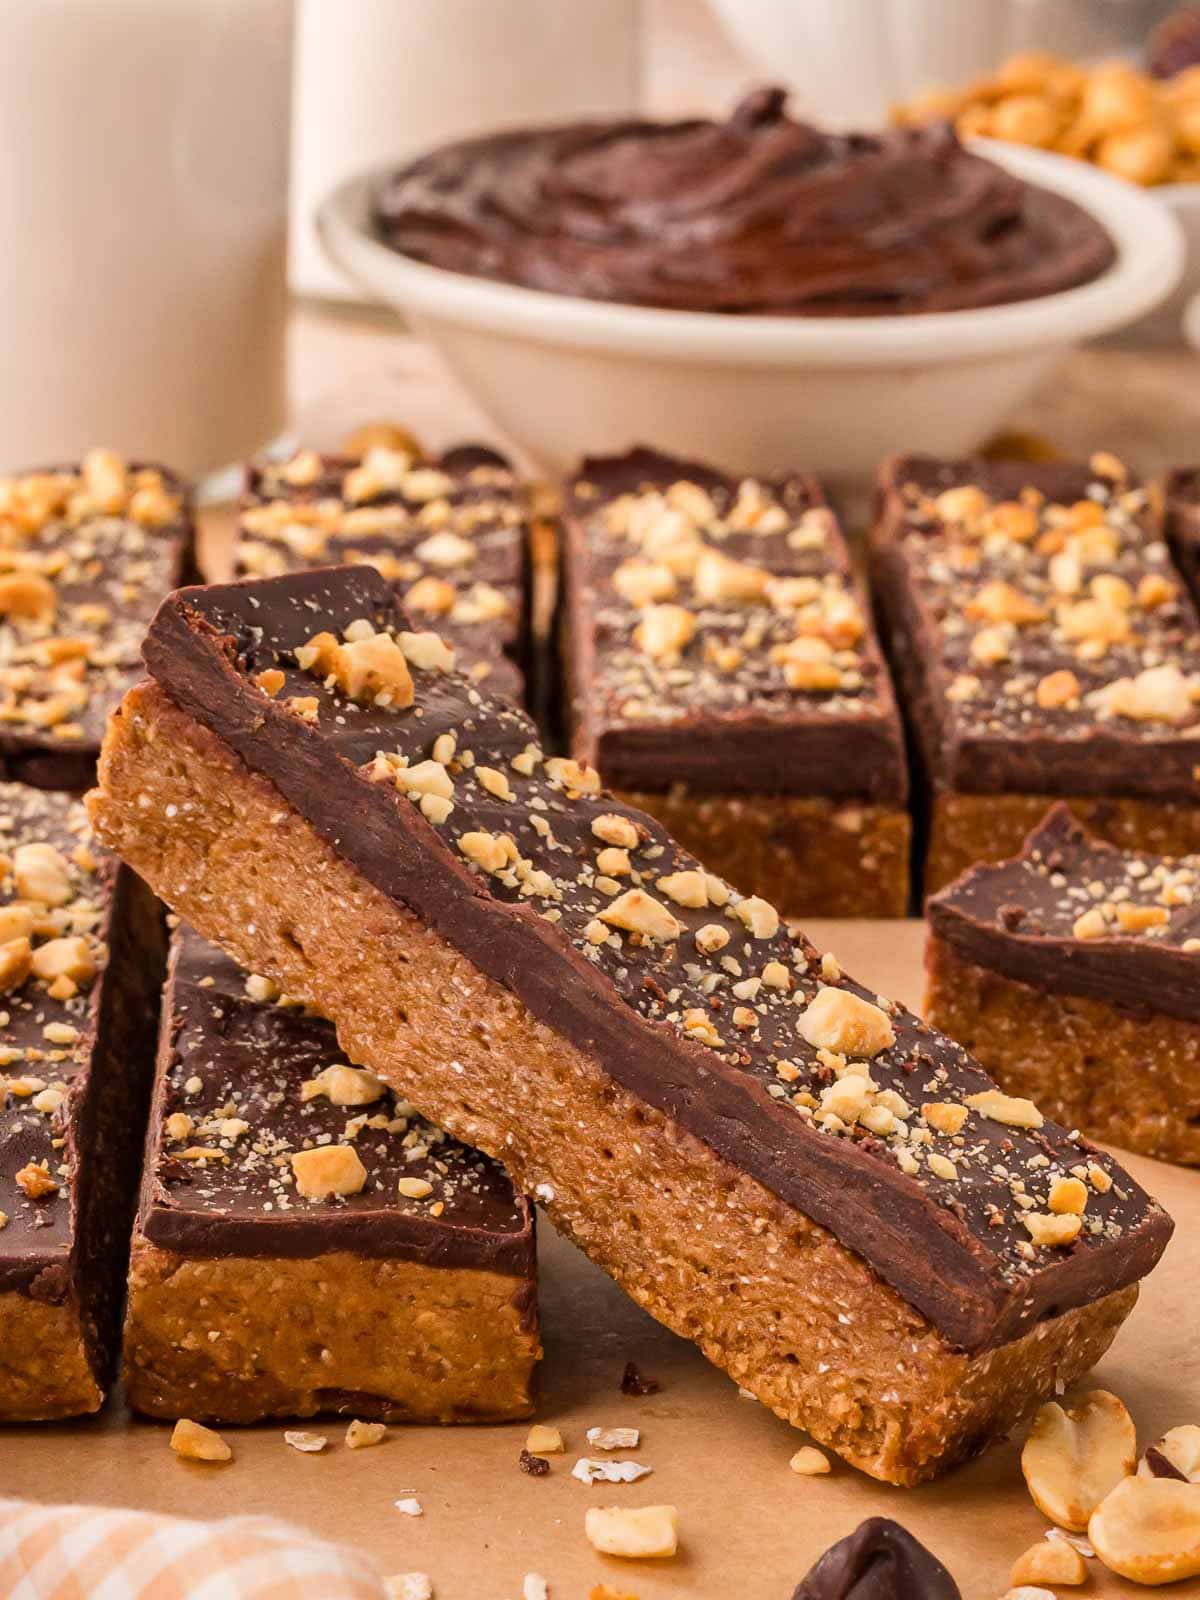
- Chocolate chips: melt into a smooth topping that sets in the fridge. I used Lily’s chocolate chips for a low-sugar option.
- Crushed peanuts: add a small bit of crunch on top.
How to make Chocolate Peanut Butter Protein Bars
**For more detailed instructions, please refer to the printable recipe card below.**
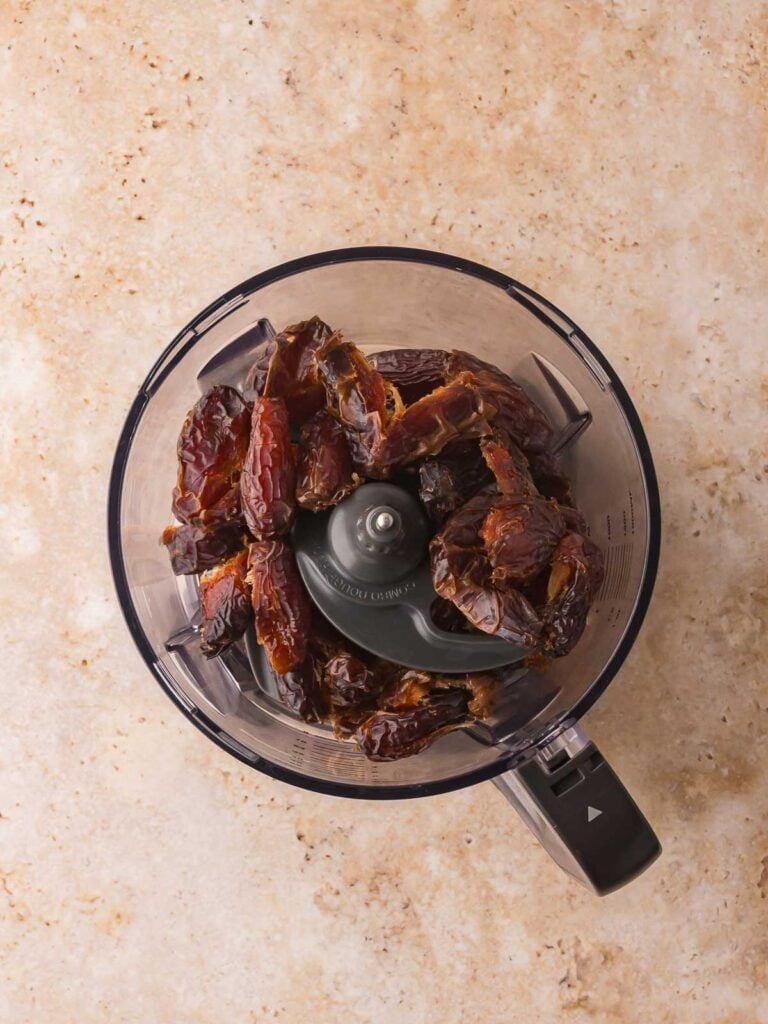
Add the dates to a food processor and blend until smooth.
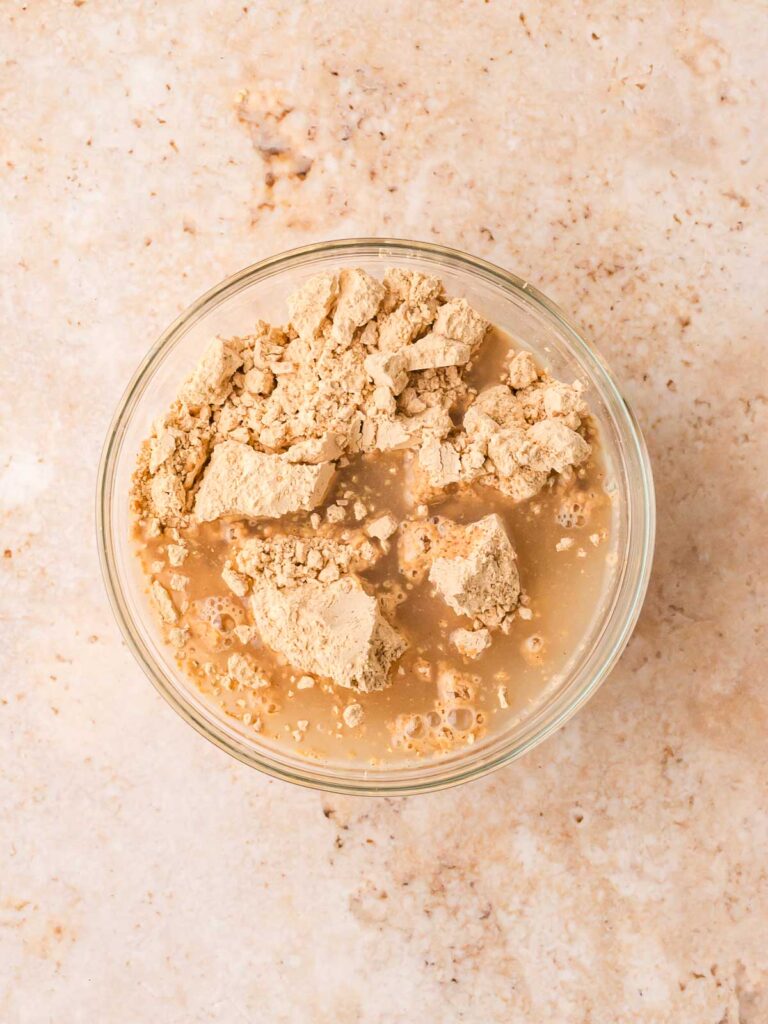
Stir the PB2 and water together in a small bowl to form a thick paste.
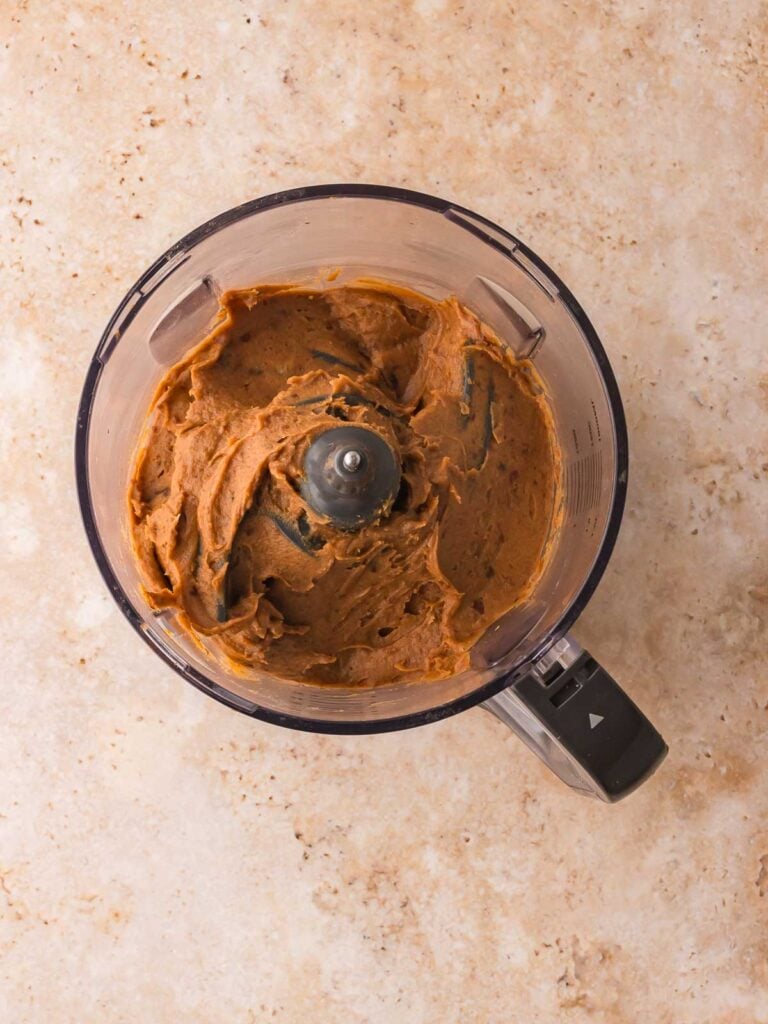
Add the PB2 paste to the blended dates and pulse until combined.

Add oat flour, protein powder, flaxseed, vanilla, and salt. Blend until the mixture forms a thick dough. Add a little water if it feels too dry.
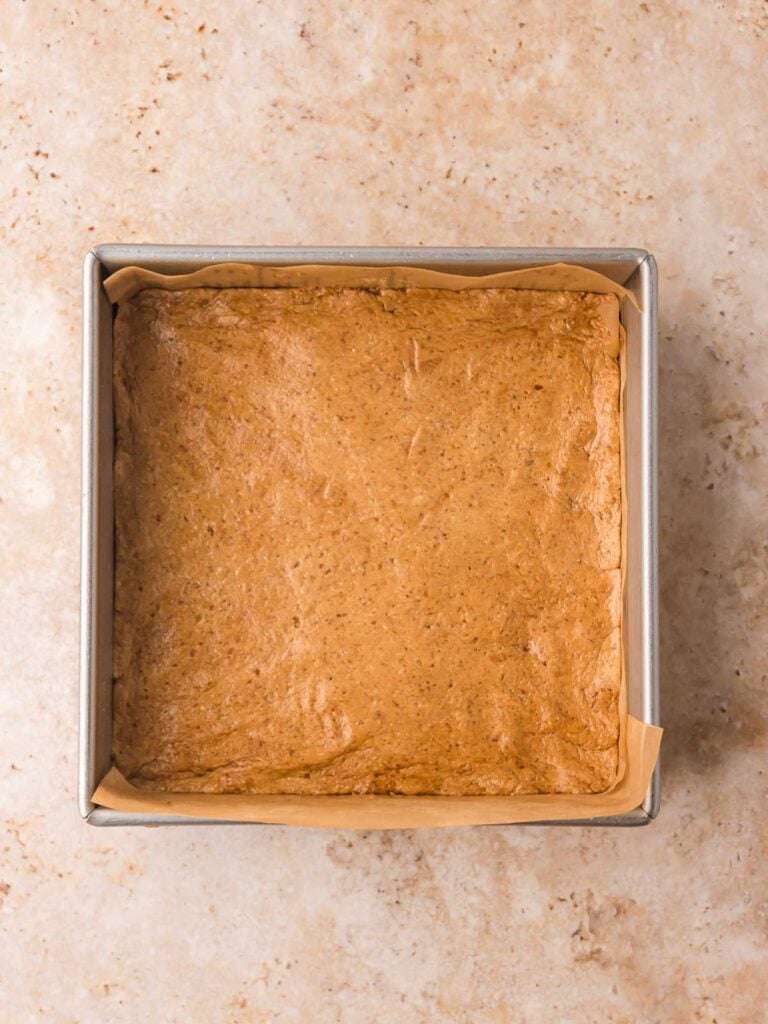
Press the dough firmly into the pan.
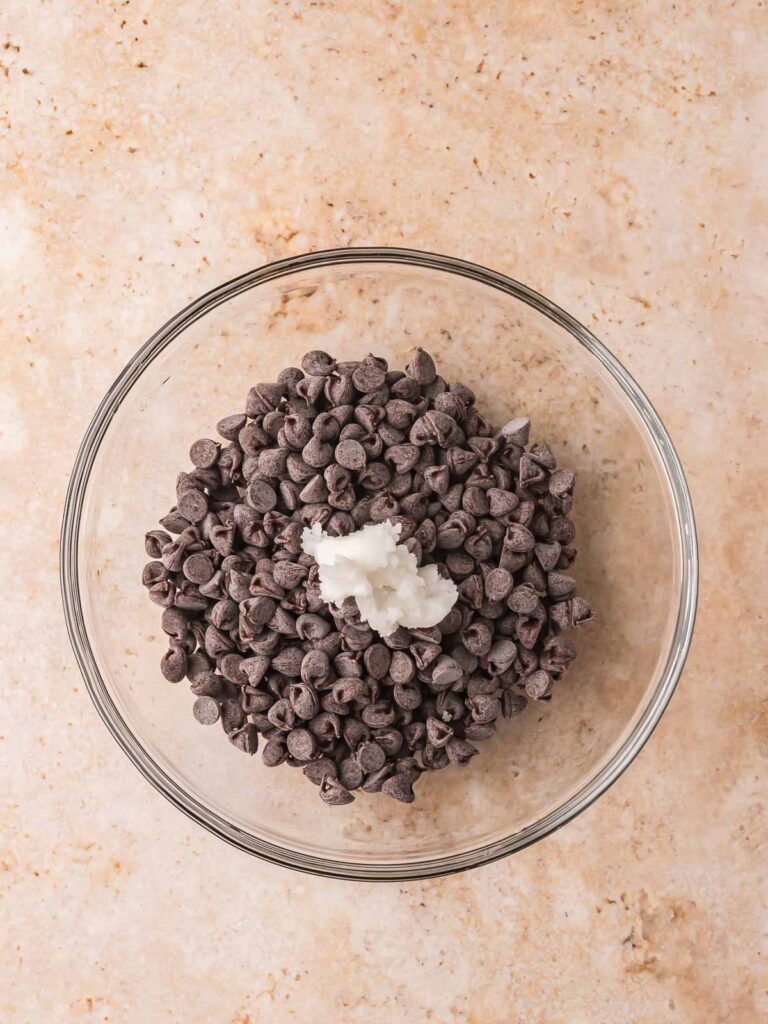
Melt the chocolate chips with coconut oil in the microwave.
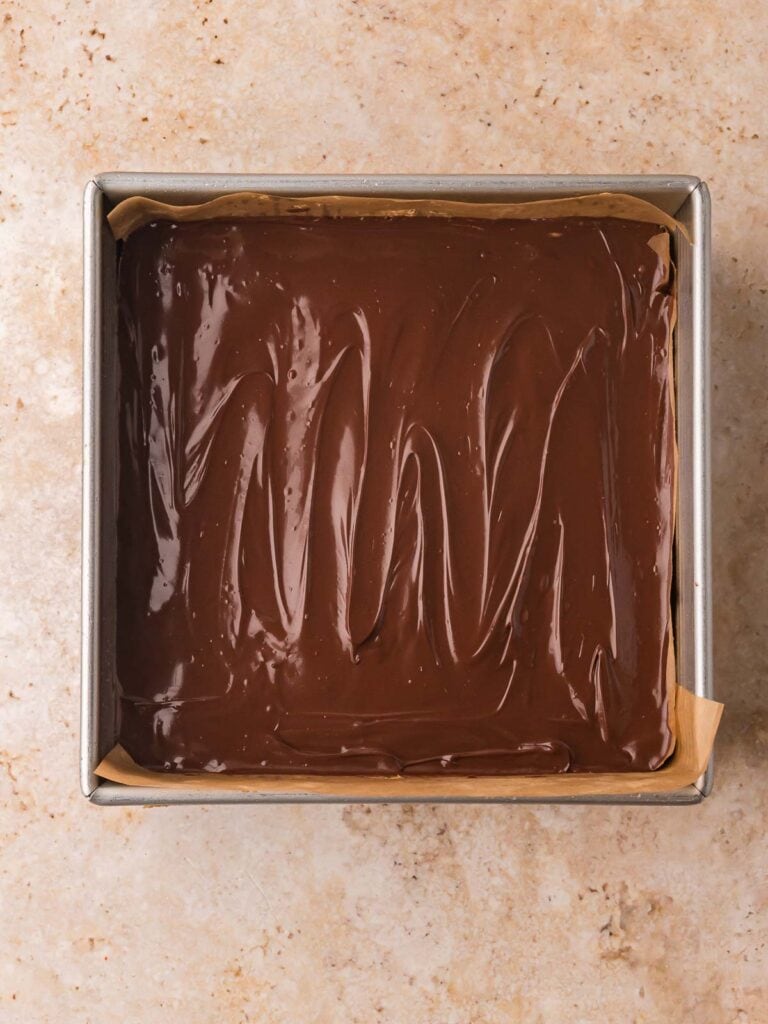
Spread the melted chocolate chips over the top.

Sprinkle with crushed peanuts and chill for at least two hours before slicing.
Variations
- Add cocoa to the base: Adding a spoonful of cocoa powder to the dough will give the bars a deeper chocolate flavor. It may make the mixture slightly thicker, so you can adjust with a splash of water.
- Use almond butter powder: If you want a change from peanut butter, almond butter powder works the same way and brings a lighter flavor. The texture stays soft and sliceable.
- Mix in chopped nuts: Adding chopped almonds or peanuts into the dough creates a firmer and crunchier texture. It also makes the bars more filling for days when you need a bigger snack.
- Make them without chocolate on top: If you prefer a lighter snack, you can skip the chocolate layer and press crushed peanuts directly onto the dough. The bars will still hold well and taste clean and simple.
- Add seeds for texture: Pumpkin seeds or sunflower seeds can be mixed into the dough for extra crunch. They also add more fiber and fit well in healthy snack recipes.
Serving Suggestions
- Pair with Spiced Peanuts: These bars go well with a handful of my Spiced Peanuts when you want a salty and sweet mix. It makes a quick afternoon snack.
- Add to your weekly meal prep: Try out some of my Meal Prep ideas to keep you on target during the week.
- Serve with fruit: Fresh berries or sliced apples make a nice side when you want a simple snack that still feels balanced.
- Carry on the go: Wrap a bar in parchment and toss it in your bag when you are running errands or heading to work. The texture holds up well.
- Pair them with Smoothie Bowl: If you like starting your mornings with high-protein options, these will keep you fuller for longer.
Storage and Freezing
- How should I store No-Bake Chocolate Peanut Butter Protein Bars?
Store them in an airtight container in the fridge. They stay firm and fresh for up to one week.
- Can I freeze No-Bake Chocolate Peanut Butter Protein Bars?
Yes. Freeze them in a single layer first, then move them to a freezer bag. They thaw quickly at room temperature. This is a better option if you want to bring them to work or on road trips etc.
Don’t forget to pin this for later!

Tips & Tricks
- Adjust the texture with oat flour: If the mixture feels sticky, add a small spoonful of oat flour at a time until it forms a soft dough that presses easily into the pan.
- Blend the dates well: Smooth dates make the bars hold together better. Let the processor run a bit longer if needed.
- Cut after chilling: The bars slice cleanly once the chocolate has set, so chilling is important for neat edges.
- Use parchment for easy lifting: Lining the pan makes it simple to lift the whole slab out before cutting.
- Use vanilla protein powder for color: Vanilla keeps the base a light peanut butter color. If you use chocolate protein powder, the color will be darker.
Recommended
More healthy Options
Looking for more meal inspiration?
Browse my Slow Cooker Meals or check out my Desserts for more yummy ideas.
FAQ
Chocolate Peanut Butter Protein Bars
Ingredients
Base
- 1 ½ cups medjool dates pitted (about 15–18 dates)
- 1 ⅓ cup oat flour blend quick oats until fine
- ½ cup PB2
- ¼ cup water to mix with PB2
- 1 cup vanilla or peanut butter protein powder
- 2 tablespoons ground flaxseed
- 1 teaspoon vanilla extract
- Pinch of salt
- 2-4 tablespoons water as needed for blending
Topping
- 1 cup Lily’s chocolate chips
- 1 tablespoon coconut oil
- ¼ cup crushed peanuts
Instructions
- Line an 8×8 pan with parchment paper.
- Check your dates: if they feel firm or dry, soak in hot water for 10 minutes and drain well. Soft dates can be used as is.
- Add the dates to the food processor and blend until smooth.
- In a small bowl, mix the PB2 with ¼ cup water to make a thick peanut butter paste.
- Add the PB2 paste to the blended dates and pulse until fully combined and creamy.
- Add the oat flour, protein powder, flaxseed, vanilla, and salt. Blend until a thick dough forms. Add water 1 tablespoon at a time if the mixture feels too dry. Add more oat flour if the mixture is too wet.
- Press the dough firmly and evenly into the lined pan.
- Melt the Lily’s chocolate chips and coconut oil in 20-second intervals until smooth.
- Spread the melted chocolate over the top and sprinkle with crushed peanuts.
- Chill for at least 2 hours, then slice into bars.
Notes
Blend the dates well: Smooth dates make the bars hold together better. Let the processor run a bit longer if needed.
Cut after chilling: The bars slice cleanly once the chocolate has set, so chilling is important for neat edges.
Use parchment for easy lifting: Lining the pan makes it simple to lift the whole slab out before cutting.
Use vanilla protein powder for color: Vanilla keeps the base a light peanut butter color, which looks nice under the chocolate topping.


My son keeps trying to steal all my protein bars, so I decided to look up how to make them myself to try to save a little money, and these were so much better than the premade protein bars. I love the combination of the chocolate and the peanut butter.
Yes! That was the same reason I decided to make my own!
I’ve never liked store-bought protein bars because they always have an odd flavor or texture so I was super excited to try these once I saw the ingredients. They were so good! Love the chocolate and peanut butter combo.
Yay! So glad you loved them!
Love the combo of chocolate + peanut butter and extra protein is a win. Can’t wait to try!
I hope your love them as much as I do!
Such a delicious way to get protein AND fiber in a treat! Yum!
Yes, they are perfect to start off the new year!
I’m always looking to boost my protein so these look like the perfect snack for me – thank you for sharing.
You are welcome. I hope you love them.
I’m really impressed by the use of such simple ingredients. Thank you for posting/creating this recipe. Do you have a recommendation for a “peanut butter” flavored protein powder? That sounds really good.
Hey Amanda, I’m so glad you like the recipe. Peanut butter protein powder is great in this recipe. I go between Optimum Nutrition and Quest Protein powder for different flavors. Quest have a good peanut butter one here:
https://amzn.to/3LF7Ccg
Some protein powders are different so just add more dry or wet ingredients until you get the right thick consistency.
Thanks for taking the time to leave a comment.
My teens loved these! Thank you!
I’m so glad to hear it! Thanks for sharing.